

One of the core parts of data communication is devices knowing each other. At this point, LLTD, a special frame format that runs at the data link layer, steps in. It may sound like a security tool or a management program. However, this structure rests on packet layout, message coding, and frame format. As a result, the system works purely as a Layer 2 protocol.
In this guide, we will treat the protocol as a data format and a communication spec. We will look at every detail, from the Ethertype value to the TLV structure, and from Demultiplex Header fields to QoS message coding. My goal is to show you clearly how network packets take shape and how they move between devices.
First, let us make one thing clear: LLTD runs free of the TCP/IP stack. That means it has no port number and carries no IP header. Instead, it swaps data directly over raw Ethernet frames. This design makes it both light and predictable.
As we reach 2026, data format analysis of network protocols has gained significant importance because you know how to code the protocol. On top of that, you use the protocol correctly and grasp its weak spots. In this article, our focus is clear: the technical format and data structure of the protocol.
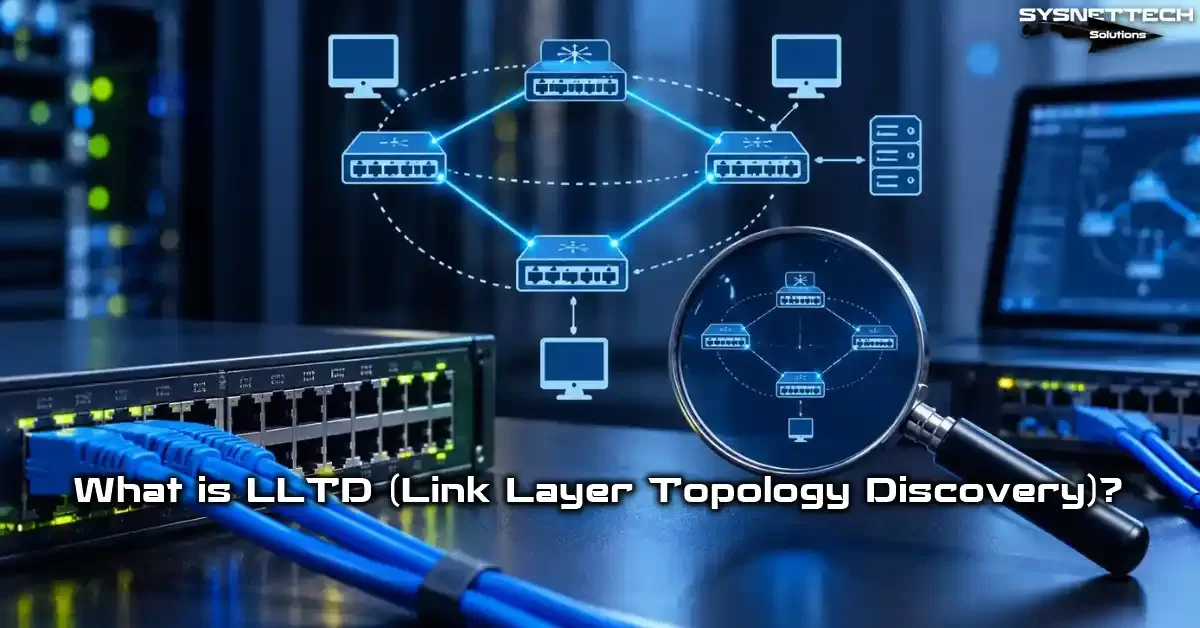
What Is LLTD? A Deep Look at the Link Layer Topology Discovery Protocol
Network protocols usually split into two groups: those that carry data and those that pass control messages. This protocol sits in the second group. The clearest answer to what Link Layer Topology Discovery means is this: it runs at Layer 2 of the OSI model and has a special frame format as a discovery protocol.
Microsoft rolled out LLTD during the Windows Vista era. Its goal was to let devices on a network find each other. However, the real technical value of the protocol lies in the data coding methods it uses. The protocol packs every message into a fixed binary format. Every field has a fixed byte length.
The main feature that sets LLTD apart from others is the Ethertype 0x88D9 value. This value tells you which upper layer an Ethernet frame belongs to. When a network card sees this Ethertype, it sends the packet to the protocol handler in the OS. As a result, the packet never touches the TCP/IP stack.
On the other hand, the message structure of the LLTD protocol is highly modular. Every message starts with a Demultiplex Header. This header is 4 bytes and carries fields like version, type of service, and function code. The function code sets the message type. For example, Discover, Hello, or Emit messages are sorted by this field.
The body of the protocol follows the TLV (Type-Length-Value) format. This format is one of the most flexible ways to pack data. Every TLV block carries a type code, a length value, and the actual data. In this way, the protocol can carry different kinds of information inside the same frame.
Real-World Experience and Hardware Compatibility
LLTD Definition and Full Name: What Does Link Layer Topology Discovery Mean?
The English full name of this protocol is ‘Link Layer Topology Discovery,’ and its Turkish equivalent is ‘Bağlantı Katmanı Topoloji Keşfi.’ By definition, it runs at Layer 2 of the OSI model, that is, at the data link layer. This layer deals with MAC addresses and Ethernet frames.
MAC addresses play a vital role at the data link layer. ARP address resolution maps an IP address to a MAC address. After that, devices on the local network find each other this way.
The phrase ‘link layer’ shows that the protocol does not depend on upper layers like IP or TCP. In other words, the protocol uses only the Ethernet frame format. It places its own data structure inside this frame. This design makes the protocol both fast and light.
The word ‘topology’ refers to the structural layout of the network. Which device connects to which device? What is the distance and link type in between? The LLTD protocol gathers the answers to these questions through data packets. In the end, a network map comes out.
The word ‘discovery’ sums up the core function of the protocol. Devices find each other by sending special messages. LLTD codes these messages in a fixed binary format. The receiving device decodes this format and builds a reply. The whole process rests on data exchange.
LLTD was born as part of Microsoft’s ‘Windows Rally’ tech suite. Its specs are open to the public and can be accessed through MS-LLTD docs. In this way, third-party hardware makers can also add this protocol to their own devices. For example, some printer makers (like Brother and Epson) support it.
What Does LLTD Do? Core Uses and Benefits
The benefits this protocol offers tie directly to its data format and packet structure. The protocol makes every device produce a message that names itself. This message carries the device MAC address, IP address, and device type. The receiving side processes this data and builds a map.
Here are the concrete benefits of the LLTD protocol:
- Automatic Device Discovery: Devices on the network announce their presence with a special data packet. Moreover, the system admin does not have to keep a manual list.
- Structured Data Format: It codes every device detail as TLV blocks. This format offers a structure that is both readable and extensible.
- Frame-Level Checks: Thanks to the Ethertype field in packets, the receiving side knows immediately if a packet is valid.
- Network Map Building: It turns the data it gathers into a visual map. This map shows the physical and logical position of devices.
- Protocol Extensions: Thanks to QoS extensions, it also carries bandwidth data inside the same frame. This shows the versatility of the protocol.
On the other hand, the LLTD protocol is not a management protocol. That means it does not configure devices like SNMP network analysis does. It only gathers data and shapes packets. For this reason, you should not see it as an SNMP alternative. Its job is discovery and data coding.
Multicast Support and Traffic Efficiency
Another key feature of the protocol is multicast support. It sends some messages not to a single device but to a defined group. This removes the burden of sending messages to every device on the network one by one. As a result, it uses network traffic efficiently.
LLTD multicast messages cut traffic on the local network. IGMP multicast management organizes these groups. Picture this: a printer wants to join a group. IGMP passes the membership information to the router. In this way, needless broadcasts do not flood the network.
How Does LLTD Work? Protocol Architecture and Working Principles
The best way to understand a protocol is to study its message flow and packet format. This protocol rests fully on an event-based mechanism. When a device joins the network, it sends a frame that announces its presence. Receiving devices take this frame and build a reply.
At the heart of the protocol sit two main roles called ‘Mapper‘ and ‘Responder.’ The Mapper is the side that starts the discovery message. It is usually a Windows PC. The Responder, however, is the device that replies to this message. These roles set the direction of data exchange.
First, the Mapper sends a discovery frame to the network. This is called a ‘Discover’ message. This message is a broadcast frame. It sets the target MAC address as FF:FF:FF:FF:FF:FF. In this way, every device on the network receives this frame.
Next, devices with the Responder role answer this message. The reply frame holds the data block of the device. This block carries details like device name, MAC address, and IP address. The data follows the TLV format, and each piece of information is a separate TLV block.
After this first contact, it sends unicast frames to gather more detail. At this stage, it uses message types like ‘Emit,’ ‘Train,’ and ‘Probe.’ Every message asks for a specific data field. For example, the ‘Probe’ message queries the signal strength data of the device.
This whole process wraps up in milliseconds because it carries frames at the raw Ethernet level. It does not touch the IP stack and does not look at a routing table. This makes the protocol very fast. Also, the protocol holds timers to stop needless traffic.
Troubleshooting and Network Analysis
eth.type == 0x88d9 filter in Wireshark. But, if you cannot catch any packet, the protocol is most likely off. If you catch packets but get no reply, there is a problem on the Responder side. These two steps help you narrow down the issue quickly.NOTE: When you cannot catch an LLTD packet in Wireshark, ICMP error messages point the way. The ICMP protocol runs checks at the network layer. From this point, ping and traceroute output narrow down the issue.
What Layer Does LLTD Run At? OSI Layer 2 and the Data Link Layer Link
The most defining feature of this protocol is that it runs at Layer 2 of the OSI model. We know this layer as the data link layer. Its job is to move frames between devices on the network. At this layer, the MAC address plays a role, not the IP address.
So, what does this mean? Even if a device has no IP address, you can still find it through LLTD. For example, a printer that has not yet pulled an IP from a DHCP server can still show up on the network map. This is because the data format of the protocol is free of IP.
This protocol runs on both wired (Ethernet 802.3) and wireless (Wi-Fi 802.11) networks. On wireless networks, the frame format is slightly different. However, the data structure of the protocol stays the same. Only the physical carrier layer changes. This flexibility lets the protocol work in any setting.
Another key point is that the protocol is bound to a single broadcast domain. That is, devices in different subnets split by a router cannot find each other directly through LLTD. This is because the data format of the protocol cannot be routed.
This limit is actually a design choice. Microsoft tuned the protocol to work only on the local segment. In this way, the frame size stays small and the load drops. In corporate networks, you should treat this as a planning point.
LLTD Mapper and Responder Roles: Who Does What?
To understand how this protocol works, you need a clear split of roles. Each role produces a different message format and manages a different data flow. Here are the job descriptions of the two main players:
| Role | Responsibility | Message Format It Produces | Data Direction |
|---|---|---|---|
| LLTD Mapper | Produces query frames to discover the network topology. | Discover, Emit, Train, Probe, Query | Outbound |
| LLTD Responder | Sends replies with data blocks to incoming queries. | Hello, QueryResp, Ack, Charge | Inbound |
The Mapper role usually starts when a user opens the Network Map. The Mapper sends broadcast frames to find all Responders on the network. Then, it joins the TLV blocks it receives from each Responder. In the end, it builds the data model of the network.
The Responder role, however, runs in the background as long as the device stays on the network. A Responder listens to frames that come its way. It reads the function code of the incoming frame. If the code is ‘Discover,’ it produces a ‘Hello’ reply. This reply holds the data block of the device.
These two roles can run at the same time on the same device. For example, a Windows PC can be both a Mapper and a Responder. This flexibility makes it easy for the protocol to fit dynamic network settings. Also, it shows the ability of the protocol to run roles simultaneously.
LLTD Message Types: Discover, Hello, Emit, Train, Probe, and Others
The working of the protocol rests on sending specific message types in a specific order. It marks each message with the function code inside the Demultiplex Header. This code sets the goal of the message and the reply it expects. Here are the most important message types:
| Message | Function Code | Direction | Purpose |
|---|---|---|---|
| Discover | 0x00 | Mapper → Broadcast | Broadcasts to find all Responders on the network. |
| Hello | 0x01 | Responder → Mapper | Replies to the discovery message, holds a TLV block. |
| Emit | 0x02 | Mapper → Unicast | Asks a specific device for more data. |
| Train | 0x03 | Mapper → Unicast | Learns the features the device supports. |
| Probe | 0x04 | Mapper → Unicast | Queries signal strength or link speed metrics. |
| Ack | 0x05 | Responder → Mapper | Confirms messages it has received. |
| Query | 0x06 | Mapper → Unicast | Queries for a specific TLV data field. |
| QueryResp | 0x07 | Responder → Mapper | Answers the query with the TLV data asked for. |
| Reset | 0x08 | Mapper → Broadcast | Resets the discovery session. |
| Charge | 0x09 | Responder → Mapper | Asks for a resource (like bandwidth). |
| Flat | 0x0A | Mapper → Broadcast | Reports that the network has a flat topology. |
| QueryLargeTlv | 0x0B | Mapper → Unicast | Queries for large TLV data. |
It codes each of these messages in a fixed binary format. The MS-LLTD spec defines the message structure in detail. In this way, devices from different makers can work together. For example, a Brother printer reads a Discover message from a Windows PC correctly.
LLTD Packet Structure and Ethernet Frame: Technical Details
For a network engineer, not just what the protocol does but how it is coded is important. This protocol runs over raw Ethernet frames. That is, it does not need the TCP/IP stack. This design makes it both fast and light. However, it also makes it necessary to understand the packet structure.
An LLTD packet starts with a standard Ethernet header. This header holds target and source MAC addresses. Then comes the Ethertype field. The special Ethertype value set aside for LLTD is 0x88D9. This value lets network switches identify the packet.
After the Ethernet header comes a Demultiplex Header unique to the protocol. This header is 4 bytes long. It holds version, type of service, function, and reserved fields. This header sets what kind of message the packet is.
After the Demultiplex Header comes the body of the message. This body holds data coded in the TLV (Type-Length-Value) structure. Each TLV carries a specific piece of information. For example, one TLV carries the MAC address of the device, while another carries the IP address. This structure makes the protocol flexible and extensible.
LLTD Ethertype 0x88D9 and Ethernet Frame Structure
When you study a network packet, the first place to look is the Ethertype field. This field tells you which upper layer protocol the frame belongs to. For LLTD, this value is 0x88D9. When you see this value, you know the packet is a topology discovery frame.
Here is the data format of a typical LLTD Ethernet frame:
| Field | Length | Description | Sample Value |
|---|---|---|---|
| Target MAC Address | 6 bytes | The MAC address of the device the packet goes to. In broadcast messages, it is FF:FF:FF:FF:FF:FF. | FF:FF:FF:FF:FF:FF |
| Source MAC Address | 6 bytes | The MAC address of the device that sends the packet. | 00:1A:2B:3C:4D:5E |
| Ethertype | 2 bytes | Protocol ID. For LLTD, it is always 0x88D9. | 0x88D9 |
| Demultiplex Header | 4 bytes | Holds version, type of service, function, and reserved fields. | 01 00 00 01 |
| Message Body (TLVs) | Variable | TLV (Type-Length-Value) blocks that carry device data. | … |
| FCS (Frame Check Sequence) | 4 bytes | CRC value used for error checks. Ethernet hardware adds it automatically. | … |
Knowing this structure gives you a significant advantage when you study network packets. For example, in a Wireshark capture, you can filter by this Ethertype and watch only the traffic of this protocol. This is an important step to understand the discovery activity on the network.
The version field in the Demultiplex Header shows which revision of the protocol is in use. The type of service field, however, marks the priority level of the packet. This field gains even more importance when used with QoS extensions. The function field, though, sets the message type.
LLTD TLV Structure and Data Coding
TLV (Type-Length-Value) is a data coding method used often in network protocols. LLTD also adopts this structure. Each TLV has three parts: Type, Length, and Value. In short, the type field tells you what the data is.
The length field says how many bytes the Value field holds. The Value field, however, holds the actual data. For example, think of a TLV that carries the MAC address of a device. The type field would be a number that means ‘MAC Address.’ The length field would be 6. The value field would hold the 6-byte MAC address.
This structure makes the protocol extensible. When you want to add a new kind of information, you just define a new Type value. The current packet structure does not change. In this way, the protocol can fit future needs. For example, you add IPv6 support this way.
The MS-LLTD spec has dozens of different TLV types. These include device name and IP address (IPv4 and IPv6). Also, signal strength, bandwidth, and QoS abilities are there. Moreover, supported QoS features are there as well. Thanks to this rich TLV set, the protocol does not just draw a map. It also gathers data about the state of the network.
The Value field of a TLV can also hold nested TLVs. This makes it possible to build hierarchical data structures. For example, a ‘Device Info’ TLV can hold sub-TLVs like ‘Operating System’ and ‘Hardware’ inside it. In this way, the protocol offers a data model that is both flexible and organized.
LLTD Packet Analysis with Wireshark: Filter Commands
Analyzing network traffic is one of the most important skills of a network engineer. Wireshark is your most powerful tool here. To catch and study the packets of this protocol, you can follow these steps:
- Start Wireshark: Run Wireshark as an admin. Pick the network interface you want to watch (Ethernet or Wi-Fi).
- Start the Capture: Double-click the network interface to start the packet capture. Or use the ‘Start’ option from the ‘Capture’ menu.
- Apply a Filter: Type
eth.type == 0x88d9in the filter bar and press Enter. This will show only LLTD packets. - Alt Filter: The
ether proto 0x88d9filter gives the same result. That is, these two commands are equivalent. - Study the Packets: Click one of the caught packets. In the detail pane at the bottom, you will see the layered structure. Expand the Ethernet II header and check that it says ‘Type: LLTD (0x88d9).’
- Study the TLV Blocks: Expand the ‘Link Layer Topology Discovery’ layer. You can see the message type, its version, and the TLV blocks it holds.
- Filter Specific Messages: To see only ‘Discover’ messages, use the
lltd.function == 0filter. For ‘Hello’ messages, thelltd.function == 1filter works well.
By following these steps, you can study the protocol traffic on your network in detail. This is very valuable for both troubleshooting and data format checks. Most importantly, when you spot a strange discovery activity, these filters help you isolate the packets quickly.
LLTD vs LLDP vs CDP: Layer 2 Discovery Protocols Compared

In the network world, the topic of topology discovery brings more than one protocol to mind. Chief among them are LLDP and CDP. So, how do these protocols relate to LLTD? In fact, each one carries a different data format and a different use case. In this section, we will compare these three protocols and study their data structures.
First, LLDP is an open standard (IEEE 802.1AB). Makers like Cisco, Juniper, and HP support it. Also, you use the LLDP protocol to share neighbor information between network devices. The system holds its own TLV structure.
CDP (Cisco Discovery Protocol), however, is a Cisco-only protocol. It runs only between Cisco devices. It serves a purpose similar to LLDP, but it has a proprietary structure. Moreover, it uses its own data coding method.
LLTD, though, focuses more on endpoint discovery. It lets a PC find printers, other PCs, and NAS devices on the network. So, it works on the ‘end user’ side of the network. Its data format is TLV-based, but it differs from LLDP.
Differences Between LLTD and LLDP: Proprietary vs Open Standard
The most basic difference between LLDP and LLTD is their standardization state. LLDP is an open protocol standardized by IEEE. This lets devices from different makers work together. This protocol, however, is a proprietary protocol built by Microsoft.
However, the specs of the LLTD protocol are also open to the public. MS-LLTD docs are accessible on Microsoft Learn. In this way, third-party hardware makers can also add it to their own devices. That is, it is technically an open spec.
There are also differences in terms of use case. LLDP shares physical link information between network infrastructure devices (switch, router). This protocol, though, lets endpoints (PC, printer) find each other. That is, while LLDP maps ‘the skeleton of the network,’ LLTD maps ‘the flesh of the network.’
Another difference is the Ethertype values. For LLDP, the Ethertype is 0x88CC. For LLTD, the Ethertype is 0x88D9. These two different values let the network switch route the packet to the correct handler. Also, the TLV structures differ from each other.
LLTD and CDP Compared: Cisco vs Microsoft Ecosystem
CDP is a protocol that runs between Cisco devices. It shares neighbor information between Cisco switches, routers, and IP phones. It uses its own proprietary data format. This protocol, however, runs in the Microsoft ecosystem between Windows PCs and other endpoints.
Network admins use CDP more frequently. It is ideal for learning which ports devices connect to, VLAN information, and power draw (PoE). LLTD, though, is for improving the end user experience. Thanks to the Network Map, users see devices on the network in a visual way.
From a data format point of view, CDP has a more complex structure. It uses Cisco’s own TLV definitions. LLTD, however, adopts a simpler and more standard TLV structure. This makes the protocol lighter. However, CDP offers a richer data set.
Both protocols are effective in their own ecosystems. CDP is essential in Cisco networks. In Microsoft networks, though, the LLTD structure stands out. In a mixed network, you can use both protocols together. However, you need to understand the data format of each one individually.
LLTD, LLDP, and CDP Comparison Table
The table below puts the core data format features of the three protocols side by side:
| Feature | LLTD | LLDP | CDP |
|---|---|---|---|
| Standard | Microsoft Spec (MS-LLTD) | IEEE 802.1AB (Open Standard) | Cisco Proprietary |
| OSI Layer | Layer 2 (Data Link) | Layer 2 (Data Link) | Layer 2 (Data Link) |
| Ethertype | 0x88D9 | 0x88CC | SNAP (0x2000) |
| TLV Structure | Yes, standard TLV | Yes, standard TLV | Yes, proprietary TLV |
| Main Goal | Endpoint discovery and mapping | Network infrastructure neighbor discovery | Cisco device neighbor discovery |
| Scope | Single broadcast domain | Link-local | Link-local |
| Message Coding | Demultiplex Header + TLV | TLV-only | TLV with SNAP |
| Common Use | Default on Windows systems | Common on all network devices | Only on Cisco devices |
As this table shows, each protocol has its own data format. You should decide which protocol to use on your network based on your device inventory and management needs.
For example, CDP is essential in a fully Cisco-based network. So, in a mixed network, you use LLDP and this protocol together.
Security Holes and Risks: CVE Analysis and Attack Surface

This protocol looks like a harmless discovery tool. However, it still holds serious security risks. Most importantly, data format bugs at the packet parsing stage form an attack vector. Now, we will study the weak spots that stem from the data structure of the protocol.
2026 was a significant year for LLTD. CVE-2026-69732, released in September, is a heap-based buffer overflow bug with a CVSS score of 8.1. This bug stems from a bounds check flaw at the data coding stage. An attacker sends a specially crafted packet and corrupts memory.
These kinds of bugs show how much care the protocol needs. Most importantly, in corporate networks, leaving this protocol open without need poses a significant risk. However, do not forget: these weak spots tie to the data format and packet parsing steps of the protocol. That is, the whole topic is data coding safety.
CVE-2024-30075: Heap-Based Buffer Overflow and Remote Code Execution
CVE-2024-30075 is one of the most serious data format bugs found in this protocol. This bug is a heap-based buffer overflow (CWE-122) issue. The issue stems from a lack of length checks in the TLV parsing code. An attacker sends an overly long TLV block and corrupts memory.
The most dangerous side of this bug is that it needs no authentication. That is, any attacker with network access can run code using this data format flaw. Since the attack vector is network (AV:N), the attacker does not need to be nearby. Being in the same broadcast domain is enough.
Microsoft patched this bug with a security update released in September 2026. However, systems without the patch are still at risk. For this reason, system admins must apply this update immediately. Most importantly, you should update servers with active protocol services first.
If an attacker exploits this bug, they can run code with full rights (SYSTEM level) on the system. This forms a jumping-off point for lateral movement on the network. The attacker can spread to other systems through the system they took over. However, at this point, the issue is again in the data parsing code of the protocol.
CVE-2007-1528: Mapper Spoofing and Fake Bridge Links
CVE-2007-1528, one of the oldest bugs in LLTD security history, shows a weak spot in the message format of the protocol. This bug lets an attacker identify themselves as a Mapper. The attacker builds fake bridge links.
The attacker sends fake Discover messages to the network and tricks Responders. Responders answer the fake messages. In this way, they pass sensitive data like MAC, IP, and device name to the attacker. They can then use this data for more complex attacks. The issue is that the message format of the protocol has no authentication field.
The most important aspect of this bug is that the protocol has no authentication mechanism by its own nature. So, the protocol works on a ‘trusted network’ assumption by design. That is, the message format has no signature or check code. For this reason, an attacker can easily disguise themselves as a legitimate Mapper.
Even though people found this bug in 2007, it still has no complete fix because the issue sits in the base message structure of the protocol.
Even though Microsoft offers some mitigation steps, the protocol is open to these kinds of spoofing attacks by its own nature. For this reason, I advise you to turn off the protocol in settings with high security awareness.
Attack Surface: Traffic Amplification, DoS, and MITM Risks
The attack surface the protocol offers is not just buffer overflow or spoofing. The broadcast-based structure of the protocol opens the door to a range of different attack techniques. Here are the most important of these techniques:
- Traffic Amplification: An attacker sends Discover messages with a fake source MAC address. All Responders on the network reply. This causes a needless broadcast storm on the network.
- Denial of Service (DoS): By sending too many LLTD messages, they can drain the resources of devices on the network. Most importantly, IoT devices with low compute power feel this attack.
- Man-in-the-Middle (MITM) Attack: An attacker identifies themselves as a Mapper or Responder. They can take over the communication between two devices. In this way, they can listen to or change network traffic.
- Data Leak: Protocol messages carry the MAC addresses, IP addresses, and sometimes OS information of devices in the open. This data is valuable for an attacker mapping the network.
- Fake Device Injection: An attacker adds fake Responders to the network and misleads the Network Map. This can cause users to connect to incorrect devices.
To build defense plans against these attack techniques, you first need to monitor the protocol traffic on your network. You can spot unusual activity by writing special rules for intrusion detection systems (IDS). For example, a much higher than normal count of Discover messages can be a sign of an amplification attack.
Also, you can use network segmentation (VLAN) to isolate critical servers and devices from the traffic of this protocol. This makes it hard for an attacker to move laterally through a device they took over.
This protocol leaks information on the local network. So, firms that use a zero trust system should turn off this protocol by default.
How to Turn Off LLTD: Group Policy, Registry, and Netsh Methods
Your data structure safety may be at risk or speed may drop. For this reason, you sometimes need to turn off this protocol. Fortunately, Windows operating systems offer more than one method to turn off the LLTD protocol.
No matter which method you choose, you first need to understand the effects of this change on your network. For example, if you turn off the protocol, the Windows Network Map may stop working. For this reason, before you make this decision, you should judge whether your users need this feature.
In corporate settings, the most common method is to use Group Policy. This method lets you change settings on hundreds of PCs from one central location. At home or in a small office, you can edit the registry. As an alternative, you can also use command-line tools.
Turning Off LLTD with Group Policy: ADMX_LinkLayerTopologyDiscovery
Group Policy is the most effective way to turn off this protocol from a central point, especially in Active Directory settings. Here is the step-by-step guide:
- Open GPMC: Open the ‘Group Policy Management Console’ (GPMC) tool. Create a new GPO or edit an existing GPO.
- Find the Policy Path: In the GPO editor, follow this path:
Computer Configuration → Policies → Administrative Templates → Network → Link Layer Topology Discovery. - Turn Off Mapper I/O: Double-click the ‘Turn on Mapper I/O (LLTDIO) driver’ policy. In the window that opens, check ‘Disabled’ and click ‘OK.’
- Turn Off Responder: Double-click the ‘Turn on Responder (RSPNDR) driver’ policy. Check ‘Disabled’ and click ‘OK.’
- Link the GPO: Link the GPO you created to the OU (Organizational Unit) you want to affect. Run the
gpupdate /forcecommand to apply the changes.
By following these steps, you can turn off this protocol on all PCs in the domain from a central point. Policy settings reside in the registry under HKEY_LOCAL_MACHINE\Software\Policies\Microsoft\Windows\LLTD. The EnableLLTDIO and EnableRspndr DWORD values show the state of the policy (0 = Off, 1 = On).
Disabling LLTD via Registry: lltdio and lltdsvc
If you have no opportunity to use Group Policy, you can also turn off this protocol by editing the registry manually. This method offers a quick solution for a single PC. However, you must be careful because an incorrect edit can harm your system.
Here is the step-by-step registry edit:
- Open Regedit: Type
regeditin the Start menu and press Enter. Confirm the UAC prompt that asks for admin rights. - Go to the Key: From the tree on the left, follow this path:
HKEY_LOCAL_MACHINE\SYSTEM\CurrentControlSet\Services\lltdio. - Change the Start Value: In the right pane, double-click the ‘Start’ DWORD value. Set the value data to ‘4’ (Off) and click ‘OK.’
- Find the Responder Service: Repeat the same path for
HKEY_LOCAL_MACHINE\SYSTEM\CurrentControlSet\Services\rspndr. Set the ‘Start’ value to ‘4’ again. - Restart: Restart the PC for the changes to take effect. As an alternative, you can stop the services with the
net stop lltdioandnet stop rspndrcommands.
The registry edit is convenient, especially for one-time fixes. However, you may want to undo this setting. In this case, you should set the ‘Start’ value back to ‘2’ or ‘3.’ In corporate settings, you should always choose Group Policy over these kinds of manual fixes.
LLTD Shutdown Decision: When Is It Needed, When Is It Not?
Turning off LLTD may not always be the correct decision. When you make this decision, you should judge the needs and risk profile of your network with care. Here is a checklist to help you make this decision:
- Cases Where You Should Turn It Off: You should protect corporate networks that need high security. Also, you need to take this step on systems that handle sensitive data. So, you should also turn it off on public Wi-Fi networks and in settings with many smart devices.
- Cases Where You Should Not Turn It Off: You use this feature on home networks and small office networks. Also, users who actively use the Windows Network Map fit in this group. So, you keep it on in settings that often use printer and NAS discovery.
- Cases Where You Should Be Careful: Mixed networks (both wired and wireless), networks with VLAN setup, virtual network settings (SDN).
If you have decided to turn it off, I advise you to do it in stages. First, test on a pilot group. Watch for any drop in user experience. If there is no issue, roll the change out to the whole network. Also, instead of turning the protocol off completely, you can also keep it closed only to public networks.
This approach keeps discovery on the internal network while it shields you from external threats. It is ideal, especially for roaming users on laptops. The protocol runs while the user is on the office network, and it turns off automatically when they join a public Wi-Fi. This strikes a balance between security and usability.
LLTD and qWAVE: QoS Extensions, Bandwidth Guess, and Flow Priority
One of the least known but most powerful features of the protocol is its QoS (Quality of Service) extensions. These extensions work with Microsoft’s qWAVE (Quality Windows Audio Video Experience) technology. The goal is to improve the quality of audio and video traffic that flows over the network.
qWAVE is, most importantly, for better media flow on home networks. When a video stream starts, apps that support qWAVE use the QoS extensions of this protocol. They ask the network for bandwidth. Devices on the network judge this request and set aside the appropriate resource.
This mechanism holds significant importance, especially on wireless networks. Wireless bandwidth is tight and shifts. qWAVE manages this shift and keeps video streams running without stutters. The QoS extensions of the LLTD protocol play a key role in this step. The data format holds special QoS TLV blocks.
LLTD QoS Message Types and Cross-Traffic Analysis
QoS extensions define new message types on top of standard protocol messages. These messages let devices on the network exchange bandwidth and priority information. Each message has its own TLV format. Here are the most important QoS message types:
| Message Type | Sender | Purpose | Data Format |
|---|---|---|---|
| QoS InitializeSink | QoS Controller | Sends a resource request to start a QoS flow. | TLV: Flow ID, Bandwidth |
| QoS Ready | QoS Sink | Confirms the resource request and reports it is ready for the flow. | TLV: Status, Resource ID |
| QoS Probe | QoS Controller | Sends test packets to gauge current bandwidth and lag on the network. | TLV: Timestamp, Sequence |
| QoS Query | QoS Controller | Queries the state of a specific flow. | TLV: Flow ID |
| QoS QueryResp | QoS Sink | Answers the query, holds flow statistics. | TLV: Stats, Latency, Jitter |
| QoS Reset | QoS Controller | Resets the current QoS session. | TLV: Flow ID, Reason |
| QoS Error | QoS Sink | Reports an error state (for example, not enough bandwidth). | TLV: Error Code |
| QoS Ack | QoS Sink | Confirms QoS messages it has received. | TLV: Sequence |
| QoS CounterSnapshot | QoS Sink | Takes a snapshot of flow statistics. | TLV: Counter Data |
| QoS CounterResult | QoS Sink | Passes counter results to the Controller. | TLV: Counter Values |
| QoS CounterLease | QoS Sink | Sets the valid time of counter data. | TLV: Lease Time |
On top of these message types, there is also a mechanism we call ‘Cross-Traffic Analysis.’ This mechanism studies how different QoS flows affect each other. For example, a video stream and a file download run at the same time. So, cross-traffic analysis gauges the interplay of these two flows.
qWAVE and LLTD: Media Flow Priority in Windows
qWAVE technology comes as part of the Windows OS. It is on by default in Windows 10 and 11. However, its full function depends on other devices on the network also supporting the QoS extensions of this protocol.
Picture a video player app (like Windows Media Player or Netflix) running on a Windows PC. The app uses the qWAVE API to start a QoS flow. This flow is passed to the router on the network with the help of QoS messages. The router gives this flow priority if it supports QoS.
This priority keeps video smooth even when another device on the network pulls heavy data. For example, a user watches a 4K video on YouTube. Moreover, someone else downloads a large file in the background. Thanks to qWAVE and QoS extensions, video traffic gets priority and the viewing experience stays intact.
However, for this mechanism to work, all network devices must support QoS. Old or low-cost devices often do not support this feature. In this case, qWAVE provides only a small benefit. For this reason, I advise you to use a QoS-capable router, especially on home networks with heavy media flow.
LLTD on Linux and Unix: lltdscan, Nmap, and Scapy Tools
Microsoft built the LLTD protocol. However, on Linux and Unix, developers study it. These tools are valuable, especially for researchers who want to study the data format of the protocol.
Thanks to these tools, you can find protocol-capable devices on the network from a Linux-based system. This is convenient for taking a network inventory or doing data format checks. Also, these tools are a great learning aid to understand how the protocol works.
However, you must not forget ethical and legal duties when you use these tools. You should only scan on your own network or on networks where you have permission. Scanning without permission can lead to legal issues. For this reason, always act responsibly.
Using lltdscan: Device Scan on Debian/Ubuntu
lltdscan finds devices on the network using the LLTD protocol. Moreover, this simple tool is quite effective. It resides in the Debian and Ubuntu repositories. Its setup and use are quite easy. The tool uses the data format of the protocol directly.
Here is the step-by-step use of lltdscan:
- Setup: Open a terminal and run this command:
sudo apt update && sudo apt install lltdscan. - Basic Scan: Start the scan by naming your network interface. For example, for the
eth0interface:sudo lltdscan -i eth0. To use the default interface, you can run thesudo lltdscancommand. - Set Timeout: The default timeout is 1 second. To wait for a longer time, use the
-tflag:sudo lltdscan -i eth0 -t 3000(3 seconds). - Show Device Names as UTF-8: To see device names in UTF-8 format, add the
-uflag:sudo lltdscan -i eth0 -u. - Wait for a Specific Device: To wait for a reply from a device with a specific MAC address, add the MAC address to the end of the command:
sudo lltdscan -i eth0 AA:BB:CC:DD:EE:FF.
lltdscan lists the IP and MAC addresses of the devices it finds as output. This tool is ideal, especially when you want to see protocol-capable devices quickly. The source code is on GitHub (zed-0xff/lltdscan). It ships under the GPLv2 license and uses the data format of the protocol directly.
Nmap Network Discovery and Packet Crafting with Scapy
Nmap is an industry-standard tool for network discovery. Nmap’s NSE (Nmap Scripting Engine) infrastructure lets you do network discovery using LLTD. Also, you can build your own protocol packets with the Scapy library. Both tools change the data format directly.
Here is the use of Nmap and Scapy:
- Nmap LLTD Discovery: You can find devices on the network using Nmap’s
lltd-discoveryscript. Command:sudo nmap -e eth0 --script lltd-discovery. This command finds and lists all protocol-capable devices on the named interface. - Script Flags: You can set which interface to use with the
lltd-discovery.interfaceflag. You can set the listen time with thelltd-discovery.timeoutflag (default 30 seconds). - Packet Crafting with Scapy: Scapy is a Python-based packet handling library. It holds the LLTD layer. For example, to build a Discover packet:
from scapy.all import *.
pkt = Ether(dst=\"ff:ff:ff:ff:ff:ff\", type=0x88D9) / LLTD() / LLTDDiscover()
sendp(pkt, iface=\"eth0\") - Analysis with Scapy: You can use the
sniff()function to study caught packets. For example, to catch only LLTD packets:sniff(filter=\"ether proto 0x88d9\", prn=lambda x: x.summary()).
These tools are invaluable for protocol researchers. However, do not forget: scans you do with these tools can cause noise on the network. Most importantly, in production settings, you should do these kinds of scans with care and at the appropriate times.
Linux LLTD Responder Setup: open-lltd vs lldpd
On Linux systems, open-source solutions are also there to support LLTD. However, at this point, there is a mix-up: open-lltd and lldpd run different protocols. Understanding this difference is key to choosing the right tool.
lldpd is a daemon for LLDP (Link Layer Discovery Protocol). That is, it runs the IEEE 802.1AB standard. So, switches and routers use this tool for neighbor discovery. It is not the same thing as this protocol. LLDP has its own TLV structure.
open-lltd, however, is an attempt to run Microsoft’s protocol on Linux. But this project does not fully support the Responder role. That is, you can use open-lltd to make a Linux box show up in the Windows Network Map. However, developers do not actively work on this project.
Say you want to join a Linux system to a Windows network. In this case, the most practical solution is to turn on the Samba (SMB) service. Samba supports protocols like NetBIOS over TCP/IP and LLMNR that are needed for network neighborhood.
In this way, your Linux box can show up as a file server in the Windows Network Map. However, the special icon support that this protocol offers may not work with Samba.
Hidden Sides and Common Myths
A lot of incorrect information about LLTD floats around the internet. Most importantly, mix-ups about port numbers, Windows versions, and shutdown effects are common. In this section, we will correct these myths and shed light on the data format side of the protocol.
First, the most common myth is that this protocol runs over a TCP or UDP port. But the protocol runs over raw Ethernet frames. That is, it has no port number. This calls for a different approach when you write firewall rules because firewalls work at Layers 3 and 4.
The second big myth is that Windows 11 ‘removed’ the Network Map. But the Network Map is still there; it is simply hidden by default.
Microsoft pushed this feature to the background in modern Windows versions to make the user experience simple. However, users who want it can still turn this feature on.
The third myth is that turning off this protocol will stop file sharing completely. This is not true. The protocol is used for discovery, not for file transfer. Users do file sharing over the SMB (Server Message Block) protocol. If you turn off the protocol, you only block devices from showing up automatically in the Network window.
Does LLTD Have a Port? Raw Ethernet vs TCP/UDP Myth
One of the most frequently asked questions is this: ‘Which port does LLTD use?’ Answer: None. It runs at Layer 2 of the OSI model, that is, at the data link layer. At this layer, there is no port concept. Ports are Layer 4 (transport layer) concepts and apply to TCP or UDP protocols.
The LLTD protocol communicates over raw Ethernet frames. The Ethertype value is 0x88D9. This means the network driver (NIC) routes the incoming frame not to the TCP/IP stack but directly to the protocol handler. That is, the data format holds no TCP or UDP header.
For this reason, it is often not possible to block it by writing a traditional firewall rule because firewalls usually work at Layers 3 and 4.
You have two ways to block the LLTD protocol. Either you use an ACL (Access Control List) at the switch level, or you turn it off in the OS.
In some sources, you see phrases like ‘UDP port 6234.’ This is completely wrong. These kinds of claims spread by people who misunderstand the protocol. This protocol has no port. This makes it both a unique protocol and one that differs in terms of data format.
Why Is the Network Map Missing in Windows 11? LLTD and Modern Windows
Windows 11 users often ask ‘Where is the Network Map?’ In Windows 10, a ‘Network Map’ button sat at the top of the ‘Network’ window. But in Windows 11, this button does not appear by default. So, why?
Microsoft chose to make the user interface simple in Windows 11. The Network Map was a feature the average user rarely needs. For this reason, Microsoft removed it from the default view but did not remove the feature completely; the company simply hid it.
So, how can you bring this feature back? Here are the steps:
- Open Registry Editor: Run the
regeditcommand. - Go to the Key: Follow the path
HKEY_LOCAL_MACHINE\SOFTWARE\Microsoft\Windows\CurrentVersion\Policies\NonEnum. If theNonEnumkey is not there, create it. - Create a New DWORD Value: Create a DWORD value named
{F02C1A0D-BE21-4350-88B0-7367FC96EF3C}and set its value to ‘0.’ - Restart the PC: Restart the PC for the change to take effect. Now you will see the Network Map button in the ‘Network’ window.
However, before you bring this feature back, you must recall the risks that stem from the data format of the protocol. If you turned off LLTD on your network, the Network Map will not work either. For this reason, you should strike a balance between security and usability when you make this decision.
Does File Sharing Stop If You Turn It Off? Operational Effects
The most frequently asked effect of turning off the LLTD protocol is on file sharing. Short answer: No, file sharing does not stop. However, the user experience can suffer. Making this distinction clear is essential for you to make the correct decision.
You do file sharing over the SMB (Server Message Block) protocol. SMB runs over TCP port 445 and is independent of this protocol. For this reason, even if you turn it off, a user can reach shared folders by typing \\server\share or using the IP address.
However, LLTD makes devices on the network show up automatically in the Network window. If you turn off the protocol, users cannot see other PCs, printers, and NAS devices on the network automatically. In this case, users need to join devices manually.
This effect can be difficult, especially for users with low technical skill. For example, a user wants to print to a printer on the network. If they cannot see the printer in the list, they must know the printer IP address and add it manually. That is, before you turn off this protocol, you should teach your users other ways to reach resources.
Link Layer Topology Discovery: Draw Your Network’s Hidden Map
LLTD lets you find the devices and links on your network. At the same time, you also use it to study network speed. Moreover, it runs on both wired and wireless networks.
- Microsoft Learn – Local Network Device Discovery Doc: This doc explains how network devices are found and how link maps take shape. Also, it provides technical details for admins. In this way, you can understand your network layout better.
- Microsoft Learn – Network Mapping and Traffic Priority Review: This page explains device discovery and network mapping steps. At the same time, it also looks at priority settings for media flow. It provides admins with practical information.
- Wikipedia – Ways to Find Devices on a Local Network: This item summarizes the history and use cases of ways to find devices on local networks. Also, it touches on uses in Windows versions. It is a basic starting source.
FAQ About the Windows Network Discovery Protocol
Which port does LLTD use?
Is the LLTD protocol safe?
How do I turn off LLTD?
What is the difference between LLTD and LLDP?
Can it find devices in a different subnet or VLAN?
What layer does LLTD run at?
Is LLTD still in Windows 11?
What information does LLTD share at the data link layer?
If I turn off the protocol, does file and printer sharing stop?
How does it find devices with no IP address?
Conclusion: Understanding and Managing LLTD the Right Way
LLTD is a hidden but effective protocol of the network world. In short, it runs the Windows Network Map. Also, it automates device discovery and improves media flow.
When you manage it correctly, the LLTD protocol gives you significant ease. However, the data format bugs found in 2026 show that we need to handle it with care.
In this guide, we covered every aspect of the protocol. We studied what it is and how it works. Also, we touched on all details from packet structure to security holes.
Most importantly, we focused on data format details. The Ethertype value, TLV format, Demultiplex Header structure, and QoS message coding are examples. I hope this information helps you understand and manage your network better.
Keep in mind, like every protocol, this is also a data format standard. How you use it sets the safety and speed of your network. Always keep security patches up to date. If you applied the patch Microsoft released in September 2026, you have removed a significant risk.

Be the first to share your comment