
In this article, we will examine how to set up a new virtual machine on VMware Fusion 12 Pro in the macOS operating system on a Mac computer.
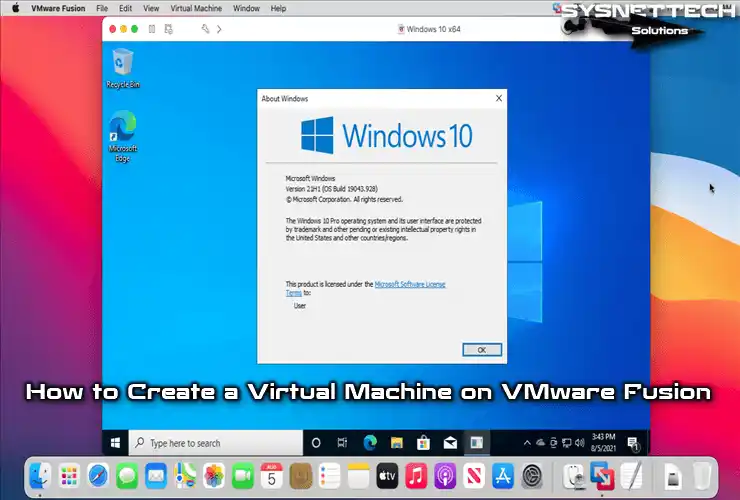
How to Install a New Virtual Machine on Mac using VMware Fusion 12 Pro
VMware Fusion is a virtualization program developed to run Windows, Linux, or macOS systems on Mac computers virtually.
With Fusion, you can run multiple or single virtual computers on your Intel-based Mac computer at the same time and use Windows applications such as Microsoft Word on your macOS system.
The operating systems running in the virtual machines you will install with this software will work in isolation from your host computers. That is, all the operations you will do on your virtual system will not affect the operating system running on your physical computer.
Instead of buying a computer with a Windows operating system, you can use a second operating system with Fusion software on your Mac computer. Thus, you will save both in terms of cost and maintenance costs.
After installing VMware Fusion Pro on your macOS system, you can easily prepare a new virtual computer. However, it is a more professional approach to understand and configure the VM’s settings well.
For example, Windows 10 supports the UEFI firmware type, so you can make your virtual computer more secure. Or, if you want to install it, you can set the firmware type to BIOS. It can be essential to choose settings such as UEFI and BIOS for the operating system you will install on a VM.
How to Create a New Virtual Machine
After running the VMware Fusion virtualization program, you will see that there are different installation methods on its homepage. You can quickly prepare a VM by dragging and dropping the ISO image of the operating system you want to install into the program, or you can start the installation using your host’s CD/DVD device.
Step 1
In the Select the Installation Method window, you can see different options for preparing a virtual machine. Generally, when creating a new virtual machine, the process starts with the Custom option. However, in some cases, you can migrate your physical computer’s system to a virtual machine or use the Windows partition on Boot Camp as a virtual machine.
Migrate your PC: You can use the operating system installed on another host computer as a VM on your Mac computer. This feature supports systems from Windows XP to Windows 10 and macOS 10.11 and newer running on a Mac. In order to move the system from your old computer to a Mac, you need to install the Fusion PC Migration Agent software. After creating the necessary files, transfer the old system to the guest machine and migrate your PC.
Install macOS from the recovery partition: You can create a VM from the macOS system running on your Mac. To make this type of VM, you must have a recovery partition and macOS 11.0 and newer.
Import an existing virtual machine: When you delete the virtual machines you created from the Library, you can use this option to add them again later. You can also import virtual machines created with Parallels Desktop. You can import the VMs you made with VMware Workstation on a computer running Windows 10 by adding the .vmwarevm extension to the end of the installation folder. In VirtualBox, you must select the OVF format when exporting the VM.
Install from Boot Camp: Boot Camp is a software developed by Apple to run Windows systems on macOS. It creates both macOS and Windows partitions on your host disk, allowing you to switch systems on the next boot. Thus, you can use two operating systems on your Mac computer. You can convert the Windows system in Boot Camp software to a virtual machine. In this way, you will be able to easily access your Windows virtual system through the program without the need to restart your Mac.
Create a custom virtual machine: You should select this option when you want to manually review all the settings of the virtual machine and prepare it.
Create a virtual machine on a remote server: If VMware Workstation, VMware ESXi, or VMware vCenter is running on the remote server you connect to, you can create a new VM on the remote server.

Step 2
In the Choose Operating System window, you need to select the operating system platform and system version you want to install in the virtual machine. With Fusion, you can run Microsoft Windows, Linux, Apple OS X, VMware ESX, and other systems virtually on your Mac.
You can also view the complete list of x86/x64 guest operating systems supported by VMware Fusion 12 here.
In the Guest operating system selection window, select Microsoft’s Windows 10 x64 version and click the Continue button.

Step 3
Suppose you are installing an up-to-date operating system with UEFI support in the Choose Firmware Type window. In that case, you can choose to install UEFI in terms of virtual computer performance and security. If you are going to install one of the older versions of Windows, you need to change the boot software type to Legacy BIOS.
You can install with the UEFI option, and you can also secure the boot process by preventing non-digital signed drivers from being loaded at boot time.

Step 4
In the Choose a Virtual Disk window, you need to create a new virtual disk to perform a clean installation of Windows on the virtual PC. If you have a VM that you have installed before, you can specify the location of the disk by using an existing virtual disk option to add the virtual disk file.
For Windows 10 x64, you can change the virtual disk capacity defined by Fusion by default later in the settings.

Step 5
After checking the settings of the virtual machine you have prepared in the summary window, you can start the system installation by clicking the Finish button. However, depending on your host computer’s hardware capabilities and performance, you should fine-tune the VM’s hardware settings. Therefore, click the Customize Settings button to make the settings before the system is set up.

Step 6
Before the VM settings window opens, select the installation location on your Mac and save it. If you continue without changing the location of the VM, it will be saved to Home Directory/Virtual Machines by default. You can then change this location again or edit the default path from Preferences.

How to Configure Virtual Machine Settings
After creating the guest machine, you need to configure some settings for system performance and add the ISO installation media for Windows, Linux, or macOS systems.
After clicking Customize Settings, when Settings opens, you will see three sections: System Settings, Removable Devices, and Other. In this window, you can add an ISO file to the guest machine and increase the number of processors or the amount of RAM.

1) System Settings
You can change the hardware properties of the virtual computer in the system settings, and you can also enable file sharing between the host and the VM or change the default applications that you will use on the guest machine via Fusion.
- General
- Sharing
- Default Applications
- Applications Menu
- Keyboard & Mouse
- Processors & Memory
- Display
Step 1: General
General settings include the virtual operating system name, version, disk capacity used, snapshot size, and system notes.
- Name: You can change the name of the VM you created later from this panel.
- OS: You can check the version of the operating system you have installed on the VM here. If you want to change the guest system installed in the VM, you can change the system platform from this panel.
- Notes: If you have installed multiple guest machines with the same version of Windows, you can make notes about what the VM is used for.
- Start automatically when VMware Fusion launches: You can enable this option if you want the VM to start as soon as you open the Fusion program.
- Clean Up Virtual Machine: You can compress and defragment the virtual disk of the guest machine to save disk space on your host computer. By following this process, you can only transfer the disk space of Windows VMs to your Mac.

Step 2: Sharing
Thanks to the Shared Folders feature, you can directly access the folders you specify on your host from a Windows 10 machine running on your Mac. Thus, you can facilitate the file transfer process between the host and the VM.
With the Mirrored Folders feature, you can access the Desktop, Documents, Downloads, Movies, Music, and Pictures private folders on your Mac from the Windows machine.

Step 3: Default Applications
You can configure Fusion software to open your files on your Mac or virtual computer using the default apps feature. When you set this feature, the apps you select on the Windows machine are added to Applications and Spotlight on macOS.
- Open your Mac files and web links by using Windows applications: You can open a Windows application file on your Mac using the applications in the VM. For example, you can open and edit a Word file on your desktop with the Microsoft Office program in the VM.
- Open your Windows files and web links using Mac applications: You can open and edit a file that can be opened in macOS on your Windows machine using Mac applications. For example, you can access websites using the Safari web browser on the VM.
- Run Windows applications from your Mac’s Applications folder: One of the great features of Fusion software is that it adds and runs the applications installed on the Windows guest machine into the Applications folder on the Mac. In short, you can open Windows apps directly on your Mac. VMware Tools must be installed to use this feature. Also, this feature is not available on shared virtual machines.
- Clean Up Applications: You can delete unused and deleted apps on Windows machines from the Applications folder on Mac.

Step 4: Applications Menu
In Fusion, when the Windows machine is in Unity view in the applications menu settings, you can run it from the Dock on Mac to access the software you use more quickly. You can also find the apps of your choice in the menu bar and open them easily with a shortcut.
- Clear Recent Applications: You can delete the applications you have added to access the applications running on the virtual computer from your Mac.

Step 5: Keyboard & Mouse
You can configure the keyboard script to be sent from your Mac computer to the VM from this panel. You can create different keyboard profiles for a Windows or Linux machine. That is, you can duplicate an existing profile and edit it to your liking.
- Mac Profile: This keyboard profile has minimal key mapping but can be productive when used on a Mac OS guest machine.
- Profile – Default: It converts common Macintosh key combinations to key combinations such as Control + C and Control + X for use on Windows or Linux guest machines.
- Windows 10 Profile: It includes the default keyboard key combination but allows the appropriate use of the key combination on Mac in Windows 10 VM.
- Windows 8 Profile: It contains the Windows 8-specific key combination and maps the +shift key to the Windows key.

Step 6: Processors & Memory
The most crucial hardware settings of the virtual machine are the processor and RAM. You can build consistent virtual computer performance by adjusting the number of processors and the amount of memory to the guest machine according to the hardware capabilities of your Mac.
For example, if you created a Windows 10 virtual machine to use office programs or to test some third-party software, 1 processor will be sufficient. If you are going to run Windows Server in the VM, you need to add a minimum of 2 processors, as more resources will be required. If you are going to use your guest system for Photoshop or video rendering, adding 4 processors will make your work easier.
You can increase the performance by setting a suitable RAM size for the virtual machine in the Memory section. If you allocate too much memory size to a Windows VM, it can slow down your Mac. For example, you can assign 1GB of memory to a Windows 10 VM only for office and Internet applications.
There are some important settings under Advanced Options for processors and RAM. You can enable these options in accordance with the performance and intended use of the virtual computer.
- Enable hypervisor applications in this virtual machine: You can enable this option if you want to use hypervisor applications in the guest virtual system. In this way, you can install the Workstation Pro software in the VM running on Fusion and create a VM with it.
- Enable code profiling applications in this virtual machine: You can enable this feature and use software like VTune or OProfile to optimize or debug your software running on the guest machine.
- Enable IOMMU in this virtual machine: You can map virtual memory addresses to physical addresses in host memory by enabling IOMMU (Input/Output Memory Management Unit) in the virtual machine.

Step 7: Display
You can enable 3D acceleration, retina display support, or single or full-screen resolution settings in the display settings of the virtual machine.
- Accelerate 3D Graphics: You can enable this feature if you want to use applications that support 3D graphics on the guest machine.
- Shared Graphics Memory: You can better use 3D applications on the guest machine by adjusting the graphics memory according to the total memory of the external video card of your Mac computer.
- Use full resolution for Retina display: If you have a Mac with retina support, you can enable retina display resolution support on guest machines. If this feature is disabled, the guest machine’s screen resolution will be half of the retina screen resolution.
- Single Window/Full Screen: You can use the Global Fusion screen preferences or change the guest system’s resolution to Center, Stretch, and Resize.

2) Removable Devices
There are more hardware settings on the removable devices of the virtual machine. You can add an operating system ISO file from these settings or start the installation via your host’s physical optical drive. You can configure the hard disk, sound card, USB, or Bluetooth settings in the removable devices section.
- Network Adapter
- Hard Disk
- CD/DVD (SATA)
- Sound Card
- USB & Bluetooth
- Printer
Step 1: Network Adapter
You can access your local network and the Internet by configuring the guest machine’s network adapter settings. Fusion software supports NAT or a bridged network so that your Mac can share an IP address.
- Share with my Mac: You can connect to your TCP/IP network and the Internet using your Mac’s network connection. However, the guest machine cannot obtain an IP address from your external network. Instead, it obtains an IP address from the VMware DHCP server. In short, the virtual computer uses the IP address of your Mac with the NAT protocol when accessing the external network.
- Autodetect: You can use this option if you want your guest machine to appear as an additional computer on the same physical network as your Mac. You can usually use this option to autodetect bridged networks on VPN connections.
- Ethernet: With this adapter, you can include your guest machine as an additional computer in your Mac’s physical network. The VM gets an IP address from a DHCP server on your Mac’s local network.
- Private My with Mac: You can connect your guest machine to your Mac using a private network, but you cannot access your VM from your physical network. The VM will be isolated from physical machines as it is configured as host-only.
You can also configure the bandwidth, packet loss rate, and network latency for packets in the advanced options in the network adapter settings. You can set the bandwidth of incoming and outgoing packets to be unlimited or a limited network type.
- Cable (10 Mbps)
- Cable (100 Mbps)
- Cable (4 Mbps)
- ISDN 1b (64 Kbps)
- ISDN 2b (128 Kbps)
- Leased Line (192 Kbps)
- Leased Line T1 (1.544 Kbps)
- Leased Line T3 (45 Kbps)
- Modem (28.8 Kbps)
- Modem (56 Kbps)
- Unlimited

Step 2: Hard Disk
In the Hard Disk settings, you can configure the virtual disk size, bus type, or how the virtual disk will be backed up on your host. You can also increase the capacity of the virtual disk and expand additional space on the Windows or Linux guest machine.
In the advanced options, you can change the bus type of the virtual disk to IDE, SCSI, SATA, or NVMe, but this may affect the performance of the guest machine. Choosing an older bus type will cause slower data reading and writing. Therefore, if the operating system you will install supports the NVMe disk type, you should select this option for performance.
- Pre-allocate disk space: You can allocate the capacity you set for the virtual disk on the physical disk of your Mac. On older equipped computers, this guest improves the performance of the machine, but you cannot reduce the disk size afterward. This option may take time during disc creation.
- Split into multiple files: With this option enabled by default, you can split your virtual disk into multiple files. The disk space that the guest virtual system will need is allocated at that moment. If you are going to copy your VM to a FAT or UFS formatted external disk later, this option is recommended.

Step 3: CD/DVD (SATA)
You can add the ISO file as installation media for a Windows, Linux, or macOS system to the VM in the CD/DVD drive settings. You can also use your Mac’s physical CD or DVD drive for system setup. In short, you can change the type of bus used for the virtual PC’s CD/DVD drive.
To add an ISO file to the virtual computer you created, select Choose a disc or disc image from the drop-down list.

When the disk image insertion window opens, select a Windows 10 ISO image you downloaded to your computer and click Open.

The VM will now boot with the Windows 10 image you added, and the setup wizard will open.

Step 4: Sound Card
In the sound card settings of the guest machine, you can make the sounds of the system you set up audible or disable them using the sound card of your Mac.
Fusion software emulates the Creative Labs Sound Blaster ES1371 AudioPCI sound card by default, but does not support MIDI input, joysticks, or game controllers.
You can choose this option because System Default is usually used as an input and output device in sound card settings.
- Enable Echo Cancellation: If you are experiencing sound echo problems in the virtual system you have installed, you can turn off the Echo feature by ticking this option.

Step 5: USB & Bluetooth
You can select the type of USB controller you want to use on your virtual computer using the USB and Bluetooth hardware settings. If you have a Mac that supports USB 3.0/3.1, you can connect USB 3.0/3.1 devices to your virtual computer.
You can connect a USB device that you have connected to your Mac directly to the virtual computer or to your system. However, if the VM is off, the USB device you want to add directly to the guest machine is connected to the host system. That is, if you want to connect the USB device directly to the VM, the VM must be turned on.
You can configure the behavior of USB devices with the Ask user option or connect directly to a VM or Mac.
- Ask what to do: When you plug the USB device into your computer, the Fusion software asks you whether you want to connect it to the Mac or the VM.
- Connect to this virtual machine: You can directly connect the USB device you inserted to the VM.
- Connect to your Mac: Only the Mac will recognize the USB device you inserted, but not the VM.
- Share Bluetooth device with Windows: You can connect your Bluetooth devices connected to your Mac to your guest operating system.

Step 6: Printer
You can use a default printer connected and installed on your Mac in your Guest operating system.
- Match the default printer on the Mac: When you want to print from a file you open on the VM, the print is sent to the default printer on the Mac.
- Allow a different default printer: With this option, printing is sent to a different printer that you set as the default in the guest operating system.
If you are not going to use a printer on your virtual computer and will not print, click the Remove Printer Port button.

Click Remove to confirm that the serial port used for printer communication has been removed.

3) Other Settings
The other section of the Settings window contains security, compatibility, isolation for file transfer, encryption, and advanced settings for the guest virtual machine. By configuring the settings here, you can change the compatibility version between the host and the VM or encrypt your VM for security.
- Startup Disk
- Encryption
- Compatibility
- Isolation
- Advanced
Step 1: Startup Disk
From which media you want to boot your virtual computer, you can select HDD, CD/DVD, or network adapter device in this panel, and you can boot your VM directly. However, your VM must be running for the boot media you selected here to be active.

Step 2: Encryption
If you have important files or data on your guest operating system, you can encrypt your VM if you absolutely do not want anyone else to access this information.
First, shut down or suspend your virtual machine and set a password after enabling encryption. Make a note of the password you created because the Fusion software does not have password recovery.
Now, when you start your virtual computer, you can open your system by typing your encryption password.

Step 3: Compatibility
The hardware version of a virtual PC you set up with old or new versions of the Fusion program depends on the version of that program. That is, a VM you set up with Fusion 12 Pro will have a hardware version of 18. If you update the Fusion software to the latest version when you add your old VM to the new version of the program, the hardware version will still be 18. Still, you can upgrade the hardware version to a newer version from the compatibility settings.
Before you can change the hardware version of your VM, you must shut down your system.
Updating the hardware version of a VM to a newer version can have a performance impact on the programs you use in your virtual system. For example, you can configure the virtual disk of the Windows 10 VM you created using the latest version of Fusion software with NVMe. NVMe virtual disks speed up the guest machine, and the applications you use will not freeze or crash. Therefore, if the hardware version is too old, NVMe disks may not be supported.

Step 4: Isolation
If you want to transfer files between your Mac and your VM using drag-and-drop or copy-and-paste methods in the Isolation settings, you need to enable the relevant options.
Or, if you want to restrict operations between your host and your VM, you need to uncheck Drag and Drop and Copy and Paste. When you do this, you cannot transfer files to your VM. To use these features, VMware Tools must be installed on the guest machine.

Step 5: Advanced
You can configure virtualization-based security, VNC service, firmware type, USB debugging, or other security functions in the advanced settings of your guest virtual system.
- Synchronize Time: You can enable this feature if you want to synchronize the system time between the host and the VM. VMware Tools services installed on the VM synchronize the time every minute and map it with your host’s system clock.
- Pass power status to VM: You can enable this feature to view your Mac’s power status on your VM as well. MacOS guest systems do not support this feature.
- Troubleshooting: You can collect troubleshooting information on your guest machine. If you configure this feature, which is enabled by default, to None, your VM will run as fast as possible. If you prefer to collect information about issues such as hangs or crashes on your Guest system, you can choose the Hang/Crash option or the Performance option to collect information that causes a process to take too long.
- Hard disk buffering: You can improve performance by enabling the buffering feature of the virtual disk, but it will use more memory on your Mac. In older versions of Windows, this setting is turned off by default. When you choose to configure this setting as Automatic, you can automatically set the buffering feature according to the system you are using. You can also select Enabled or Disabled to turn buffering on or off on the guest machine.
- Remote display over VNC: You can use a VNC connection to remote desktop connection from your Mac to the guest machine. In addition, you can change the connection port or set a password for confirmation during the connection.
- Power options: You can change the power options in the tool menu on the guest machine according to your purpose. For example, instead of shutting down the VM normally, you can choose to power it off directly with Power Off.
- Enable verbose USB debugging: You can enable logging about USB devices connected to the guest machine.
- Firmware type: You can change the firmware type of the guest operating system to UEFI or BIOS again, but if you change this setting after the system installation, you will get a boot error.
- Enable UEFI Secure Boot: You can enable this option to enable secure boot on your virtual system.
- Enable VBS (Virtualization-Based Security): You can enable virtualization-based security on your Windows virtual machines. Check this option, and the Fusion software will automatically allow UEFI and Secure Boot.
- Enable Dark Mode Synchronization: If you enable this feature, you will sync the Light or Dark mode of your macOS system to the Windows and macOS guest machines.
- Disable Side Channel Mitigations: You can enable this feature on guest machines to prevent side-channel attacks such as Specter and Meltdown. Side Channel Mitigation can reduce virtual machine performance, so you may prefer to deactivate it.

How to Run the Virtual Computer and Install Windows
After creating a virtual machine with VMware Fusion on macOS and configuring its settings correctly, you can now start the system setup.
Steps:
Step 1
Run the Windows 10 x64 virtual computer you created in Fusion.

Step 2
On the Windows 10 setup screen, configure the display language, time zone, and keyboard layout you want to use on your system and complete the installation.

How to Install VMware Tools
After installing the Windows 10 operating system on the guest machine, you need to install VMware Tools to use some hardware features or fix the screen resolution.
Step 1
While the VM is running, click Virtual Machine / Install VMware Tools from the tool menu.

Step 2
Click the Install button to mount the VMware Tools Installer CD to the virtual PC.

Step 3
When the CD image is mounted to the system, click on the warning you see in the lower right corner and click Run setup64.exe in the window that opens to start the installation.

Step 4
When the VMware Tools wizard opens, click Next to continue.

Step 5
Select Complete in the installation options of VMware Tools and click Next again.

Step 6
Click the Install button when the wizard is ready to install the virtual machine tools.

Step 7
Wait while the video adapter and other drivers are installed in your guest operating system.

Step 8
After installing VMware Tools, restart your virtual system to ensure the changes take effect.

How to Delete a Virtual Machine from VMware Fusion
If you want to remove the guest virtual system you created from your Mac altogether, you must also delete the files from the location where the VM is installed.
Step 1
Right-click the Fusion program on the dock, and then click Virtual Machine Library.

Step 2
To open the directory of your VM installed in the Library, Right-Click / Show in Finder.

Step 3
After checking that the guest machine is stored in the Virtual Machines folder, click the Right Key / Delete option on the VM again.
When the Remove Virtual Machine window opens, click Move to Trash to erase the VM. If you only want to delete the guest machine from the Library, you should click on the Keep File option in this window.

Step 4
After completely deleting the VM on macOS, you can see that there are no longer any files in the Library and its installed directory.

Video
Using Old Versions
Conclusion
In conclusion, VMware Fusion software is a powerful virtualization tool for Mac users. It also offers you excellent performance if you want to run different operating systems without any problems. However, it is pretty easy to migrate an existing system. That is, you can run another OS without hardware restrictions.
Plus, it provides a more flexible environment than others if you want to test new software. Thus, you can learn various installation methods and gain significant advantages.
In addition, making the right choice between UEFI and BIOS increases the performance of the virtual system. These settings increase both your security and OS stability.
In short, virtualization saves you money and space. Plus, it allows for both personal and professional use as it provides more opportunities for experimentation and productivity. Virtualization not only expands your operating system options. With it, you open the doors to a new platform for innovation on your Mac.

Be the first to share your comment