
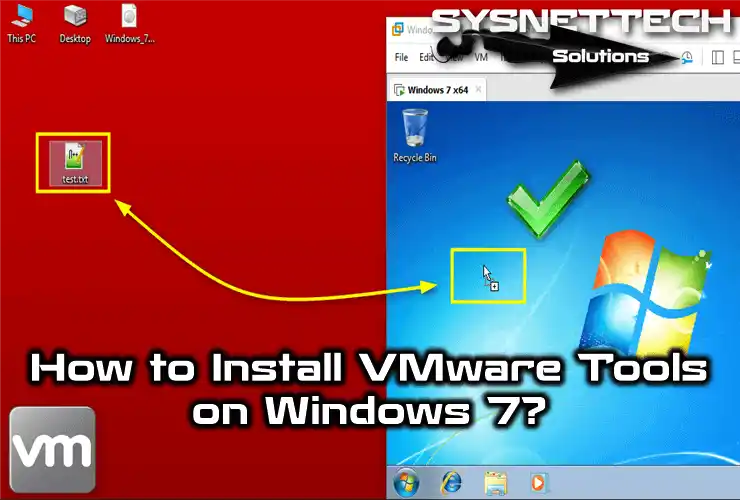
It is crucial to install VMware Tools on your Microsoft Windows 7 virtual machine. This will increase performance and improve integration. Not only that, but you will also get better graphics performance. This will improve the response time between you and your host PC.
Plus, you will gain ease of use by increasing mouse and keyboard responsiveness. You will also get access to better LAN features. In this guide, I will explain the steps to build VMware Tools on a Windows 7 VM.
Benefits of Installing VMware Tools for Windows 7
First of all, I want to mention that with VMware Tools, you can increase the performance of your virtual machines. Thus, you can improve your user experience and provide better usage. Plus, when you install on Microsoft Windows 7, you will also gain:
- Improved Graphics Performance: You will significantly improve the graphics capabilities of your guest machine. Thus, you will make your graphical interface more fluid and more responsive.
- File Sharing Capabilities: You will enable file sharing between the host machine and your guest machine. You can operate it to drag and drop files or access mapped drives.
- Clipboard Functionality: Copying & pasting your text, images, and files will be more effortless. In particular, you will speed up your data transfer and increase productivity.
- Time Synchronization: You will automatically synchronize your VM’s clock with your host machine. Obviously, if you have time-related tasks, you will prevent errors by ensuring consistency.
- Improved Mouse Interaction: You can move your mouse cursor smoothly between the host and guest systems. Plus, you will eliminate problems such as cursor lag.
Why Should I Install Windows 7 Virtual Drives in VMware?
As you know, technology is constantly evolving, but sometimes you may need old applications. So, virtual PCs give us a good solution for this. VMware makes it incredibly easy for us to manage these digital environments.
Here are the main reasons why we need to install Windows 7 virtual drives:
- Legacy Application Support
By running Windows 7 on a virtual machine, we can experience old applications. For this reason, we can use software that does not work on new versions of Windows. This development eliminates the need for us to search for old hardware.
- Testing and Development
VMs are the ideal testbeds for us to experiment with any software. Additionally, you can experiment without affecting your primary operating system. Moreover, you can safely explore different scenarios on a stable system.
- Safe Browsing Experience
You can reduce security risks by running legacy browsers in a VM. For example, you can isolate threats in a virtual environment before they affect your central system. This is an effective strategy to increase your knowledge & experience in cybersecurity.
- Resource Efficiency
Modern PCs also have the power to run multiple virtual OSes at the same time. VMware also preserves the performance of existing hardware by using resources efficiently.
- Easy Backup and Recovery
For example, you can easily create backups with snapshots in a Windows 7 VM. Additionally, you can quickly revert to a previous state if a problem occurs.
- Cost-Effective Solution
Old physical systems are expensive to maintain and troubleshoot. So, a virtual OS like Windows 7 reduces our costs. We also save physical space by reducing our energy consumption.
In short, we get all these benefits by installing the hardware drivers of the Windows 7 VM.
How to Build VMware Tools on a Guest Machine
Usually, if your host PC has Internet, you will automatically install VMware Tools when installing the VM. If you still can’t install it, that’s okay, so you will need to install it manually.
Steps:
Now, let’s install the Guest software on the Win7 OS step by step.
Step 1
As you can see below, the driver software is not installed on the Win7 guest machine. You can obviously understand and verify this by the fact that your screen resolution has not changed.

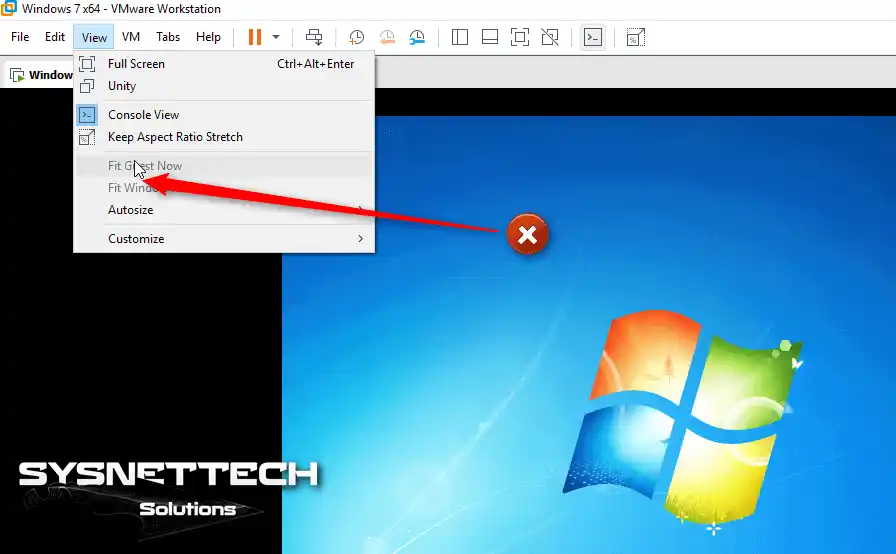
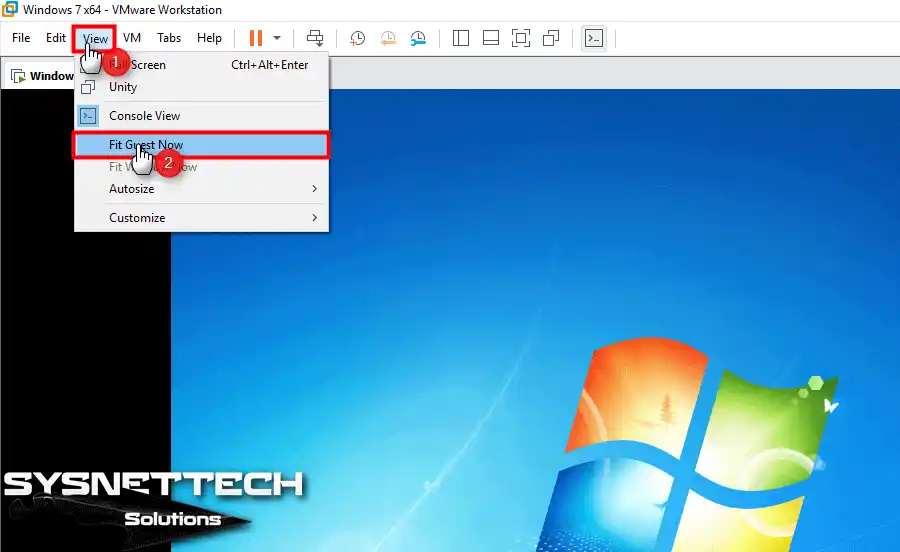
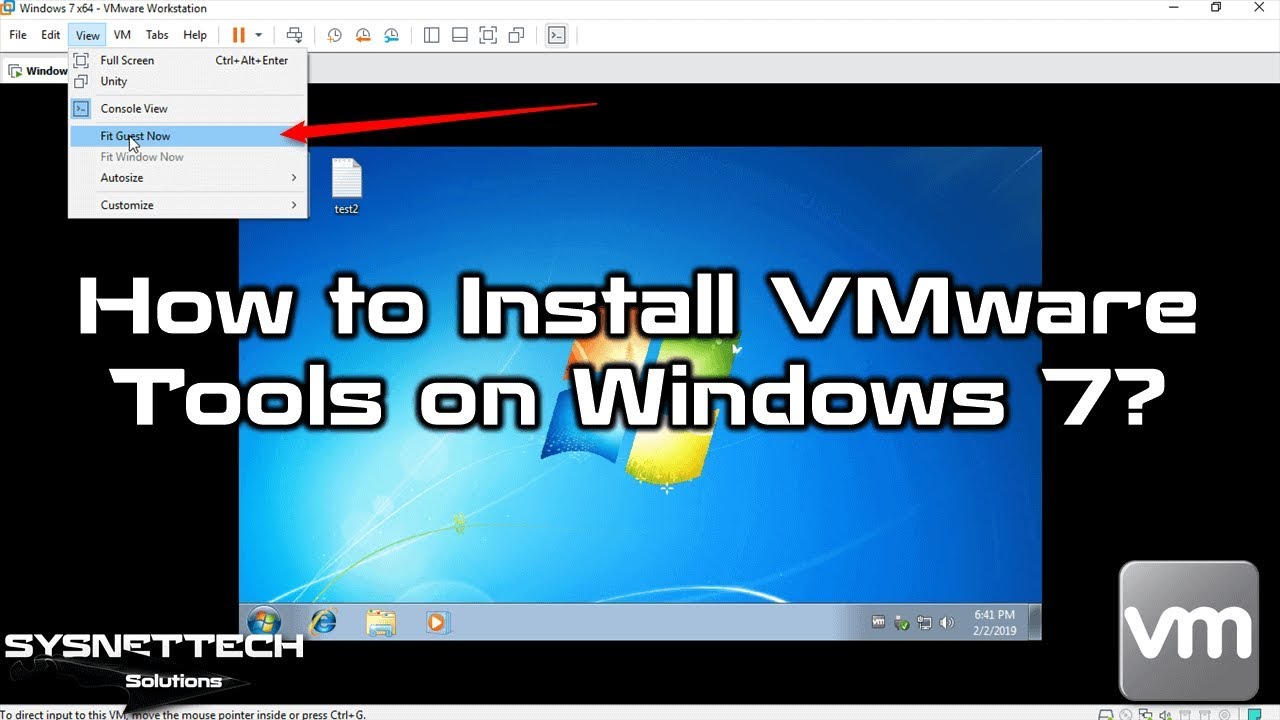
Step 2
Here, if you installed the drivers for your guest machine, View / Fit Guest Now would be active, as in the image below. However, after the installation process, you can automatically fix the screen resolution of your VM.
However, since VM Tools is not installed at the moment, this option is inactive.
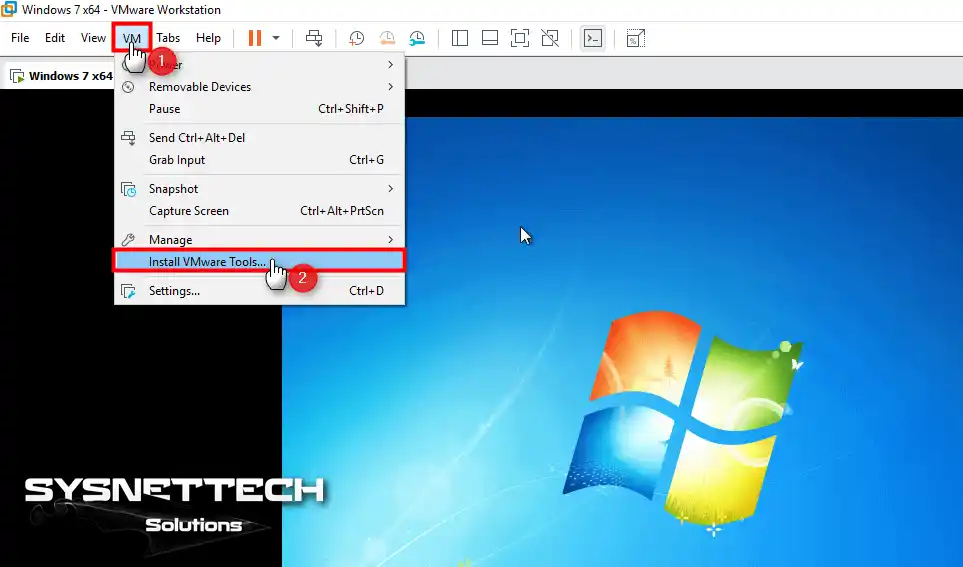
Step 3
To get rid of this situation, you should install the VMware tool on your guest machine. If you are ready, click on the VM / Install VM Tools option to install the additional software.
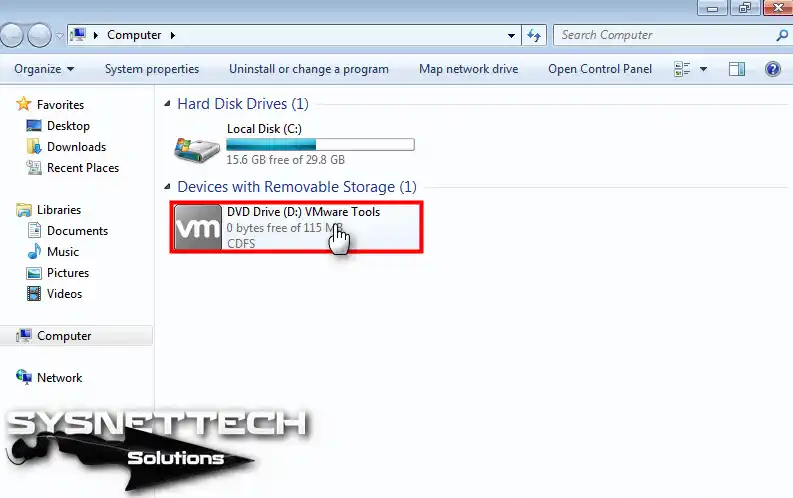
Step 4
You have mounted the image of the VM tools to the system. Then open My Computer and double-click the drive to start the wizard.
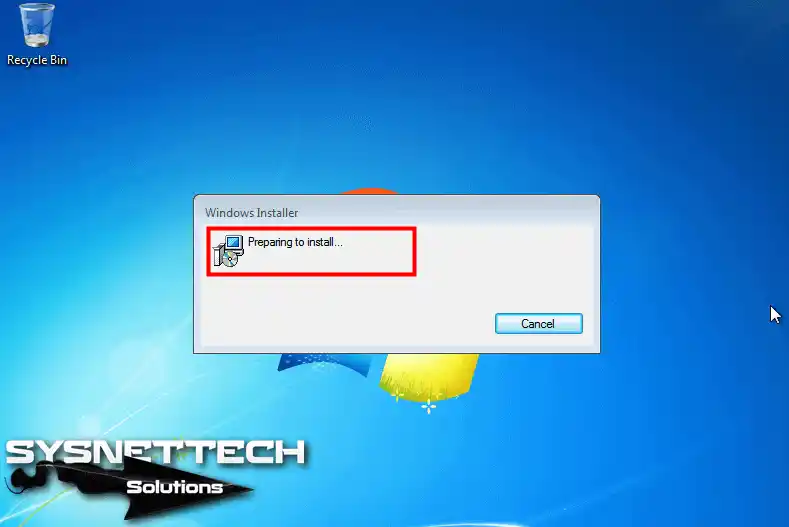
Step 5
We need to confirm that the wizard will start so the User Account Control pops up. Here, allow the running of files from the CD/DVD drive and proceed.

Step 6
The wizard prepares the drivers for your Windows 7 guest machine.
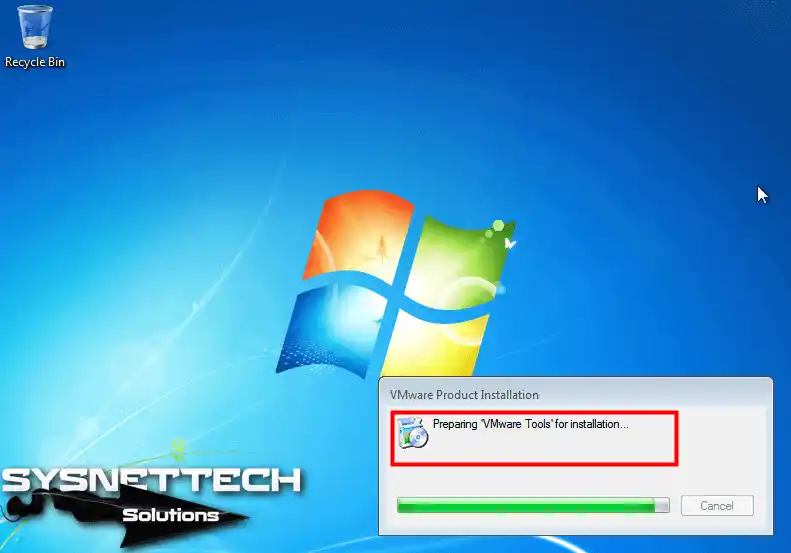
Step 7
Now, wait patiently for the installation process.
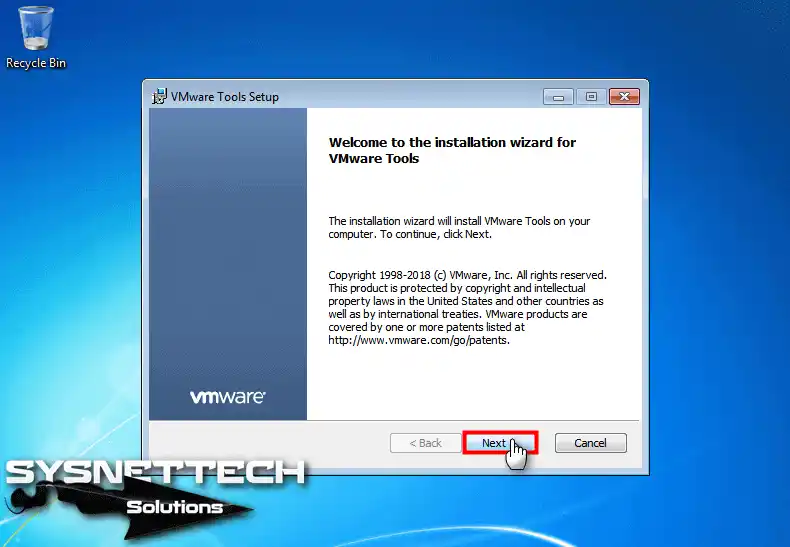
Step 8
Proceed through the Setup window, reading the legal rights regarding the VM tools.
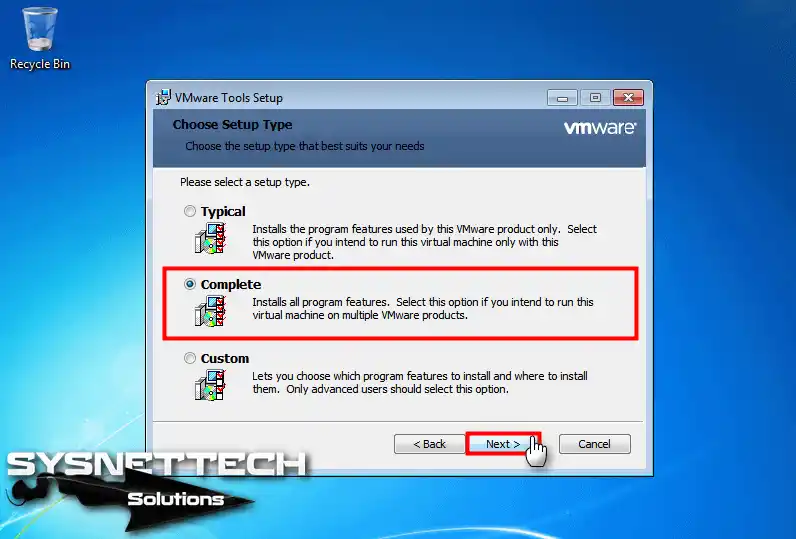
Step 9
When installing VM Tools on your Guest PCs, I definitely recommend that you select the Complete option. If you install all of these tools, you will prepare your virtual machine for new technologies in the future. That means you can run it on different VMware platforms.
Now, choose the Complete option and click Next to continue.
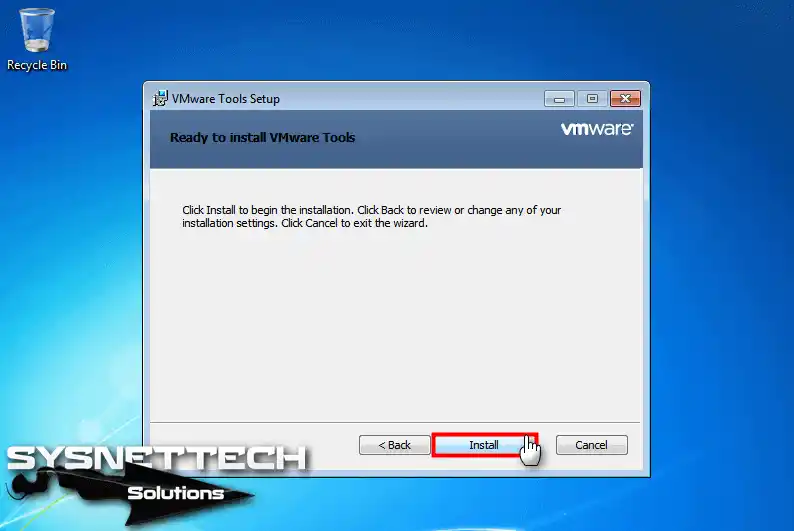
Step 10
The wizard is now ready to install VMware Tools, so continue by clicking Install on the relevant screen.
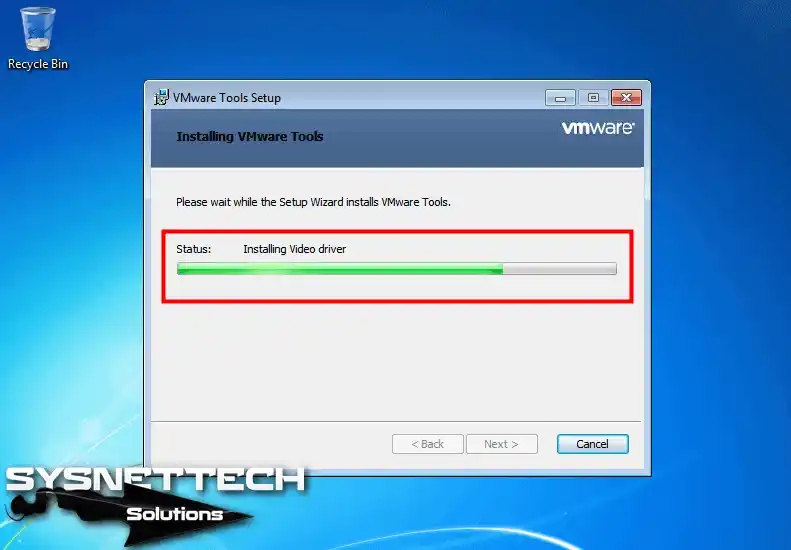
Step 11
Wait while the wizard installs VMware Tools on your Windows 7 virtual PC.
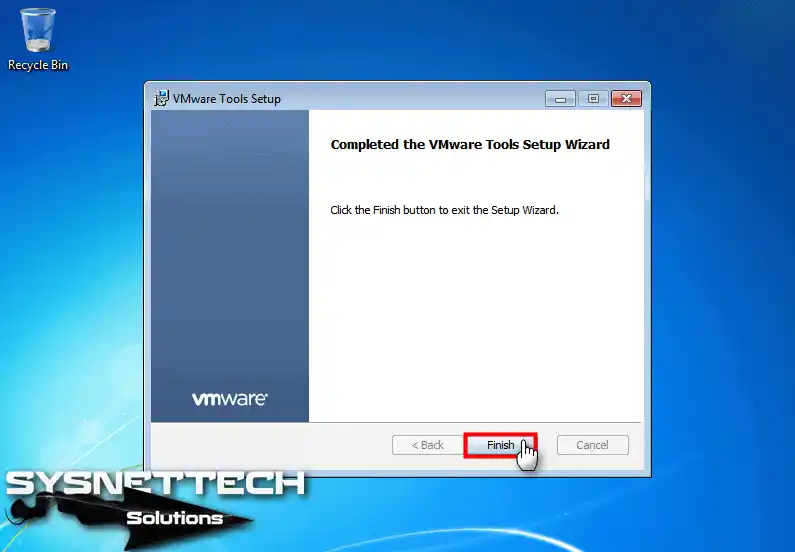
Step 12
Now, you have installed the drivers for your VM’s virtual hardware.
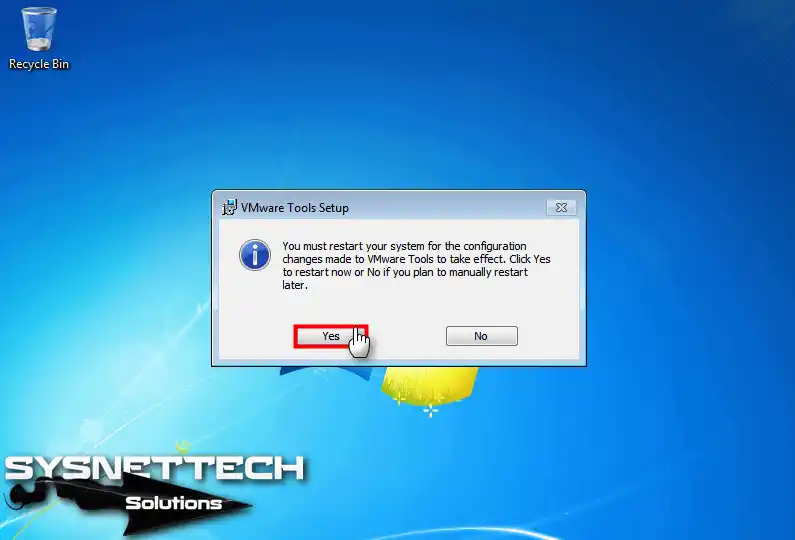
Step 13
Restart your virtual PC to enable VMware services.
Step 14
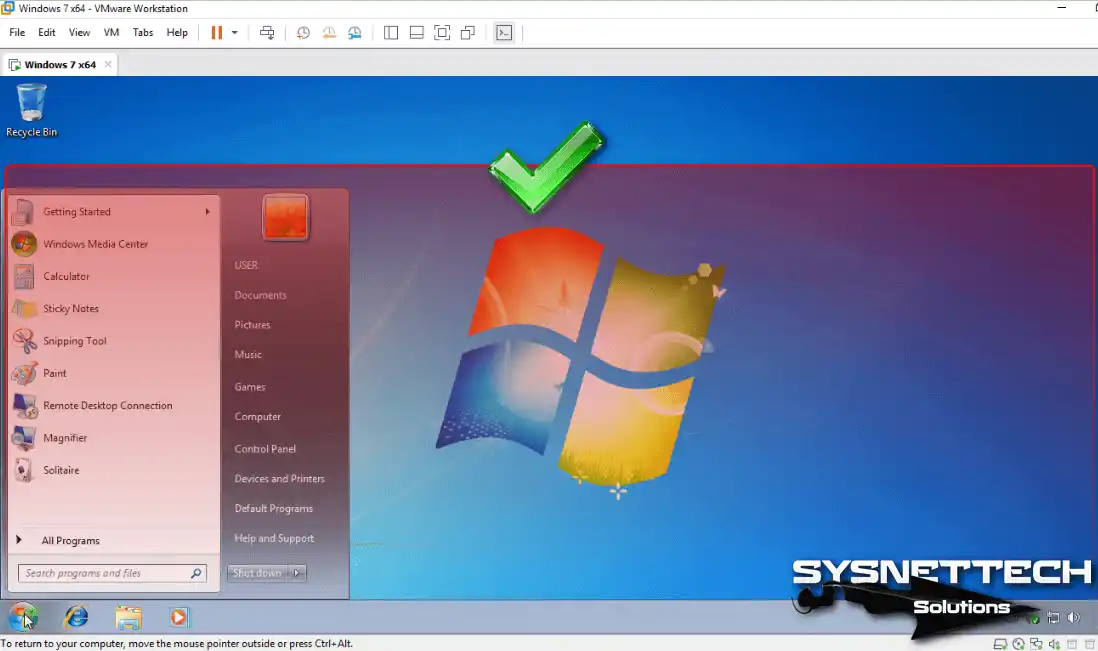
Now your Fit Guest Now option is active. Click on the relevant option to adapt the Win7 screen settings to your host’s panel.
Step 15
As soon as you click on the Fit Guest Now option, you will have changed the resolution of your VM.
Step 16
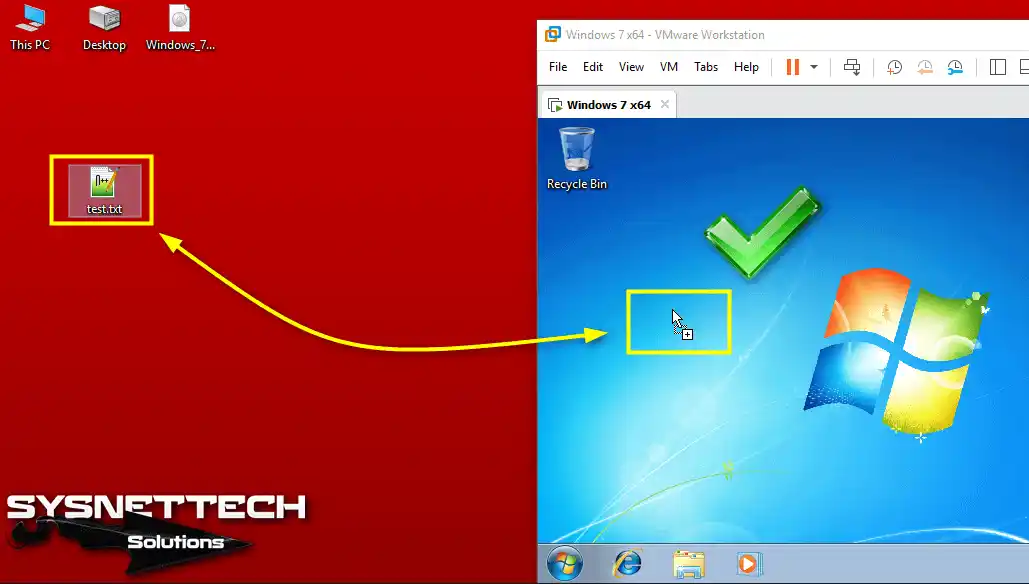
You can now transfer files between your physical PC system and your Win7 VM!
How to Setup Guest Software on Win 7 VM ⇒ Video
You can also increase the performance of your Windows 7 in VMware Workstation with our detailed video guide. For this, check out our YouTube tutorial video below. Finally, if you find our content helpful, we would like you to support us.
Frequently Asked Questions (FAQ)
- What if I encounter problems during installation?
- Can I uninstall VM Tools?
- Does it work with all versions of Windows 7?
- Is it necessary to update regularly?
- How can I verify that VM Tools was installed successfully?
Final Word
As a result, you have increased the efficiency of your Windows 7 guest system. In addition, of course, you can speed up your workflow by making GPU improvements.
One of the best parts of using VM is file sharing. You can share your documents quickly from both systems. You can also work smoothly with better mouse functionality.
Now, you can use old apps on your Win7 OS. For example, you are forced to use this system for an old machine in a manufacturing company. Because the software of this invention they made in the past works on this OS. Now you can solve such problems on your new generation PC!
If you are still having trouble with the configuration, we have a complete guide. I also explained how to use all these features in our article Installing Windows 7 with VMware. If you read it, you will see that there is only one solution on the Internet.

Be the first to share your comment