
With GNS3, you can find a different way to use virtual machines for your network designs. For example, you can use a Loopback. This allows you to take advantage of a feature provided by Windows.
This lets you pick your current network adapter. Or you can add a new virtual one. Because of this, you can talk with other devices on your LAN. You can even link to virtual computers.
I suggest adding this network card to your GNS3 emulator. This will let you connect your PC to virtual machines in your larger LAN plans. In short, this adapter enables you to build more complex projects.

Using the Loopback Adapter in GNS3
Before you make the Loopback in Graphical Network Simulator-3 (GNS3), you must do one thing first. To start, you need to add the “Microsoft Loopback Adapter” to your Windows computer.
This pretend network card is handy. We can use it in test setups that need their own isolated LAN.
First, pick a good set of IP addresses for your LAN designs. This is very important for the setup steps in GNS3.
After you change these settings, restart your computer. This will help you fix any possible problems.
A self-loop adapter is a virtual network card. Specifically, it acts just like a real one. This way, you don’t need actual hardware.
Also, it is perfect for programs that need a network link. This makes it great for LAN practice. It is also ideal for testing.
In our past guides, we looked at Cloud configuration very closely. We also showed how to make a VMware connection inside GNS3.
In this article, I will cover adding a Loopback NIC to Windows. First, I will provide a comprehensive guide for Windows 10 & 11.
Next, I’ll explain how to integrate it with GNS3. In other words, I’ll help you take your networking simulation skills to the next level.
How to Add a Microsoft Loopback Adapter on Windows for GNS3
First, we will add this adapter to the Windows 10 & 11 operating systems. This will turn on smooth virtual network tools for your OS.
Now, to correctly add the virtual adapter, just do the steps we list for you next.
1. Start the Add Hardware Wizard
Step 1
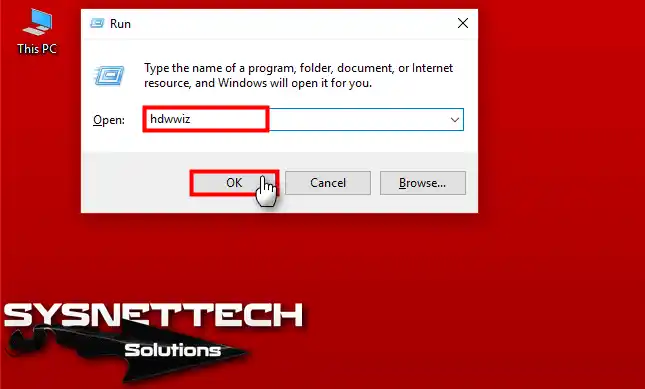
To add a hardware adapter in Windows, first open the Run box. To accomplish this, press Windows + R, and enter “hdwwiz” in the dialog that appears.
Doing this, you will launch the Add Hardware Wizard. You can then add a new network device. And, you can also set up other outside devices.
Step 2
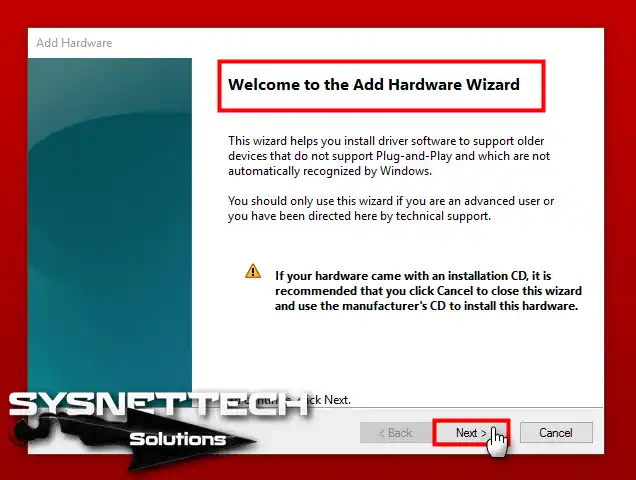
When you see the hardware wizard, wait a moment. I recommend reading the instructions on the screen to better understand what to do. Then, when you are ready to proceed with the configuration, click Next to move on to the next steps.
2. Add Loopback Adapter to Windows PC
Step 1
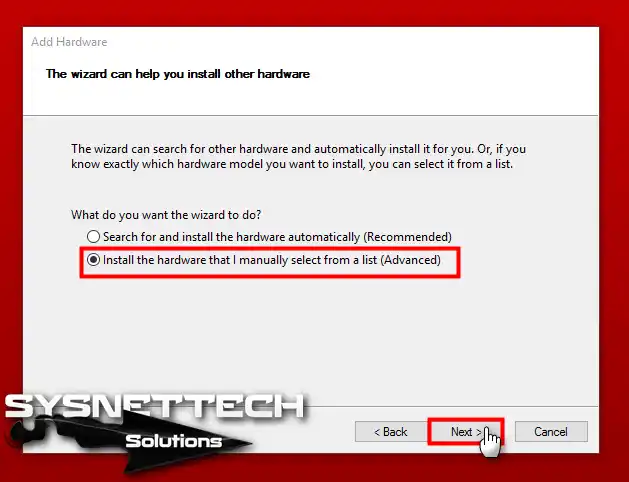
Now, click the Advanced tab in the settings menu. This lets you add the loopback card by hand. You can also set up sound paths well. Lastly, be sure you are allowed to make these changes.
Step 2
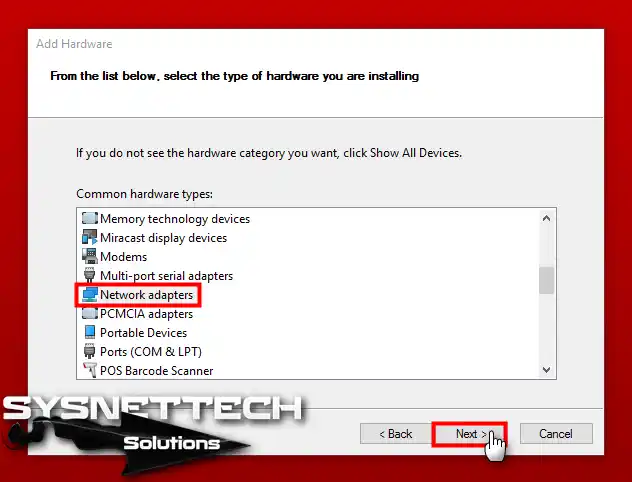
First, go to the Hardware Types window in the setup interface. Then, find the Network Adapters section.
Click on it to highlight your selection. Then, click Next to keep going with the setup.
Step 3
First, go to the Manufacturer area. Then, pick the “Microsoft” choice from the list. After making this selection, look at the right-hand pane. Here, you will see a list of available devices.
Select “Microsoft KM-TEST Adapter” from the current list. I must say again that this adapter is just for testing. Therefore, it may not be suitable for everyday use. For this reason, read the steps to make sure it works best.

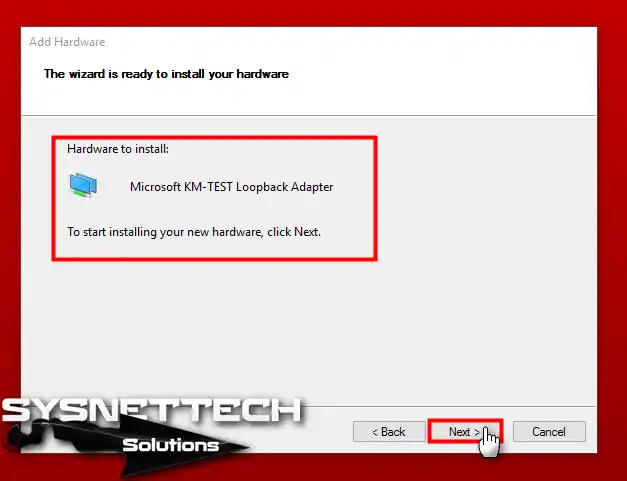
Step 4
First, look at the hardware summary closely. This way, you can be sure that all components meet your needs. Then, confirm that everything is in order.
Next, click Next to keep going with the wizard. So, look at everything again before you go on.
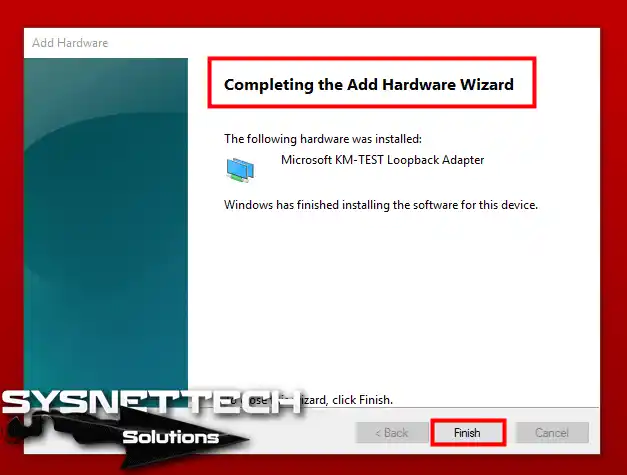
Step 5
You have now finished adding pretend hardware to your Windows computer. Now, press Finish to leave that window and go to the IP setup.
3. Assign an IP to your Loopback Card
Step 1
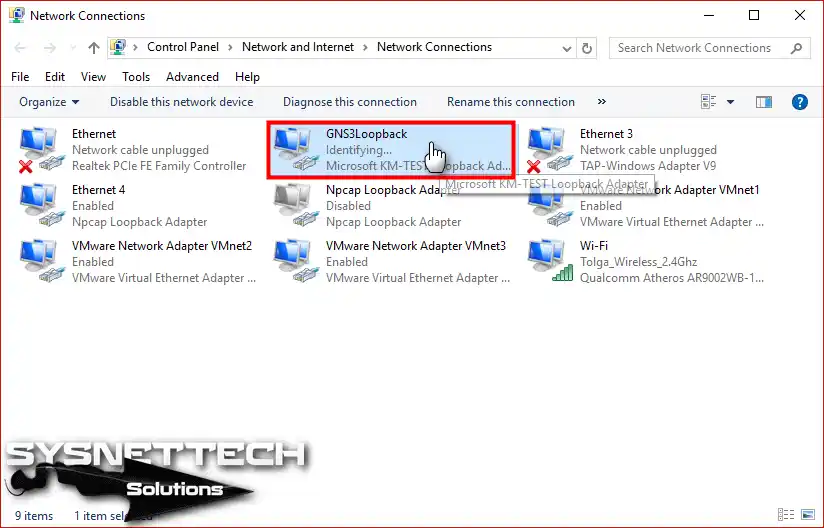
You can check that you added the loopback adapter. I also suggest you give it a new name so as not to mix it up with other LAN cards.

Step 2
Double-click the pretend LAN card you made to go on. This step is critical, so do not wait to do it.
Step 3
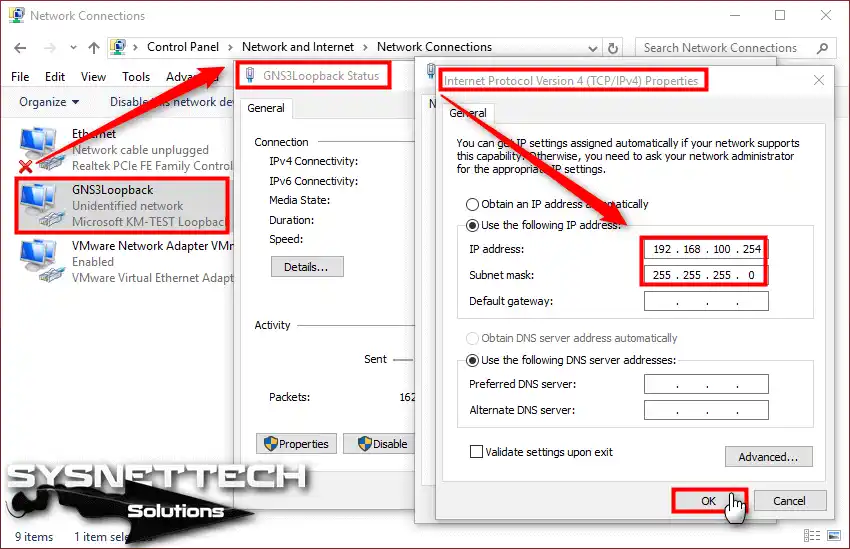
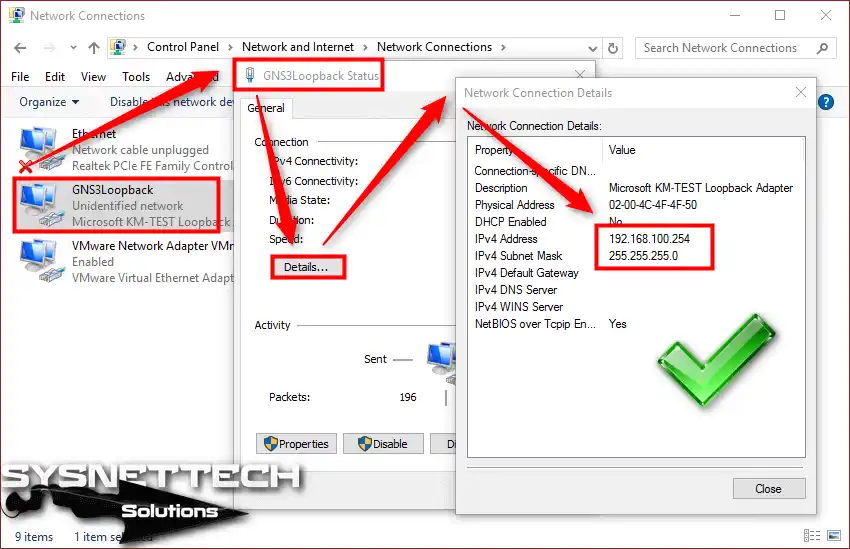
You need to assign an IP address to the GNS3Loopback interface. Therefore, I am configuring the 192.168.100.0/24 network on my virtual card.
Please make the needed changes for your project and save what you did.
Step 4
To check the structure, you can click on the Details button that appears on the NIC card.
Adding the Loopback Adapter to GNS3 Software
You have now added the self-loop adapter so far. But before you put it in your GNS3 program, you must restart your computer. Once you save the changes, you can then add it to your emulator.
Step 1
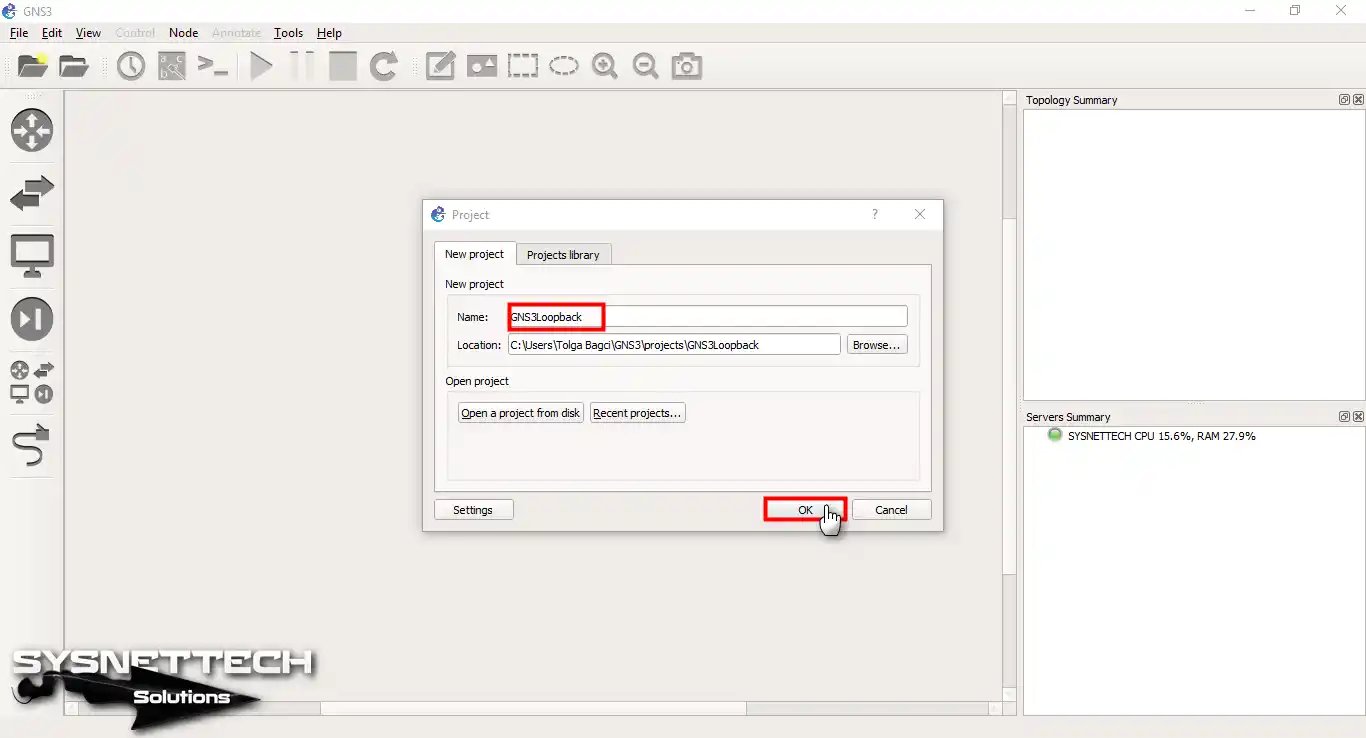
Once you restart your Windows 11 & 10 PC, open the GNS3 program and start a new project.
Step 2
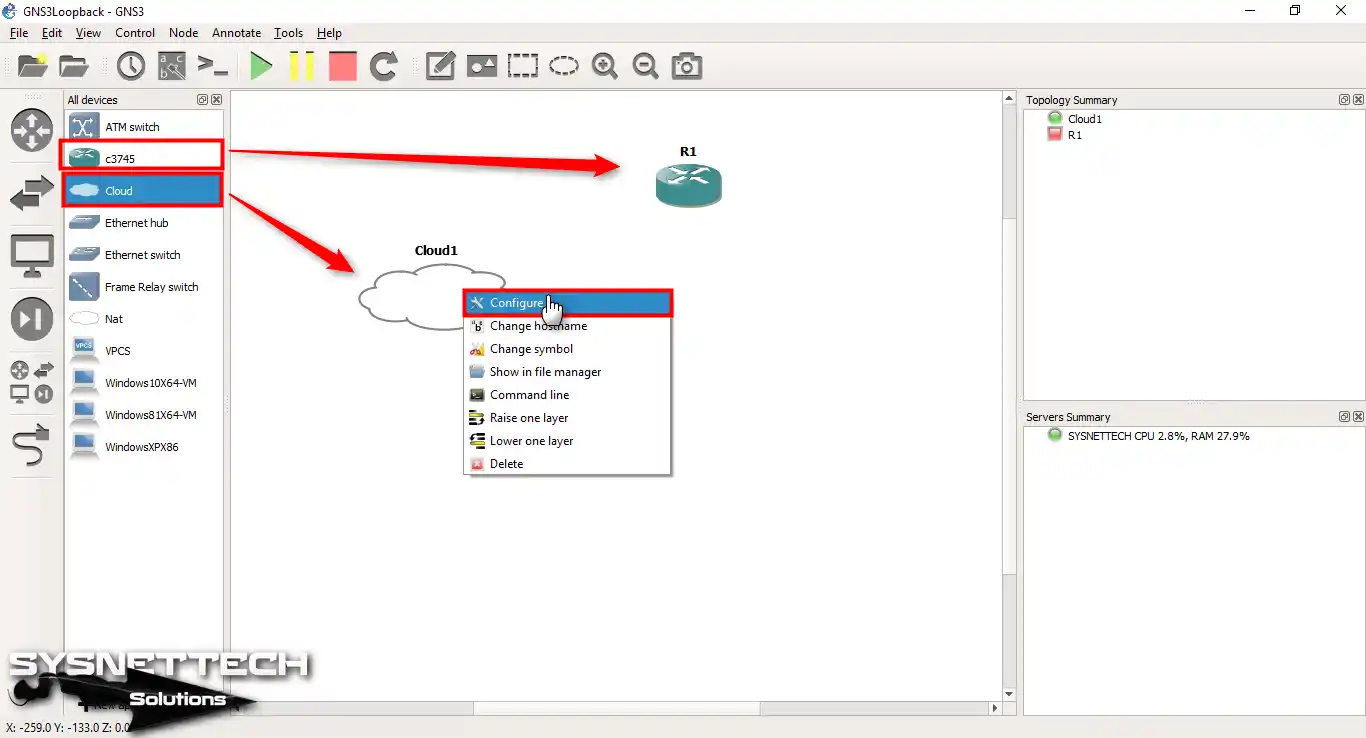
Drag one Router and one Cloud device into the GNS3 workspace. Then, right-click to select the “Configuration” option to set up Cloud1.
Step 3
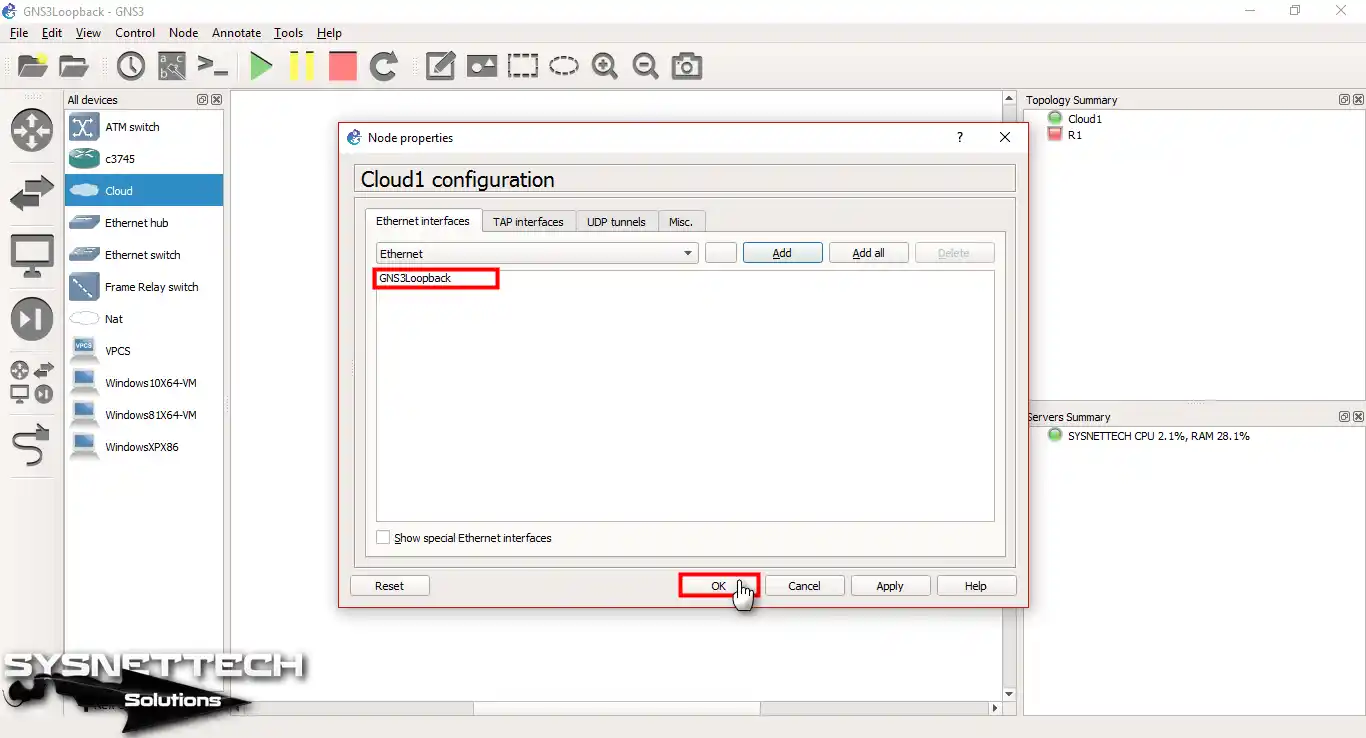
Go to the Ethernet Interfaces section in the Cloud1 window. Then, add your loopback card to GNS3. When you see the adapter you already added to the list, click the Add button.
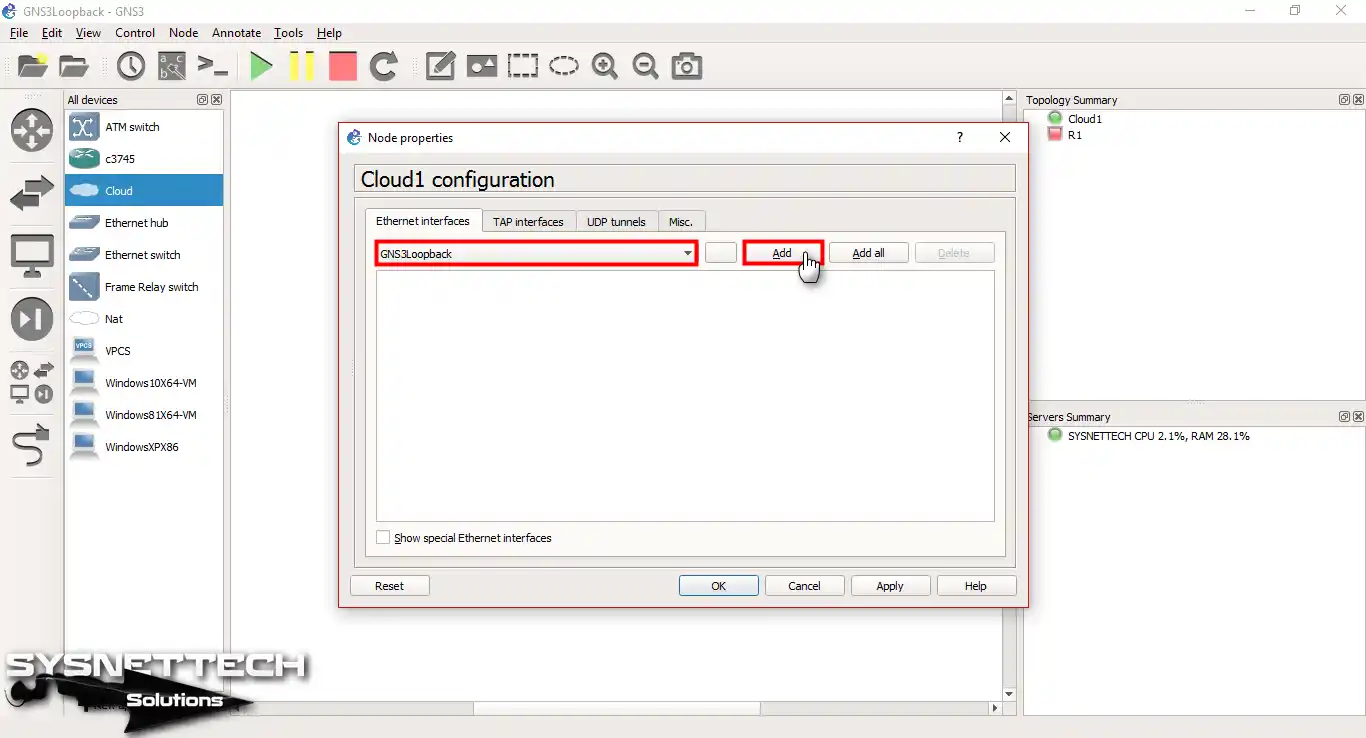
Step 4
After you add the Windows virtual card, press OK to save your work.
Step 5
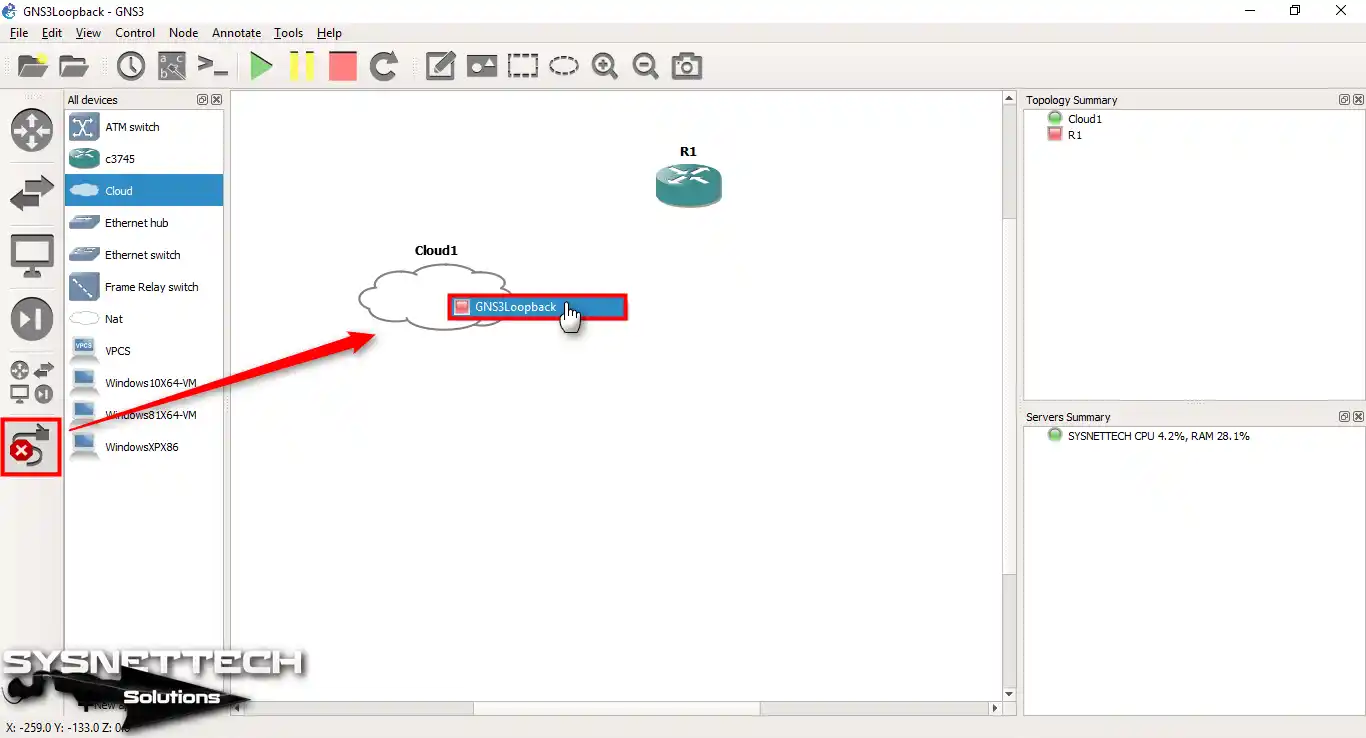
Next, click on the cabling to connect Cloud1 to the Cisco Router. As a result, you can select the Loopback card as shown in the image.
Step 6
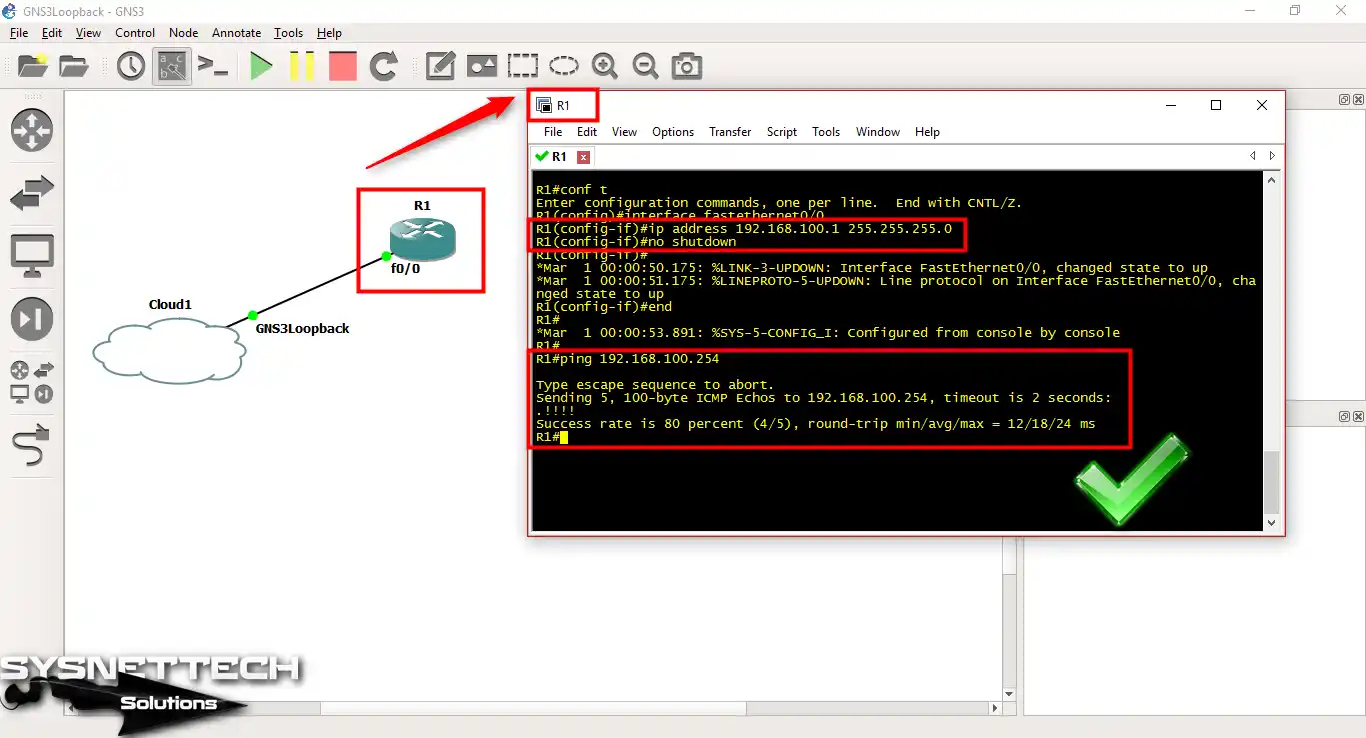
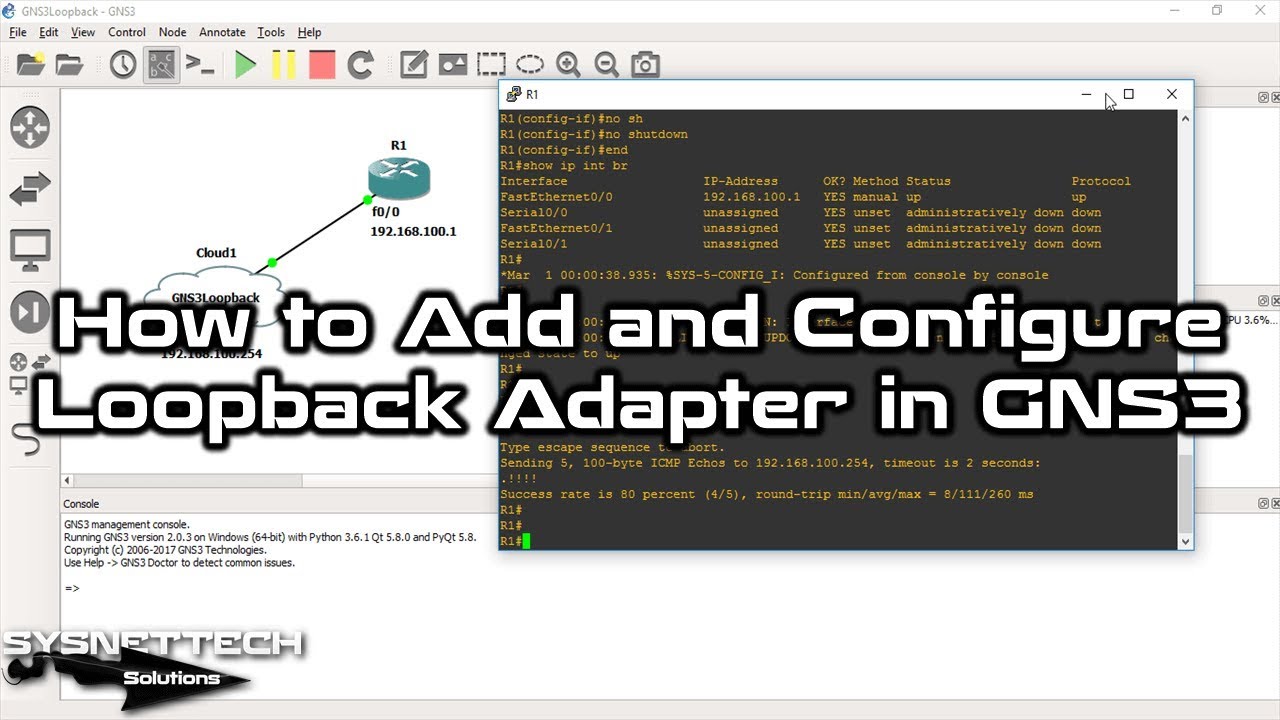
Assign an IP address to the Cisco Router’s FastEthernet 0/0 port to activate it. Then, ping the loopback IP address to verify that everything is working. As a result, Cloud1 and the Cisco Router can now communicate with each other.
Step 7
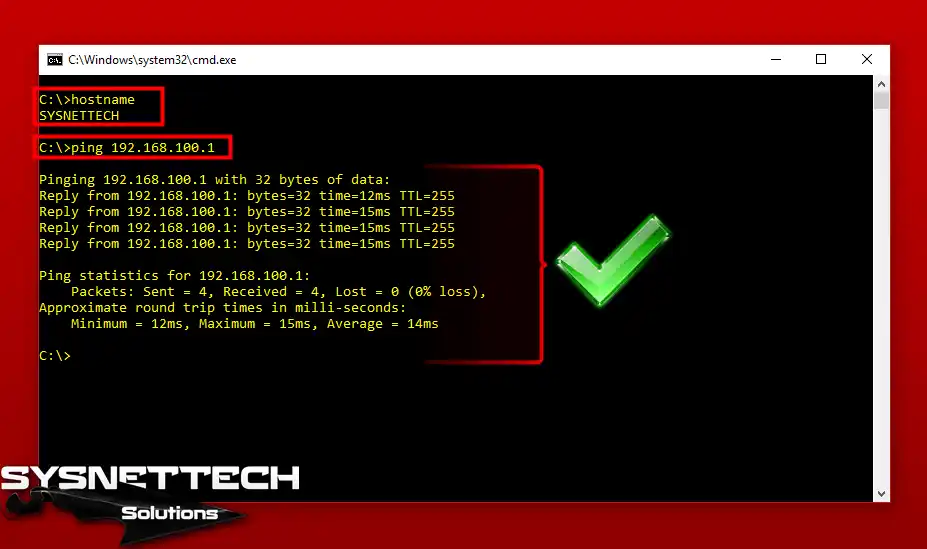
Now, do one more test like this. Ping the Cisco Router’s FastEthernet 0/0 port from your real computer.
If all is working well, the link is running without problems. Also, the link to the Loopback card should look like the picture you see here.
Video
Frequently Asked Questions About GNS3 Loopback Adapter (FAQ)
- What does a loopback adapter do?
- How do I set the loopback IP address?
If you want to give an IP address to this pretend network card, do these things:
- Open the settings of the Loopback you made in your Windows computer’s network settings.
- Double-click on the TCP/IPv4 thing, and in the window that pops up, type the IP address you want in the boxes and click OK. Usually, people use the address 127.0.0.1 for it.
- Save the Loopback card settings and make sure the changes take effect.
- What is the purpose of the Loopback in GNS3?
Conclusion
To end, I really say you should add the Microsoft Loopback interface to GNS3. This lets you work well on complete network jobs without using virtual machines. Using virtual machines puts more load on your computer.
You can use the steps I gave you to add this fake networking card and begin making a test area that you can change. It also has the good bonus of making your network plans more straightforward.
This setup lets things contact with each other. Primarily, it works between pretend and real machines. So, you make a base for bigger network jobs. Plus, it also enables you to build newer solutions.
As you learn this method, you will find out how to build many Cisco networks. For one, you can try plans like sending data between separate networks.
Also, you can surely grow your skills by getting better at fixing problems!

6 People Shared Their Experience
Hi I love your article. Was a great help.
I have comnected a circuit using 2 routers and 1 DNS server
But I have one problem.
The pinging from command prompt to the router is successful, but while pinging from router to the address of the loopback(192.168.100.254) , it shows success rate as 0 percent. Can you please help me with correcting that.
I have the same problem, any help?
the ping from router to loop back is 0 percent.
I have done by same way. But can’t ping from both end.
Why do you want to “ping” the Loopback device? It’s not a real device/hardware? It’s virtual. It’s used to bridge your physical home network / PC devices to the virtual ones inside GNS3 ?
Yes, this adapter is virtual. However, we use loopback on various network connections, especially in virtual environments. That’s why we need to test the connection between both the Router and the loopback adapter. To do this, we check that the network connection is OK with the ping tool.