
It may be a good idea to back up any settings you have made on the Cisco Router. If your router’s NVRAM fails, the initial configuration file cannot be loaded, and you will lose your existing settings.
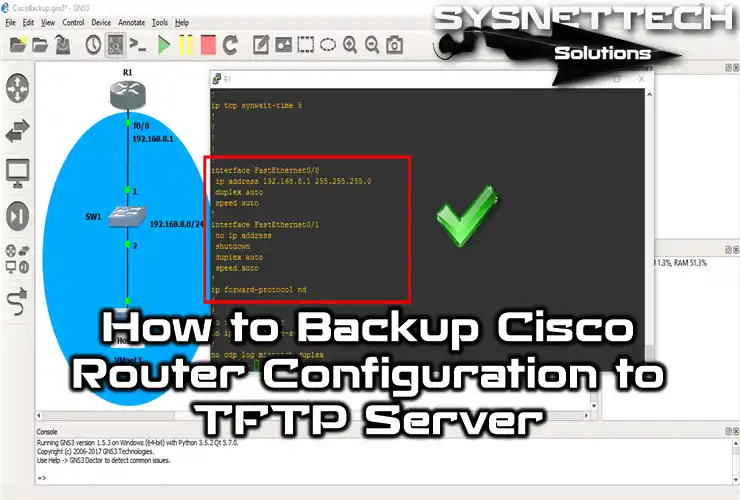
How to Backup Router Configuration on TFTP
There are many ways to back up the router configuration, one of which is to use a TFTP Server.
You can quickly copy the configuration and image files of all your network devices by placing a TFTP server in your existing network structure. However, since TFTP is an insecure transport protocol, you need to secure your server.
It is a good idea to back up your Cisco router’s startup-config and running-config files frequently.
Suppose a Cisco Router on your network fails. In that case, you can quickly add your backup device to the network environment and transfer the configuration file of the previous device to the new device via TFTP. This will ensure the continuity of your network.
Recovering configuration files is great. But what if the router’s operating system is completely erased? That’s when just the config file isn’t enough.
At this point, knowing the steps to back up the IOS image via TFTP is a lifesaver. Now, let’s take it a step further; you absolutely must practice this scenario on the GNS3. This way, you’ll gain the skill to restore the entire device software from scratch.
How to Save the Cisco Router’s Startup-Config and Running-Config Configuration Files
First, install the SolarWinds TFTP Server application on a VMware virtual machine, and then follow the steps below in order to configure the required settings.
Step 1
Create a new virtual machine with VMware, and then configure the VMnet settings, as shown in the image below.

Step 2
After creating VMnet3, change the IP address to 192.168.8.2.

Step 3
After completing the VMware Workstation settings, run GNS3 and create the topology, as shown in the image below.

Step 4
Once you have completed the VMware Workstation settings, run GNS3 and create the topology, as shown in the following illustration.
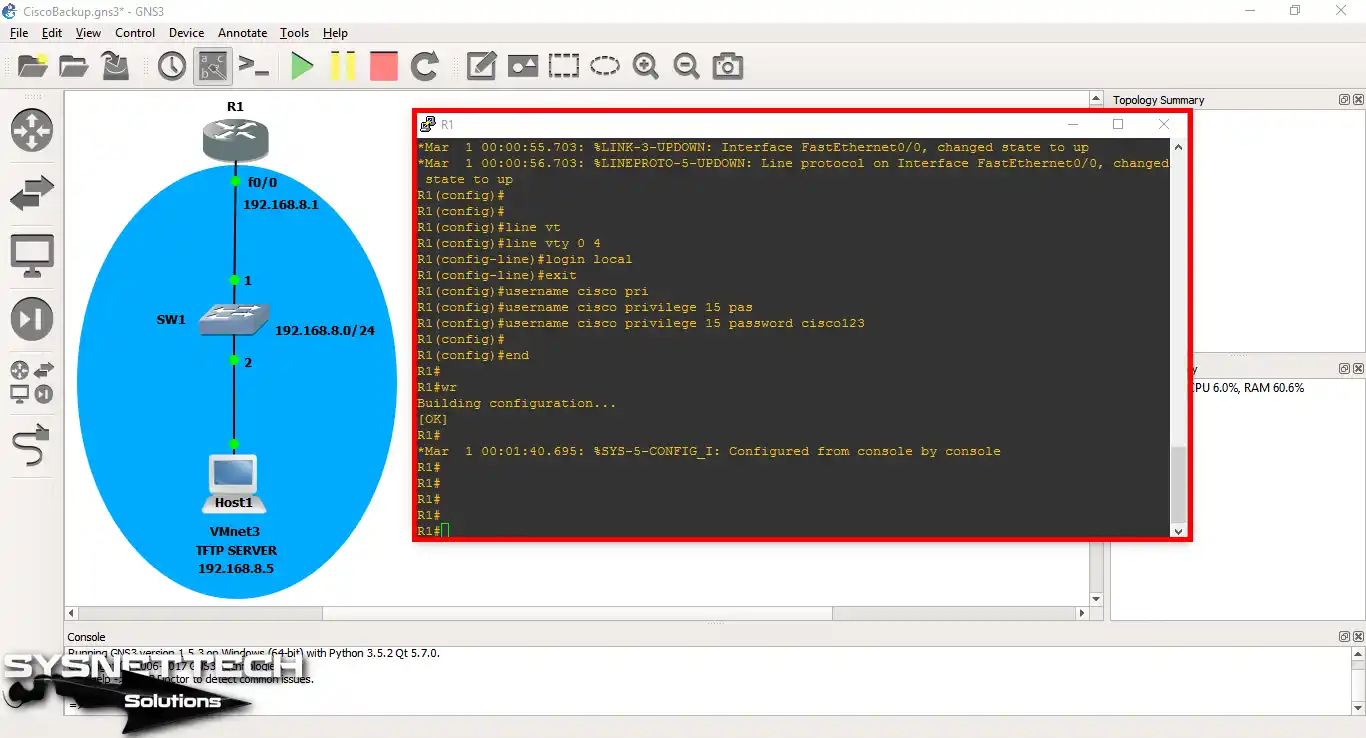
In addition, create a new user and configure the Console connection to connect to your Router from a remote computer.
First, you should set a username and a password for the console. That is the very first thing to do. But if you manage the router from far away, you need to make it even safer. To be honest, using SSH to connect to the router is much smarter than using older ways like Telnet.
Step 5
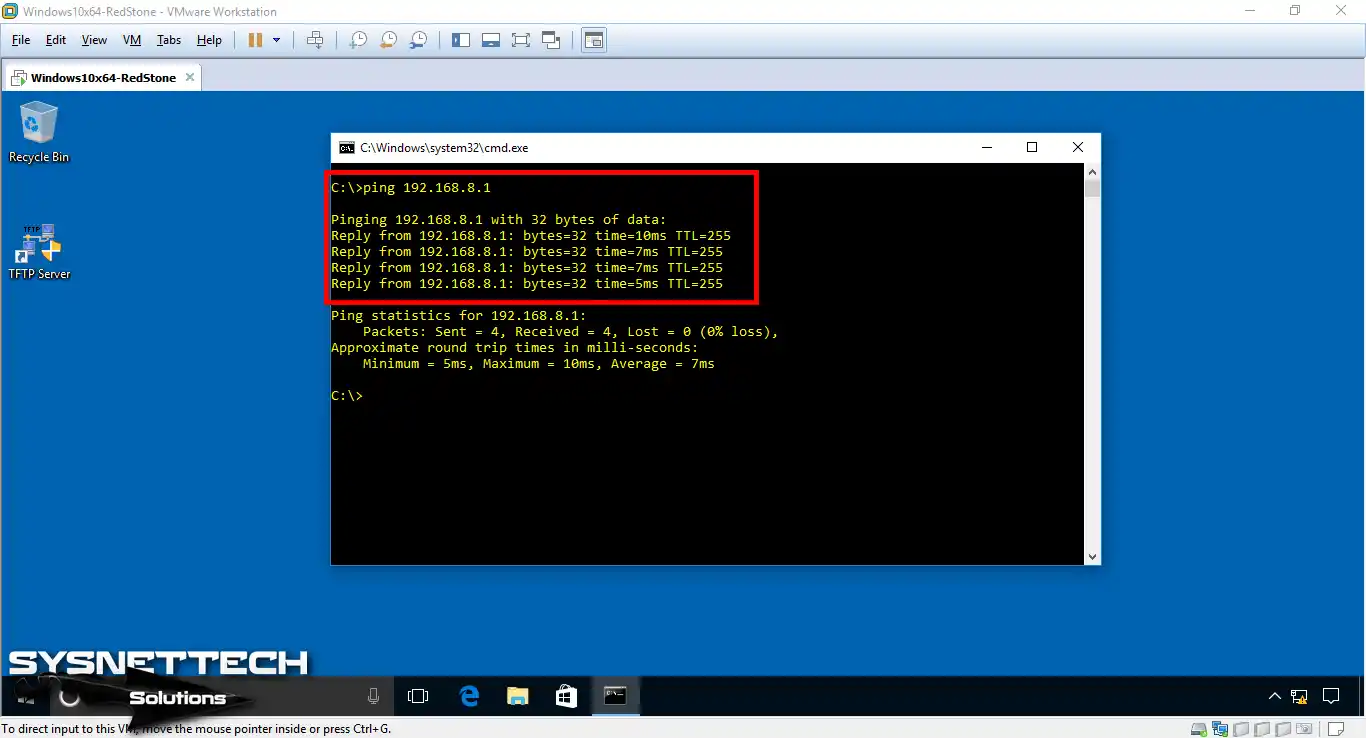
Ping the test from the VMware Windows 10 virtual machine to the Router’s FastEthernet0/0 interface.
Step 6
Ping the Windows 10 machine from the router CLI console to test the network connection.

Step 7
After verifying the network connection, install and run the SolarWinds TFTP Server program on the Windows 10 VM. Then, start the service from the File menu.
Setting up a full Windows virtual machine to test a TFTP server can sometimes unnecessarily strain your system. You can create a lightweight computer using VPCS within GNS3 itself. With this small client, you can assign an IP address and ping directly.

Step 8
Now, execute the following commands at the CLI command prompt to back up the running-config file on the router.
In the Remote Host section, do not forget to enter the IP address of the TFTP server!
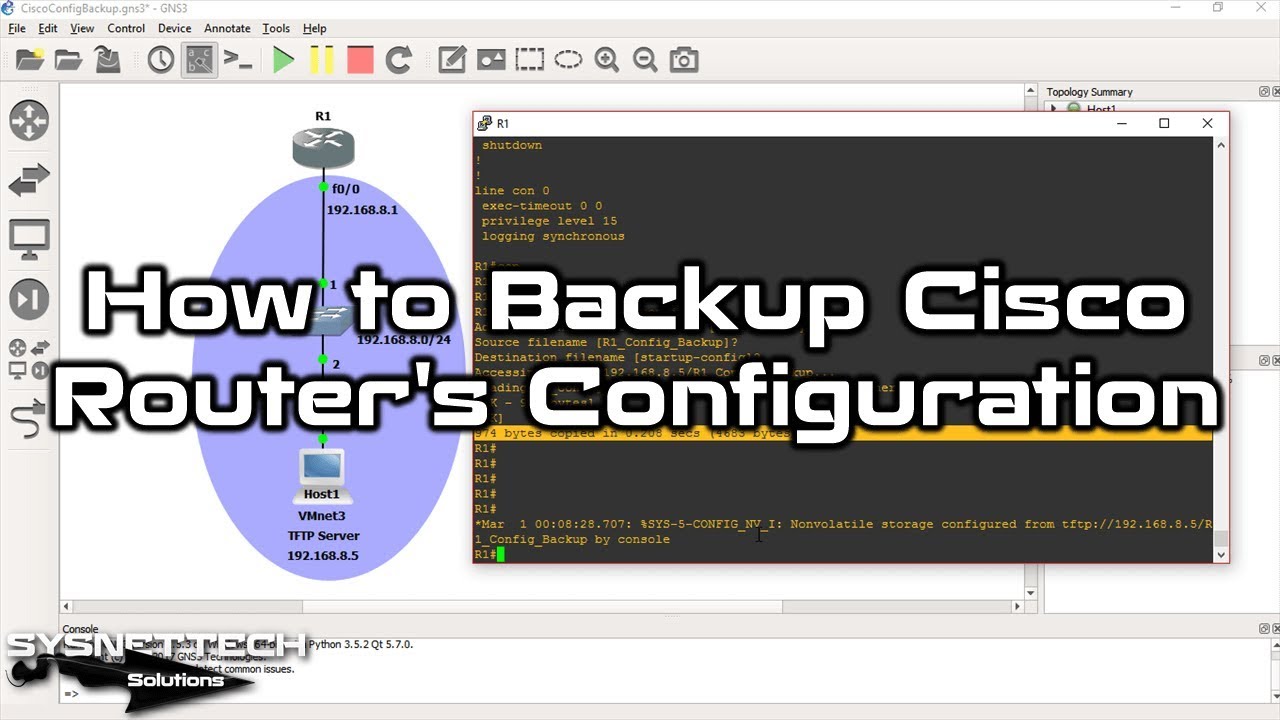
In the following image, you can see that the router configuration has been successfully backed up!
R1#copy running-config tftp:
Address or name of remote host []? 192.168.8.5
Destination filename [r1-confg]? R1_Config
!!
974 bytes copied in 4.444 secs (219 bytes/sec)
R1#
Step 9
When you check the server, you can see that the router configuration file is saved as R1_Config.
You can also view the Log outputs on SolarWinds.

Step 10
You can check the existing configuration by opening the R1_Config file with Notepad.

Step 11
After you have completed the backup process, first make a few changes to the existing settings to restore the router’s configuration file.
For example, configure the FastEthernet0/1 interface and save the settings with the save command.

Step 12
To restore the Router’s configuration, you must use the copy command again.
In Destination filename, press Enter to verify that the file name you want to restore is running-config.
R1#copy tftp: running-config
Address or name of remote host []? 192.168.8.5
Source filename []? R1_Config
Destination filename [running-config]?
Accessing tftp://192.168.8.5/R1_Config...
Loading R1_Config from 192.168.8.5 (via FastEthernet0/0): !
[OK - 974 bytes]

974 bytes copied in 0.772 secs (1262 bytes/sec)
R1#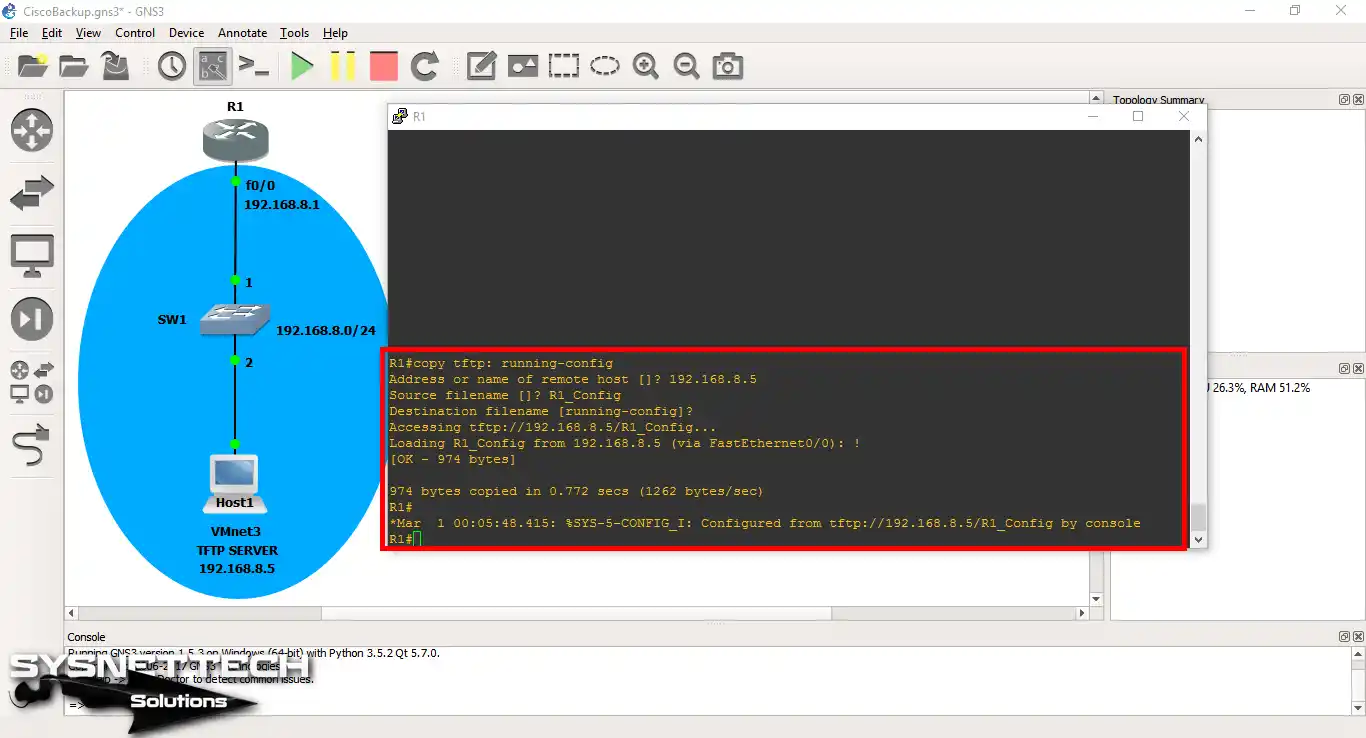
Step 13
Now, when you check the configuration with the show running-config command to verify the backup and restore operation, you can see that the backup file has been successfully restored.

Show Commands
R1#show running-config
Building configuration...

Current configuration : 974 bytes
!
version 12.4
service timestamps debug datetime msec
service timestamps log datetime msec
no service password-encryption
!
hostname R1
!
boot-start-marker
boot-end-marker
!
no aaa new-model
memory-size iomem 5
no ip icmp rate-limit unreachable
ip cef
!
no ip domain lookup
ip auth-proxy max-nodata-conns 3
ip admission max-nodata-conns 3
!
username cisco privilege 15 password 0 cisco123
!
ip tcp synwait-time 5
!
interface FastEthernet0/0
ip address 192.168.8.1 255.255.255.0
duplex auto
speed auto
!
interface FastEthernet0/1
no ip address
shutdown
duplex auto
speed auto
!
ip forward-protocol nd
!
no ip http server
no ip http secure-server
!
no cdp log mismatch duplex
!
control-plane
!
gatekeeper
shutdown
!
line con 0
exec-timeout 0 0
privilege level 15
logging synchronous
line aux 0
exec-timeout 0 0
privilege level 15
logging synchronous
line vty 0 4
login local
!
end

R1#
How to Copy Cisco Router Settings ⇒ Video
You can watch the video below to save the settings of the Cisco Router and subscribe to our YouTube channel to support us!
6 Critical Questions About Backing Up Cisco Routers in GNS3
Is NVRAM failure really that scary? What happens if I delay taking a backup?
TFTP is so fast and easy. Why doesn’t everyone just use this protocol?
What is the most common mistake when setting up the network between GNS3 and a VMware machine?
I backed up the running-config, but I mix up the difference with startup-config. Which one is more important?
I am afraid the router will lock up when restoring the backup file. What should I watch out for?
Do you have a free and simple TFTP server recommendation other than SolarWinds?
Conclusion
In this article, we have examined how to save config files for a Cisco router on the network. Thanks for following us!

Be the first to share your comment