GNS3 is a strong tool that lets you copy complex network topologies. In detail, you can simulate Cisco Routers and Switches. You can also make firewalls and virtual machines.
This bendy platform does not need real computer hardware. Because of this, it is perfect for people getting ready for Cisco exams. Since it gives the chance for learning by doing.
To begin, you first need a Windows 10 or 11 computer. However, putting it in is very easy, yet check that your system has the needed requirements. In the end, this is very required for the best work.
With GNS3, you can join in real-life scenarios. This helps you grow your technical skills. Also, your knowing of network protocols and problem-solving gets stronger. This learning not only gets you ready for tests but also makes you a better IT worker.

Why Use GNS3 for Cisco Exams & for Professional Networking?
You can become a professional system and network expert by designing networks with GNS3 software. Thus, you can improve in every field and be one step ahead.
Moreover, its developers constantly update this network simulator. That’s why it has always remained a popular software compared to its competitors. We also recommend that you always check for updates to get new features.
Even though this program works like Cisco Packet Tracer, there’s a big difference. The critical thing is that it handles Cisco Router and Switch IOS images in more detail. Also, while PT has basic IOS commands, this emulator program has more advanced controls for your projects.
This simulator software lets you create network designs on your PC using images of real Cisco devices. However, keep in mind that only the systems of some devices may work. Still, because other programs like Packet Tracer don’t provide IOS, this software gives a more advanced experience.
For those preparing for Cisco’s entry-level networking exams, the first program they should use is Packet Tracer. Suppose you want to create fancier and more professional network plans and projects. In that case, it’s a good idea to pick and use this Graphical Network program.
Before you install GNS3, you must first get it. In detail, you can get the Cisco emulator program straight without signing up on any website. Or you can make a new account on the main website to get the latest copy.
Minimum System Requirements
- Operating System: It should be at least Windows 7 64.
- Processor: You must have at least a Dual-Core processor.
- RAM (Memory): 4 GB minimum is sufficient.
- Disk Space: You only need a minimum of 1 GB. However, keep in mind that Cisco images might need more space.
Recommended Requirements
- Operating System: It must be Windows 7 64-bit or newer.
- Processor: You need four or more logical processors. We recommend opting for a Core i7 or i9 processor.
- RAM (Memory): 8 GB is sufficient, but if it is 16 GB, it will be more stable.
- Disk Space: Using it with an SSD disk or NVMe helps you get more performance. Also, you must have a minimum of 35 GB of free space.
Let’s say your computer meets the system requirements for the GNS3 simulator. Still, we suggest turning on the virtualization feature in your PC’s BIOS settings.
How to Install GNS3 on Your Windows 11 PC Step-by-Step
I have listed the steps to run in GNS3, the best network simulator tool you can get. First, you need to set up this handy program well.
It is an invaluable tool, mainly for Windows 11, 10, or 7 users. Also, if you are getting ready for Cisco tests, this guide will show you each key step.
In short, you will have a strong simulation environment. This way, you can get real practice with network setups and know network rules better. Be sure that your problem-solving skills will get better in many situations!
1. Get GNS3
Step 1
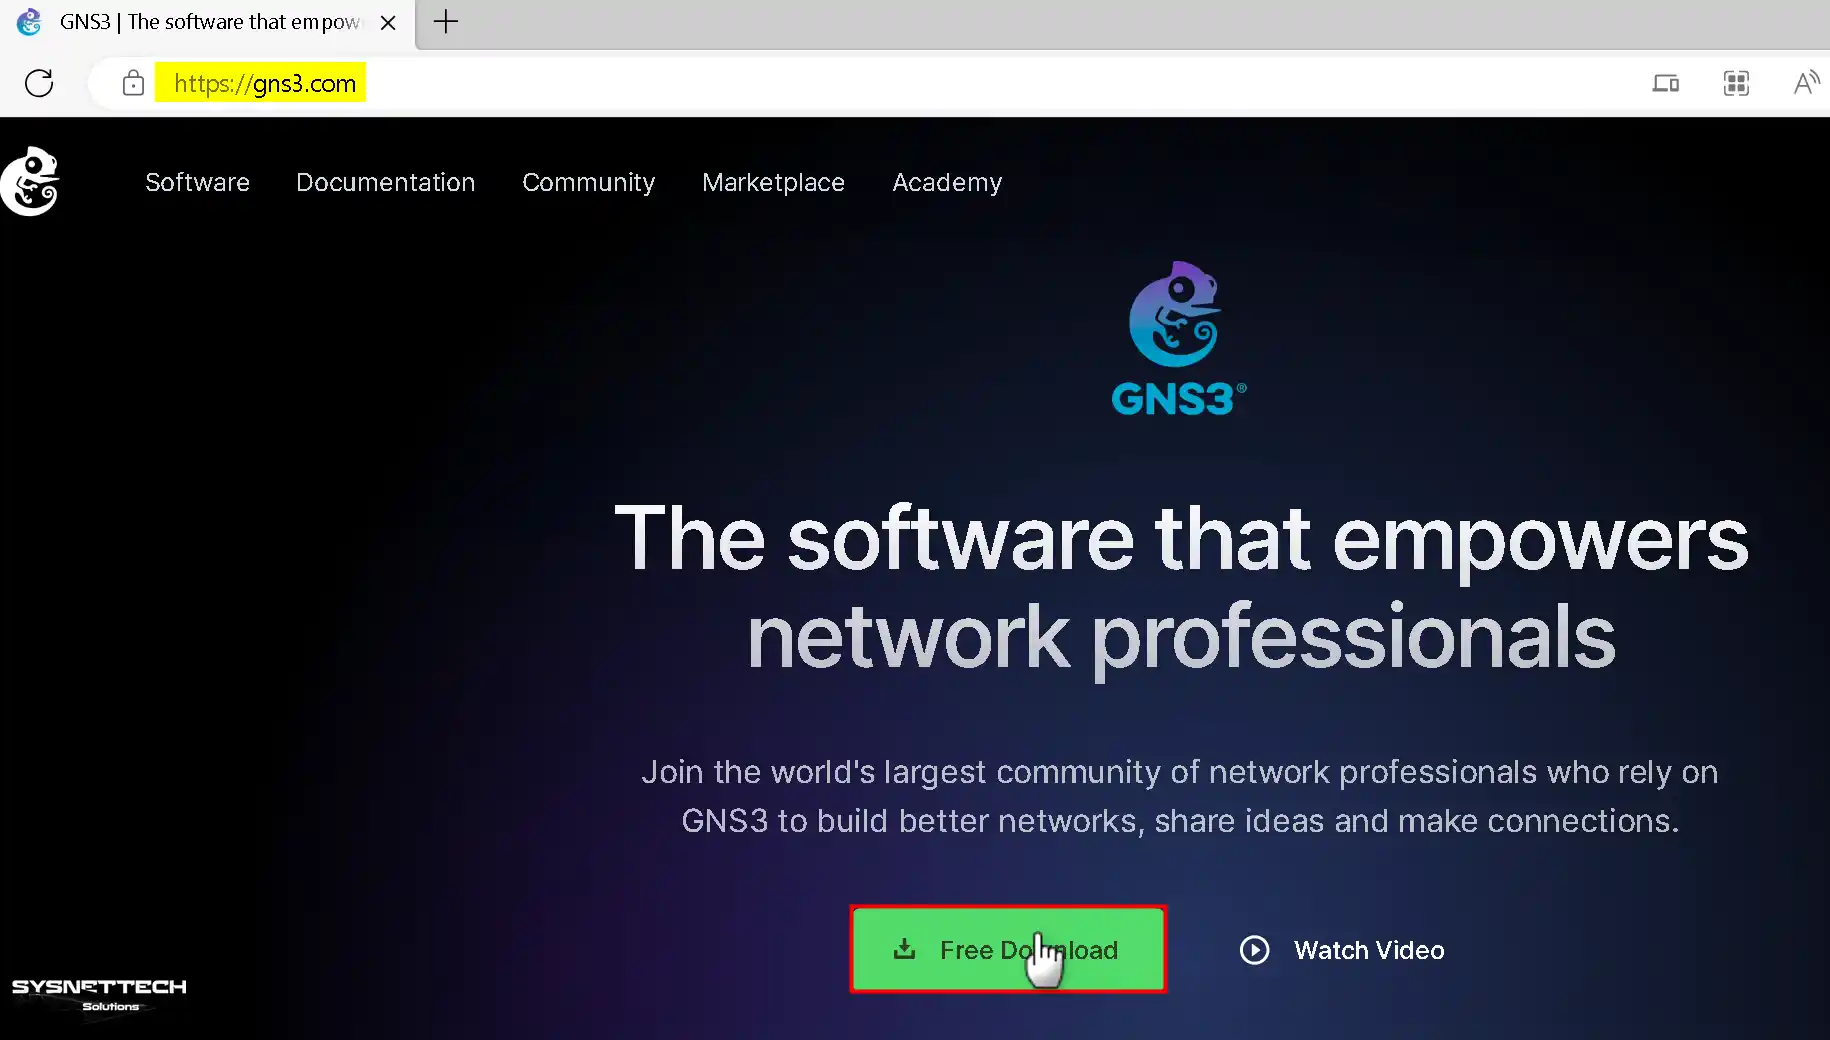
After creating a new account on the GNS3 website, log in. Next, click the “Free Download” button on the home page.
Step 2
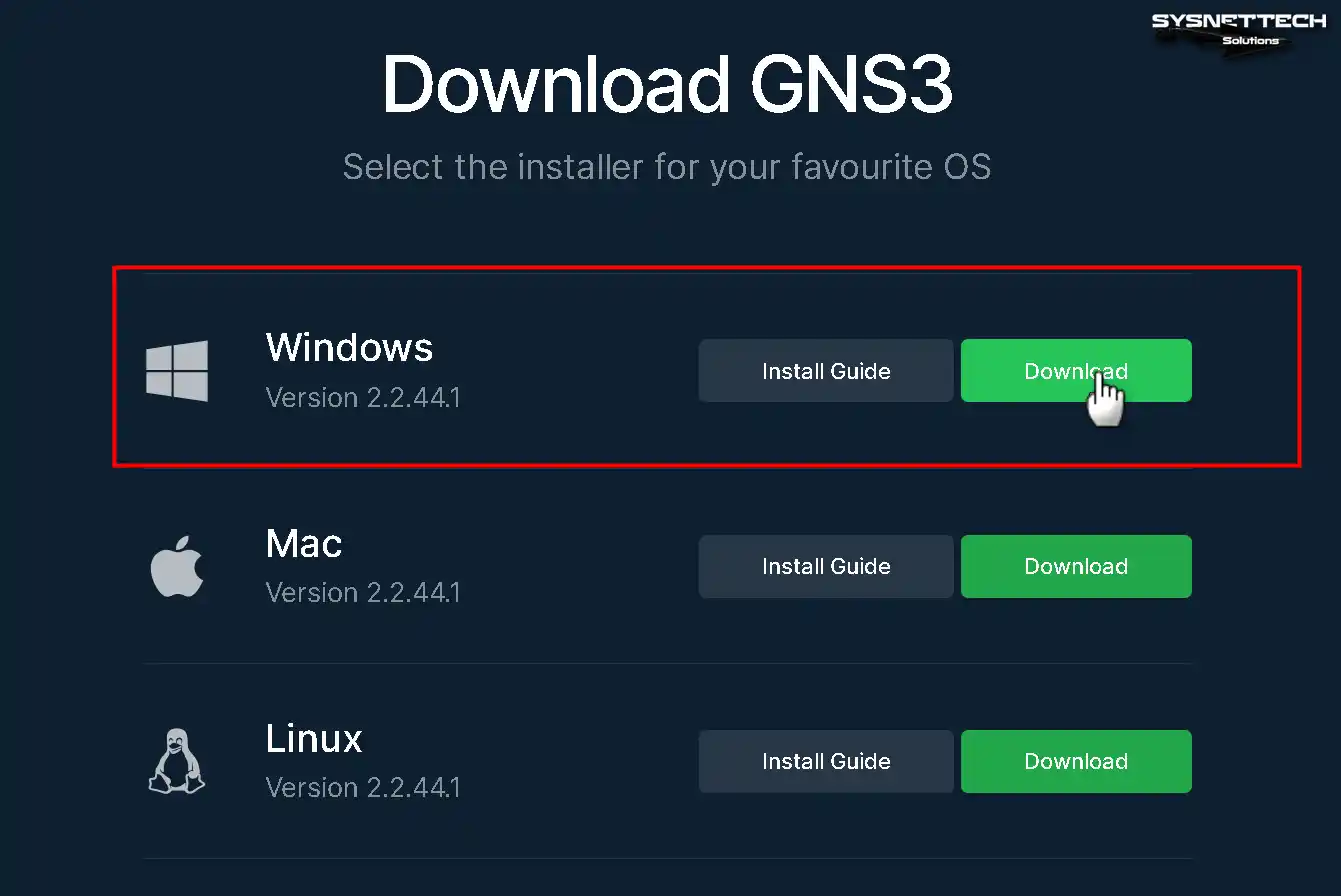
You will install GNS3 on Windows 11 or 10. Because of this, find the Windows choice. Then, pick the “Download” option found right under it.
Step 3
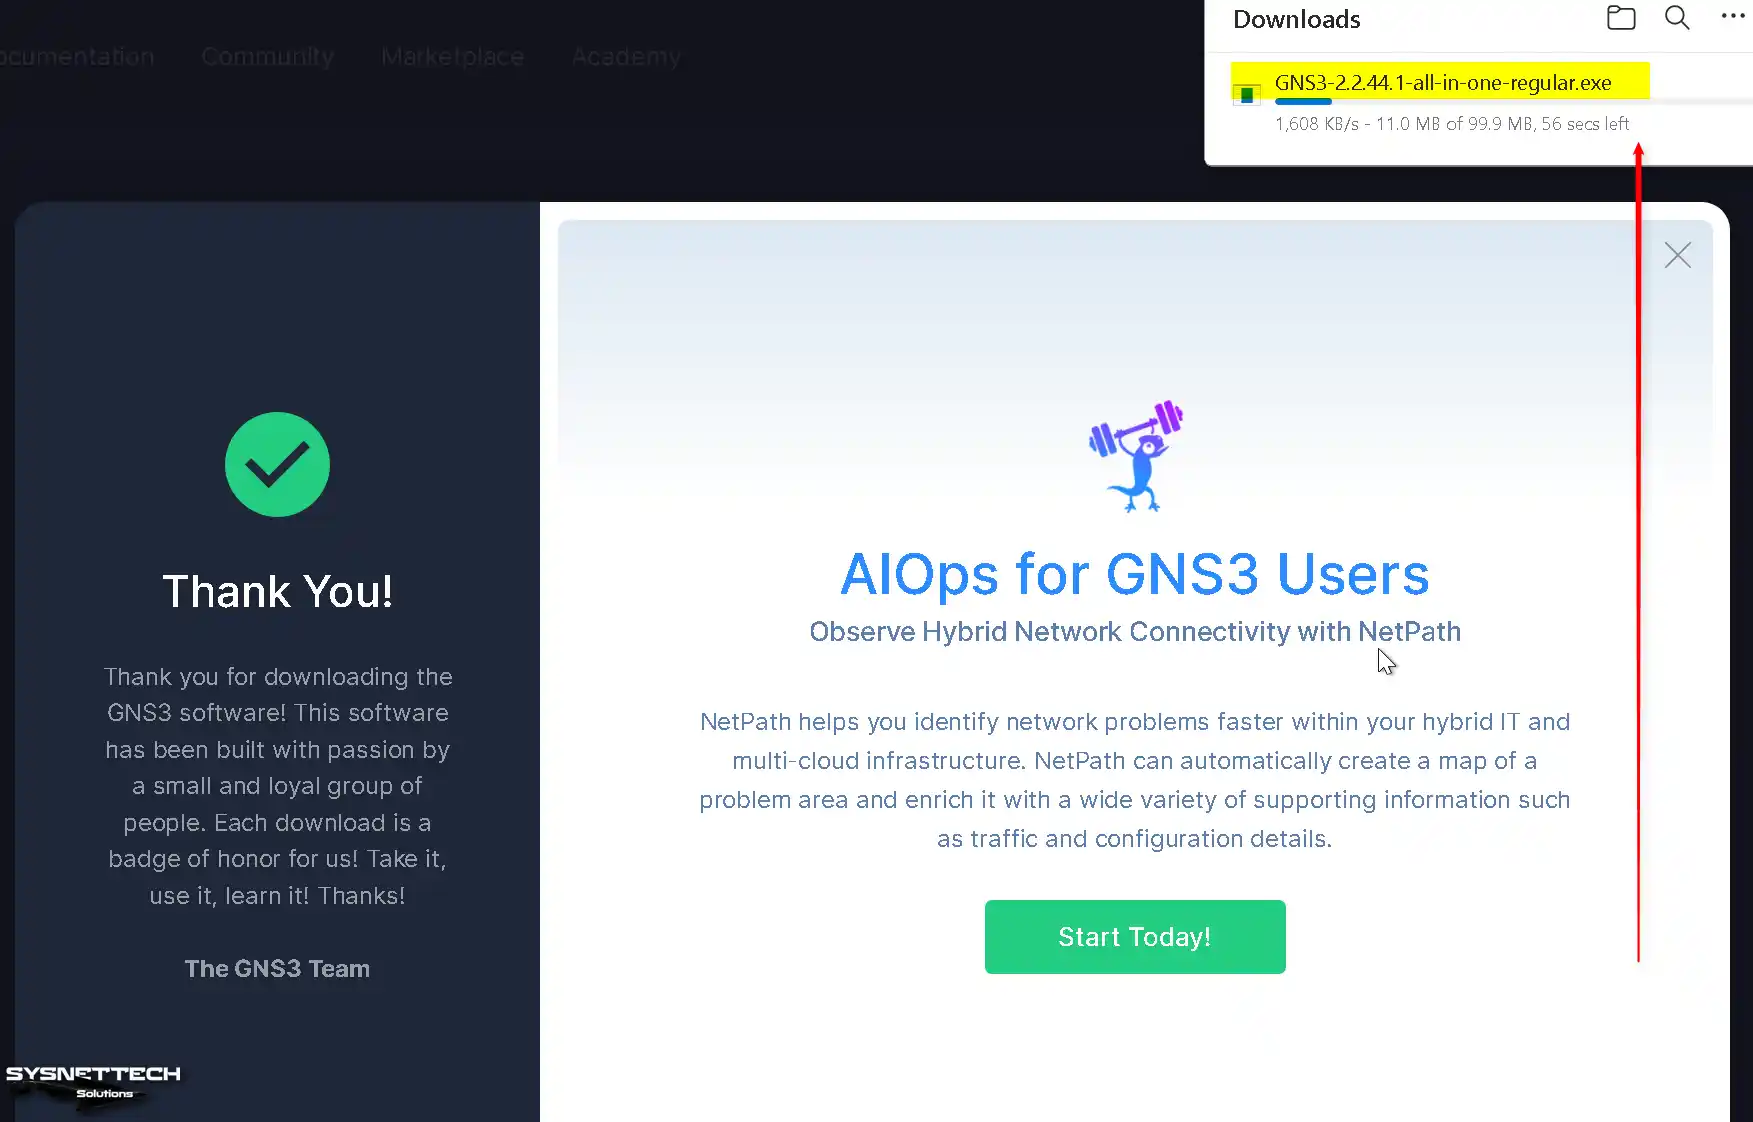
When you start downloading in Chrome, look closely at the icon in the top right corner. Right here, you will quickly see that the file is coming down.
3. Install GNS3 Step by Step
Step 1
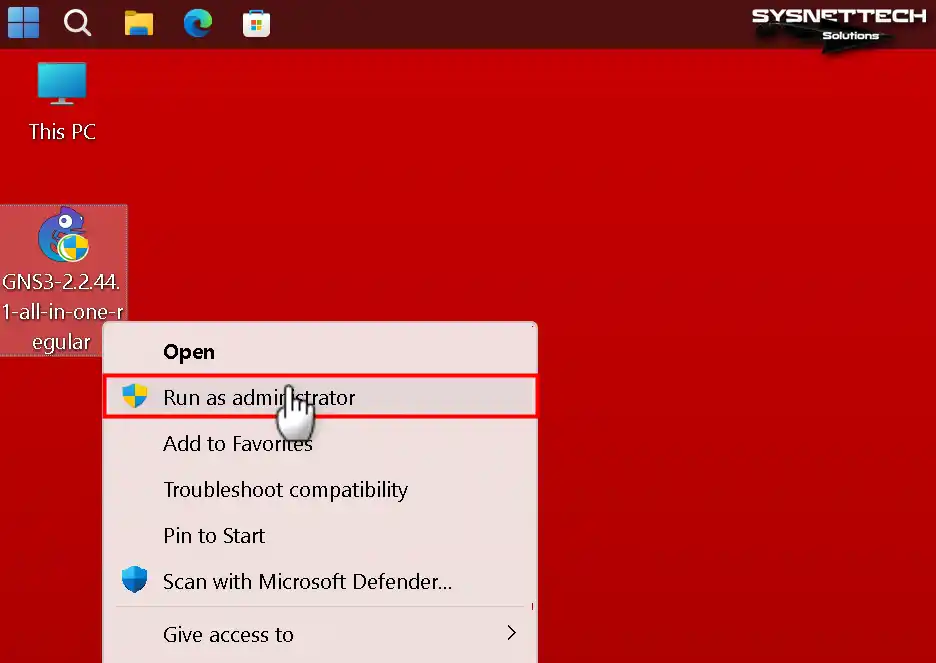
After you get the setup file, find the “GNS3-all-in-one-regular.exe” file. To start, press the right button on the file and then pick the “Run as administrator” command.
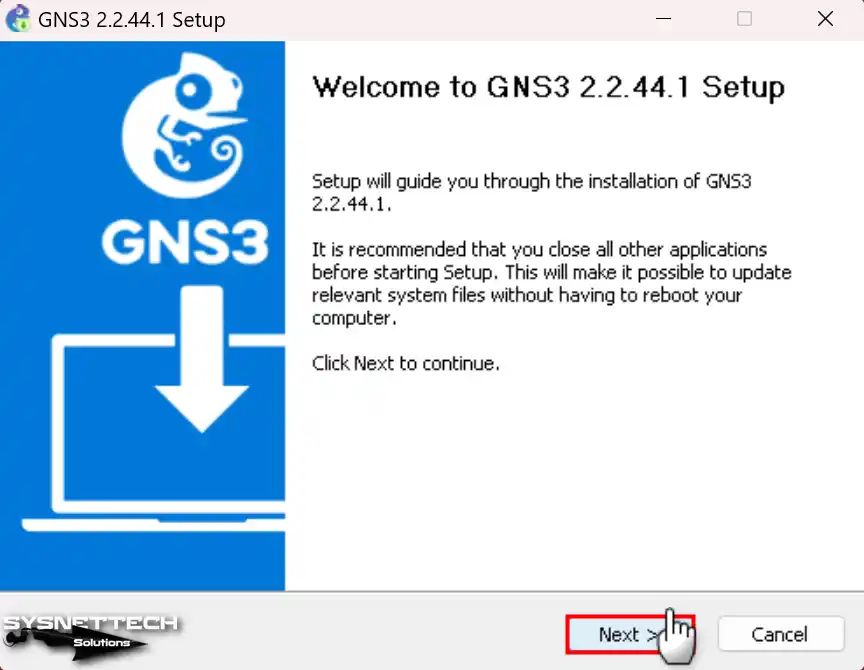
Step 2
Press the “Next” button to go on in the “Welcome to GNS3 Setup” window. Then, start the putting-in process.
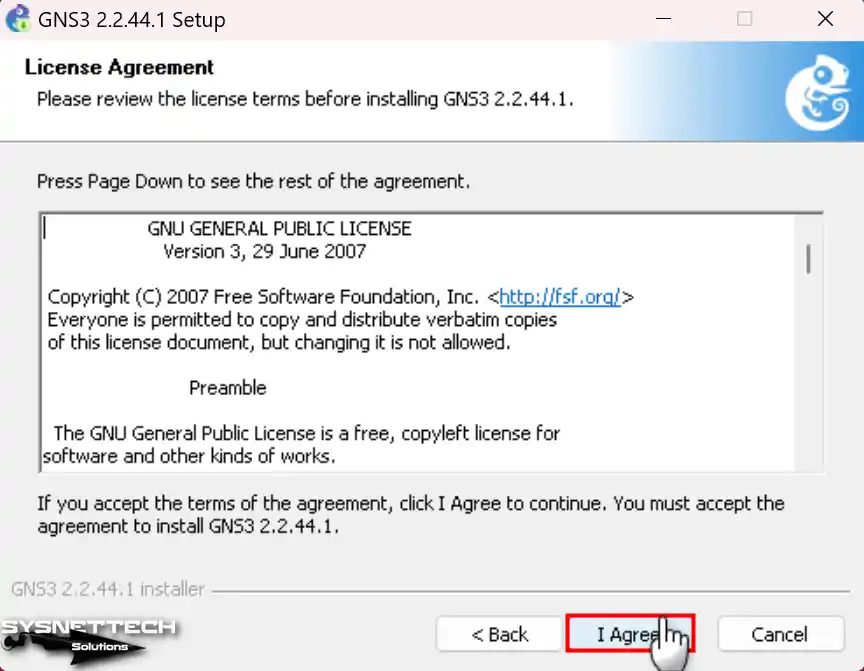
Step 3
First, you must say yes to the Cisco network simulator’s rules. So, press the button named “I Agree” to say the step is okay.
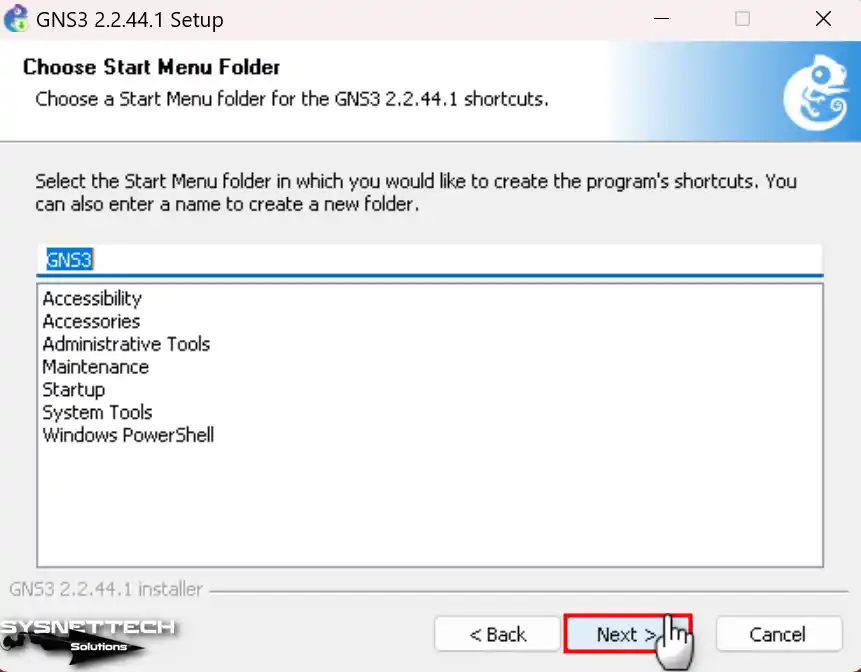
Step 4
In the “Choose Start Menu Folder” window, click the Next button to continue. What you are doing here means you accept the default folder name.
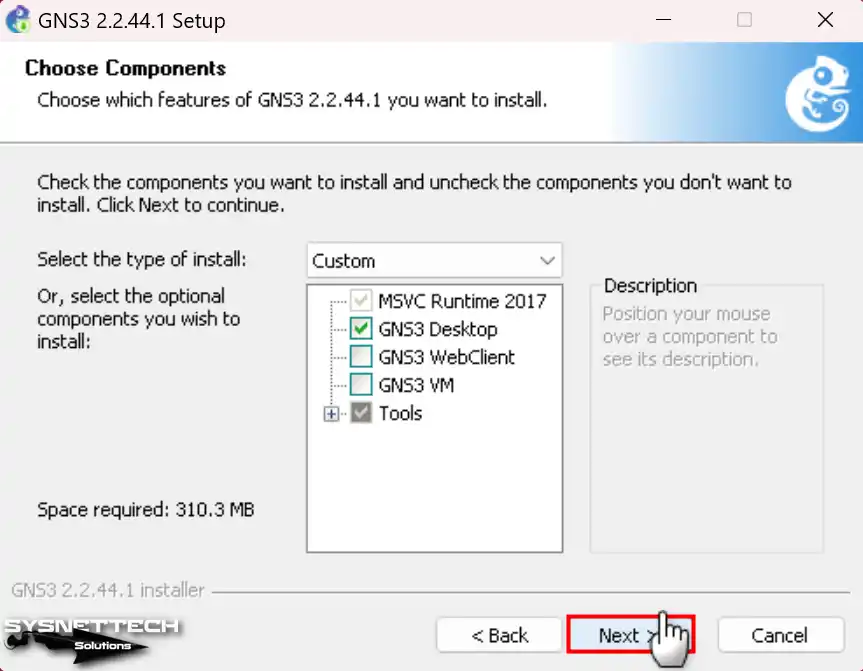
Step 5
You must pick components in the “Pick Parts” window. First, mark the WebClient, which is one of the new tools, and select Next.
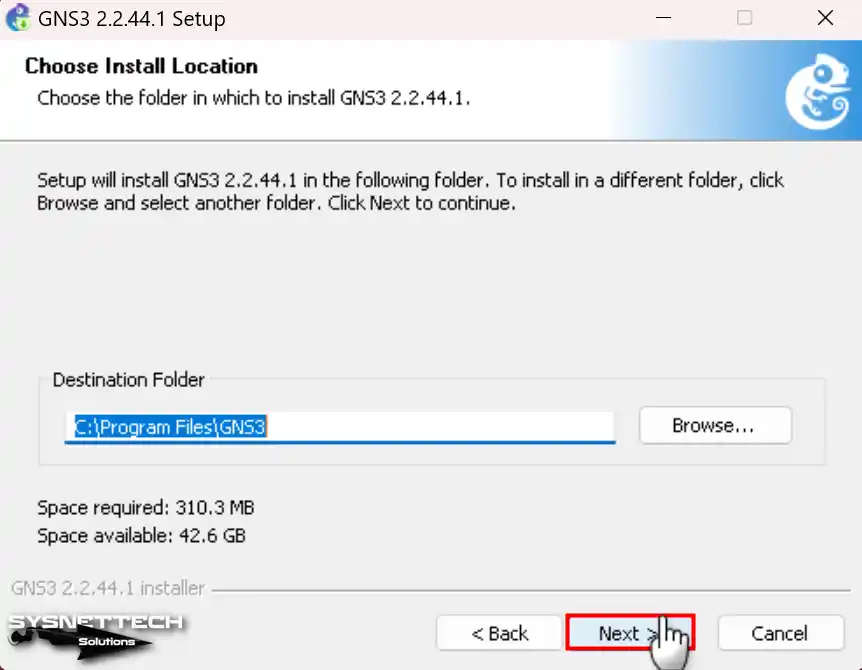
Step 6
In the “Choose Install Location” window, first pick a location. Then, choose your best liked spot and hit Next.
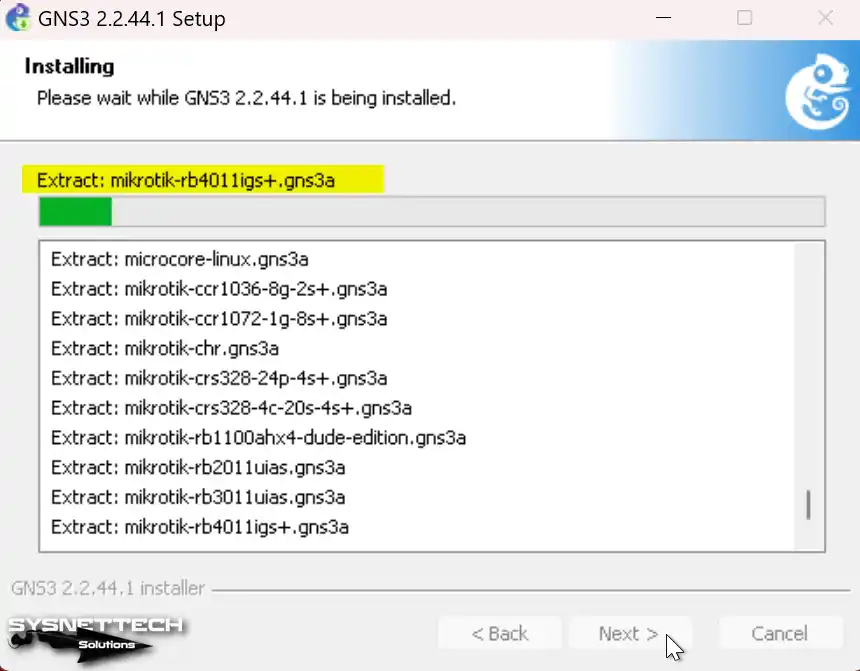
Step 7
Please hold on while you install the Cisco simulator app on your PC operating Windows 11 or 10.
3. Configure Npcap
Step 1
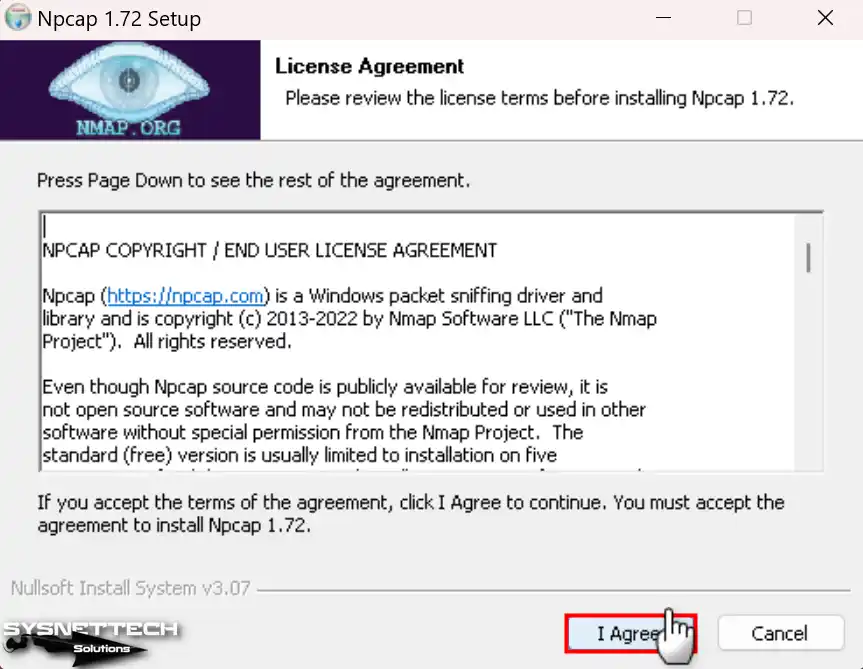
One needed tool when putting in the GNS3 program is Npcap. So, click Next to put the Npcap tool in.
Say yes to the rules for the Npcap software and go on with putting in.
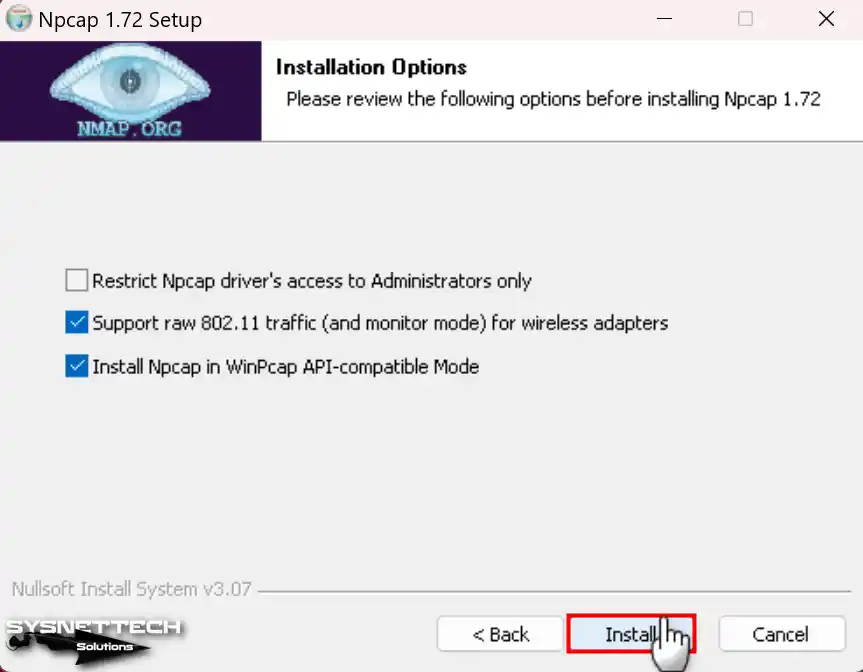
Step 2
When you’re installing Npcap, make sure to turn on WinPcap API compatibility mode. You can also decide to watch 802.11 traffic if you’re using Wi-Fi. So, keep going without changing the default options that the wizard gives you.
Step 3
Set up Npcap to monitor IP packets. Then, when the wizard is OK, press Next to finish the installation.
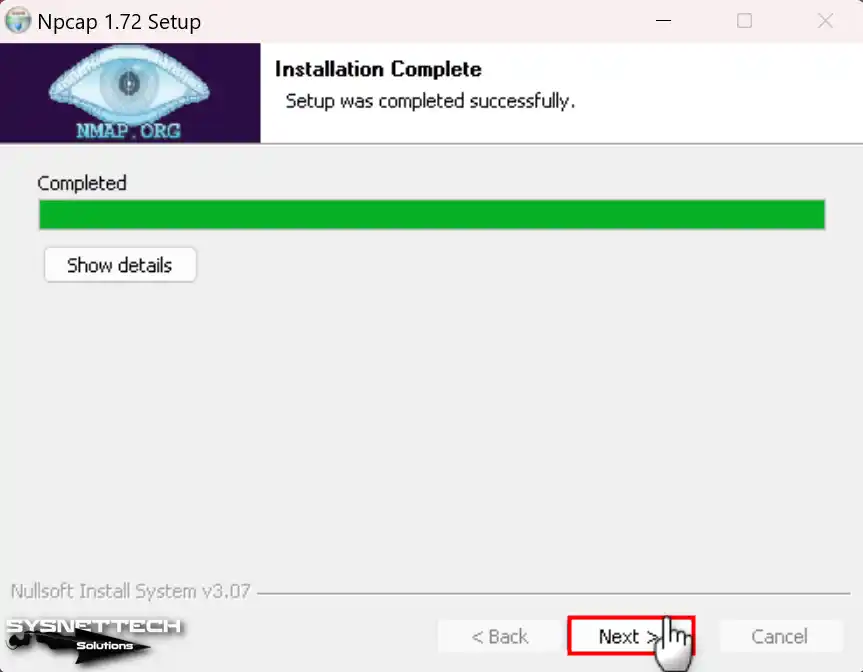
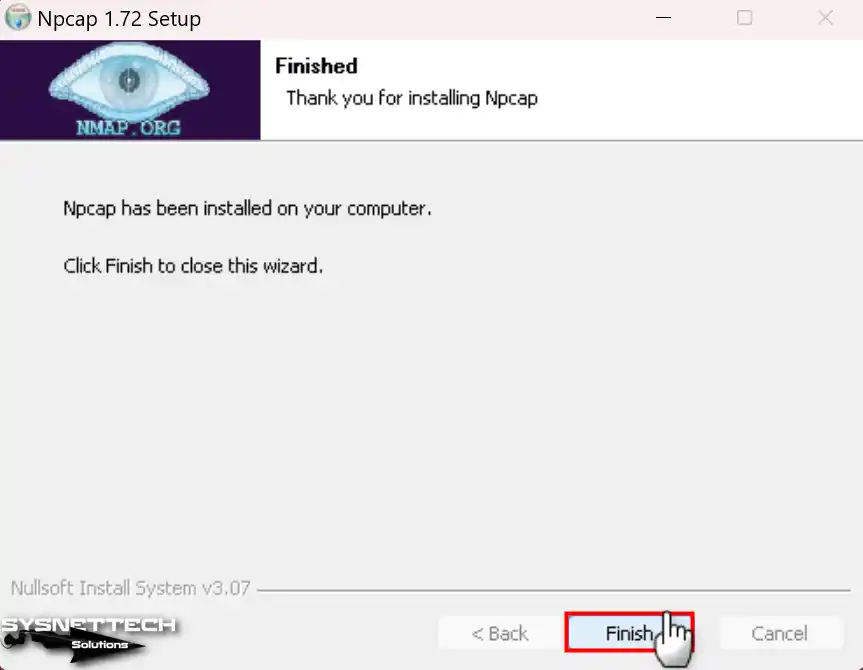
Step 4
After you have completed the Npcap setup, press Finish and go on.
4. Install Wireshark & Other Tools
Step 1
Lastly, if you need Wireshark on your computer, do not fear. The helper will get and put in this tool from the web by itself.
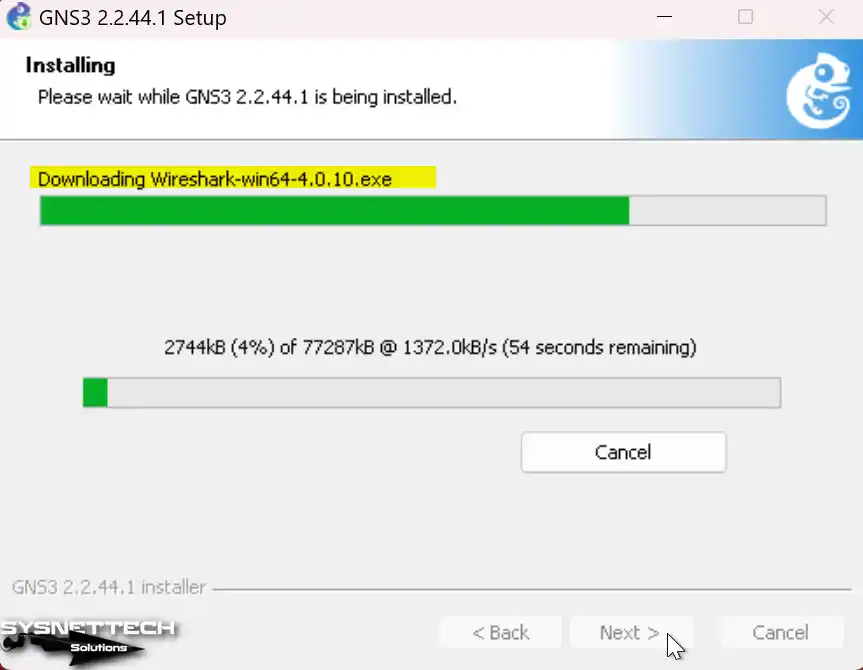
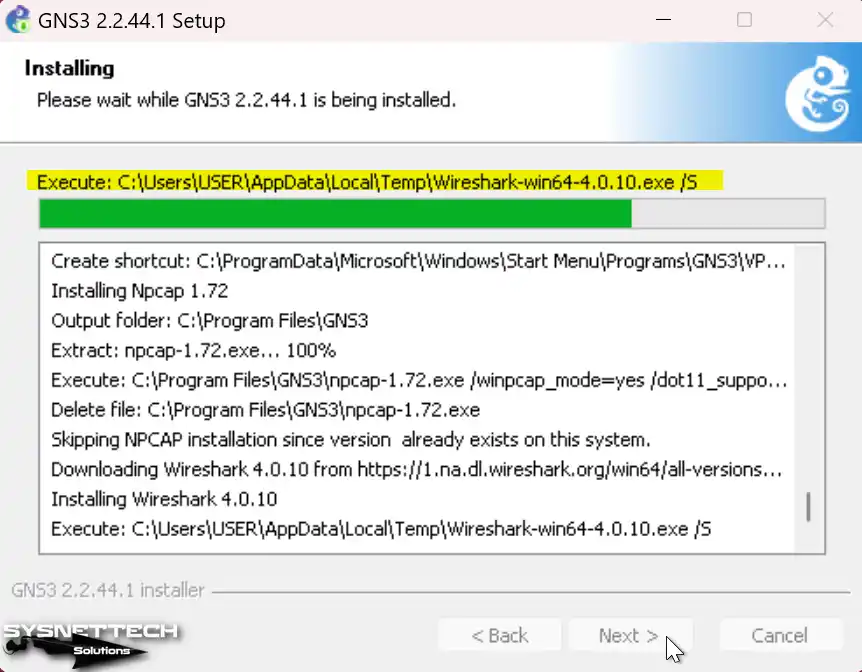
Step 2
After you get Wireshark on your system, please wait for the GNS3 installation wizard to install it.
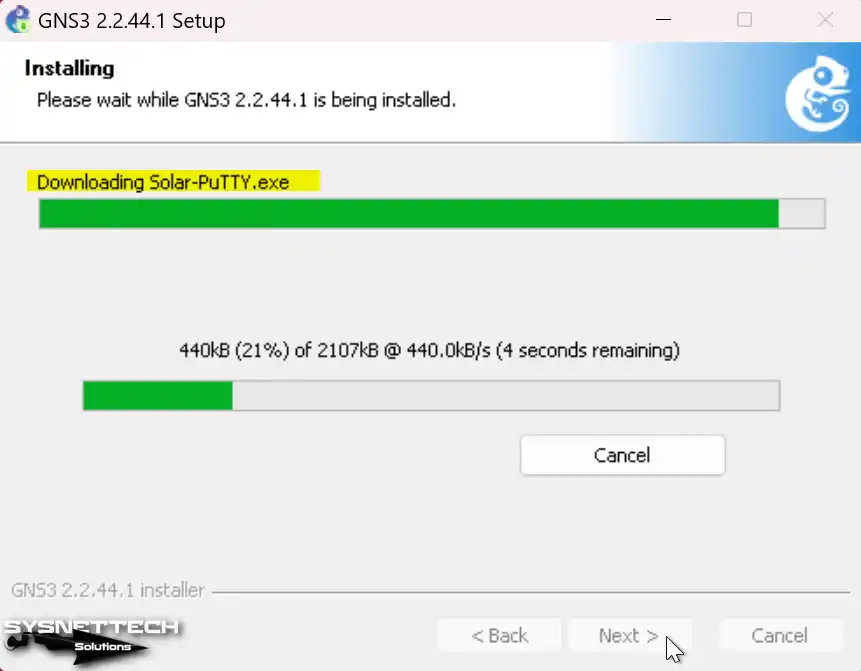
Step 3
Similarly, the wizard will get and install the Solar-PuTTY software. In short, this helps manage network devices like routers or switches.
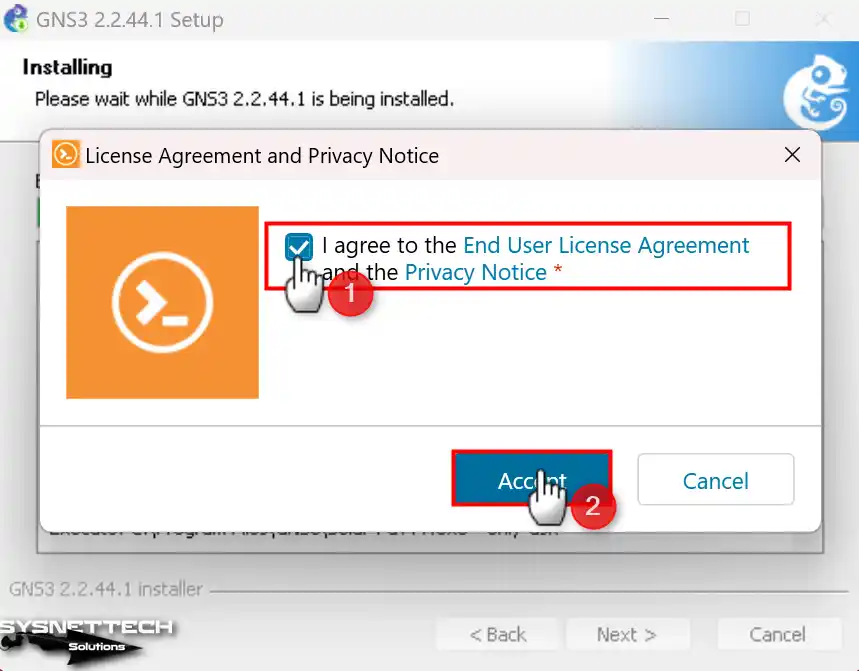
Step 4
In the next part, you must say yes to the Solar-PuTTY rules agreement. To do this, click the “I Agree” button on the screen.
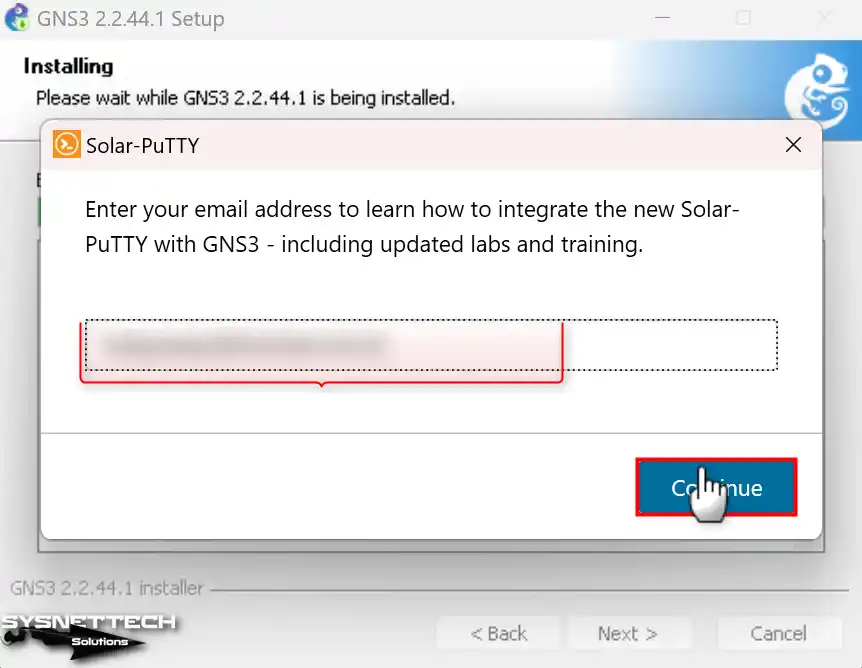
Step 5
To begin using Solar-PuTTY, first type your email address. Then, press Continue to start the step.
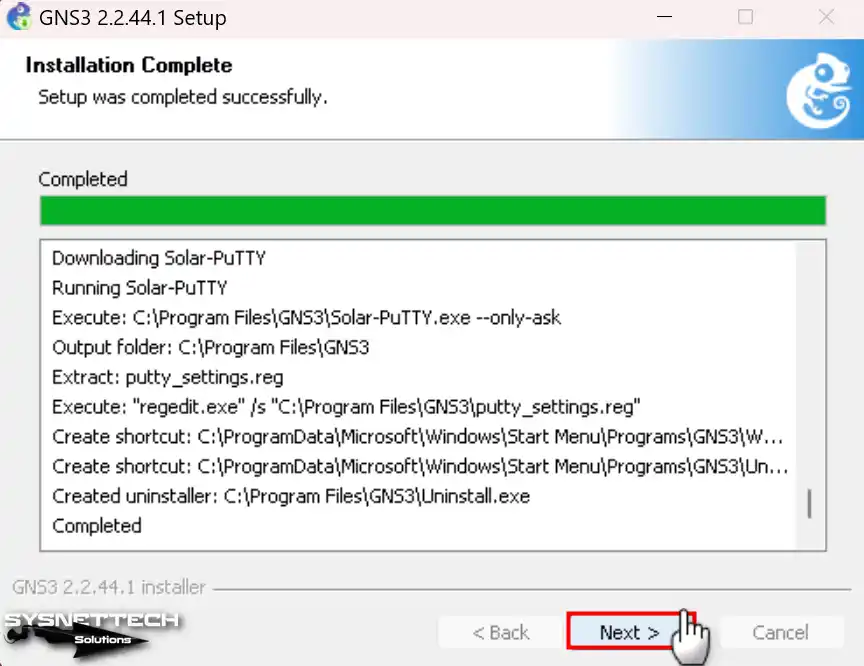
Step 6
In the last step, the wizard will present a summary. In here, you can see that it has created the Start Menu folder and desktop shortcuts. After that, you can complete the GNS3 installation by clicking Next.
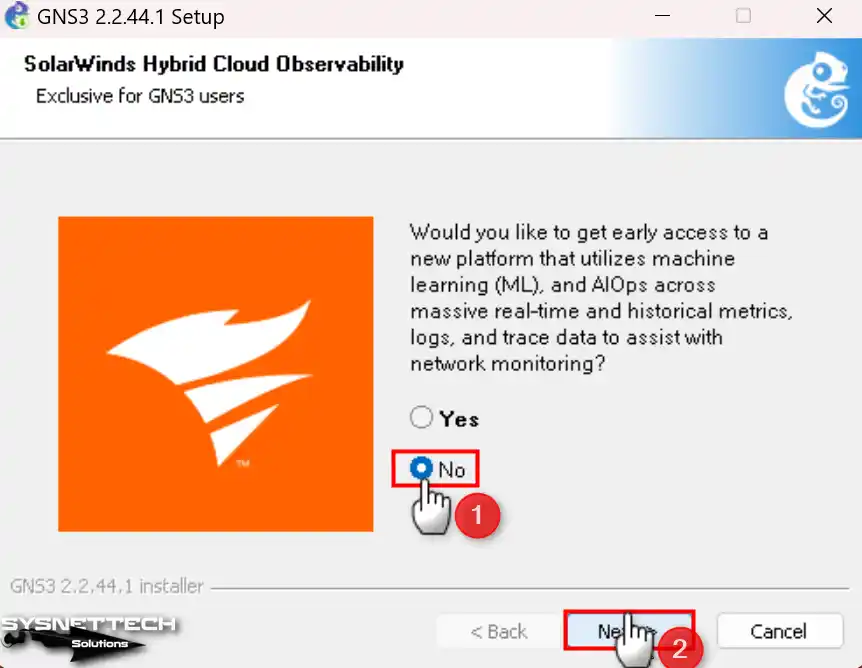
Step 7
You may wish to use SolarWinds tools for free. In this case, select the “Yes” option. However, if you do not want this service, select “No.”
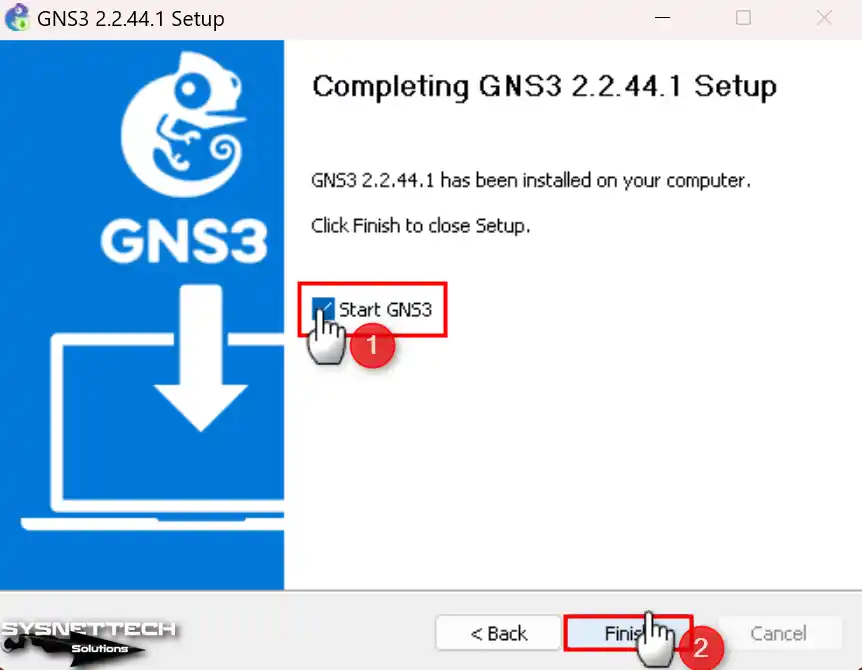
Step 8
After successfully installing the GNS3 emulator, click Finish to run the program.
4. Configure GNS3 Local Server Settings
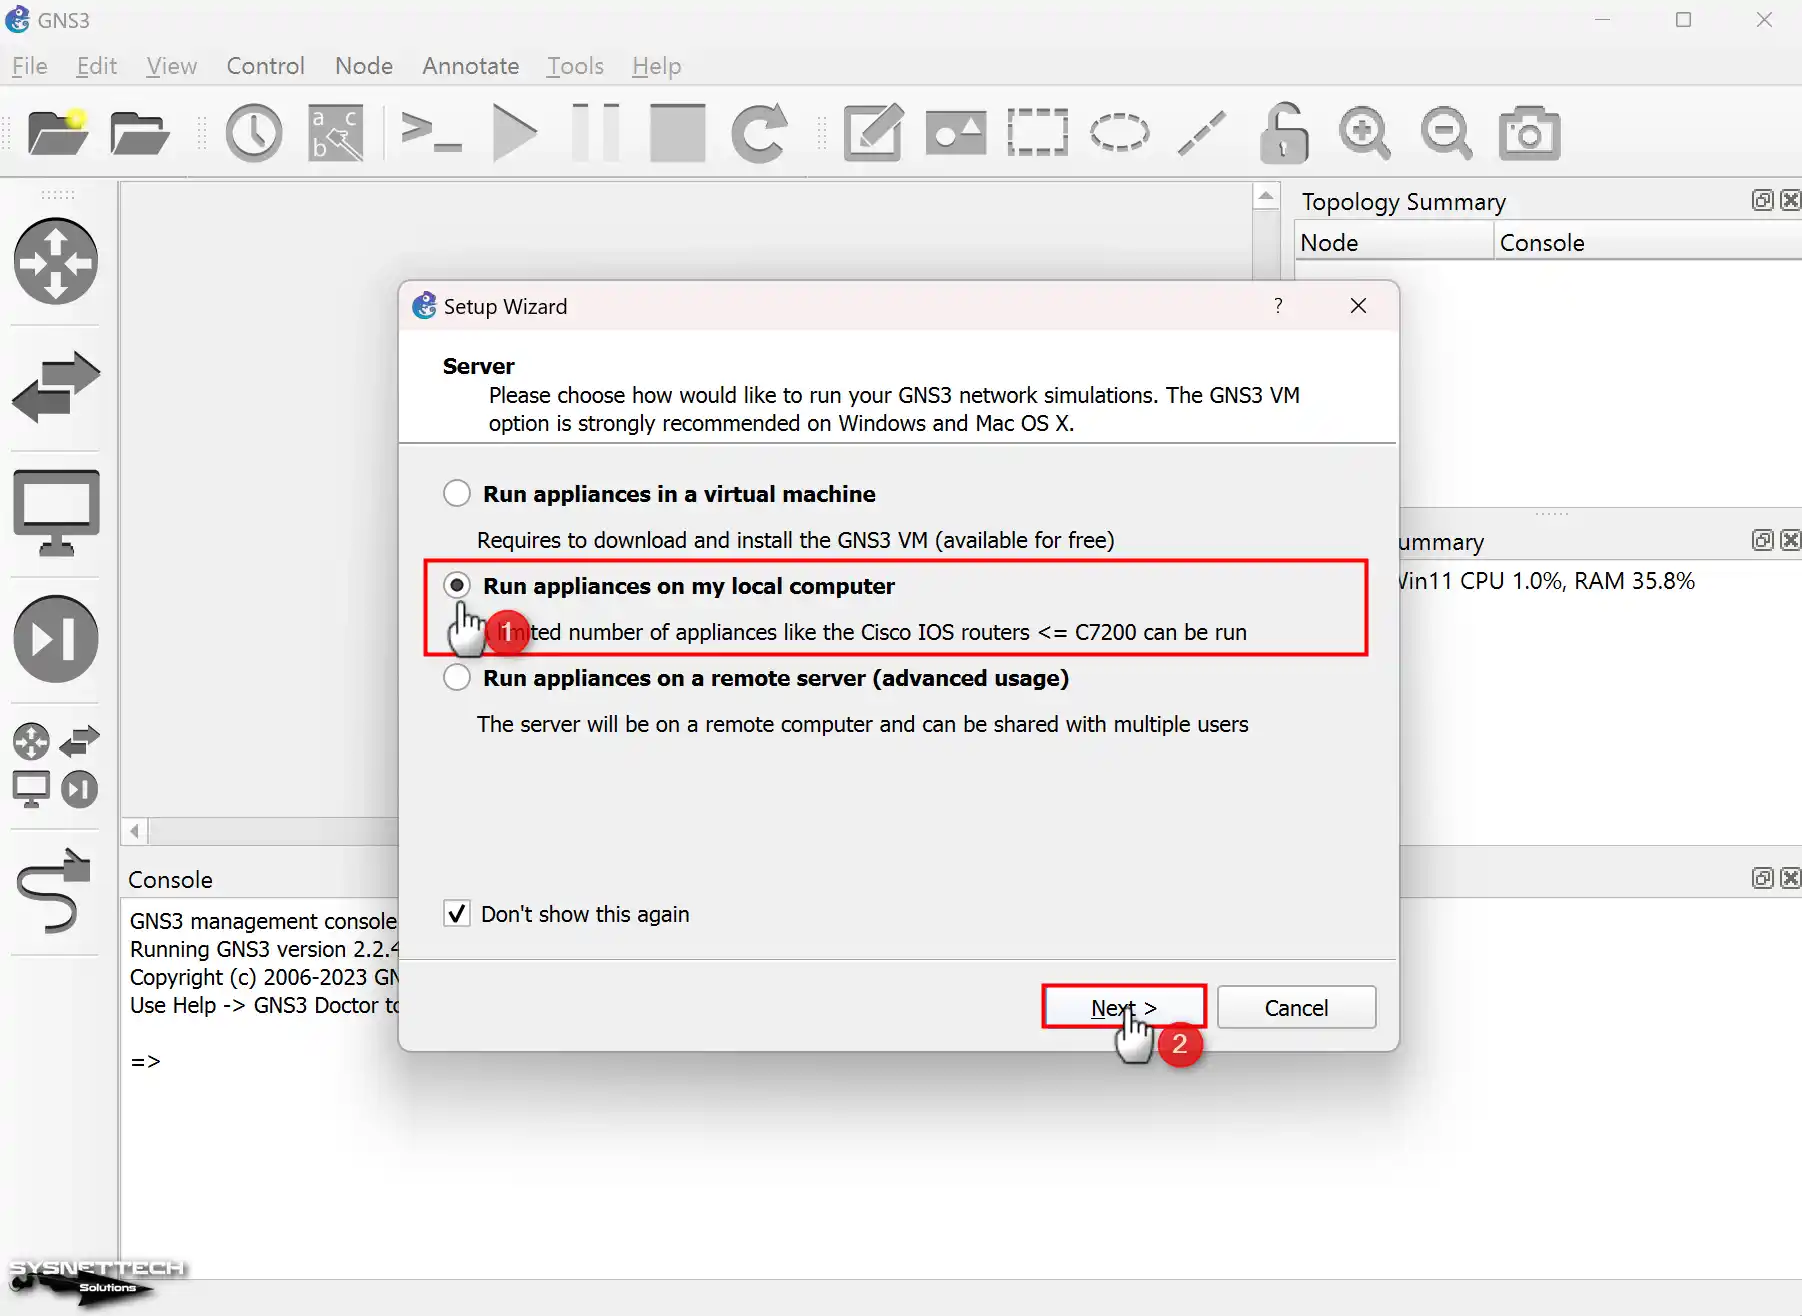
After installing GNS3, click on the desktop shortcut. You will launch the program and open the Setup Wizard.
In this wizard, you can check the Local Server settings. Specifically, you need to set up the Localhost link and port here.
Step 1
In the Setup Wizard, first pick the “Run appliances on my local computer” choice.
Step 2
In the Local Server Configuration window, first look at the Host Binding setting. Make sure you set this setting to “localhost”. Also, if the 3080 TCP port is busy on your system, pick a different port number.

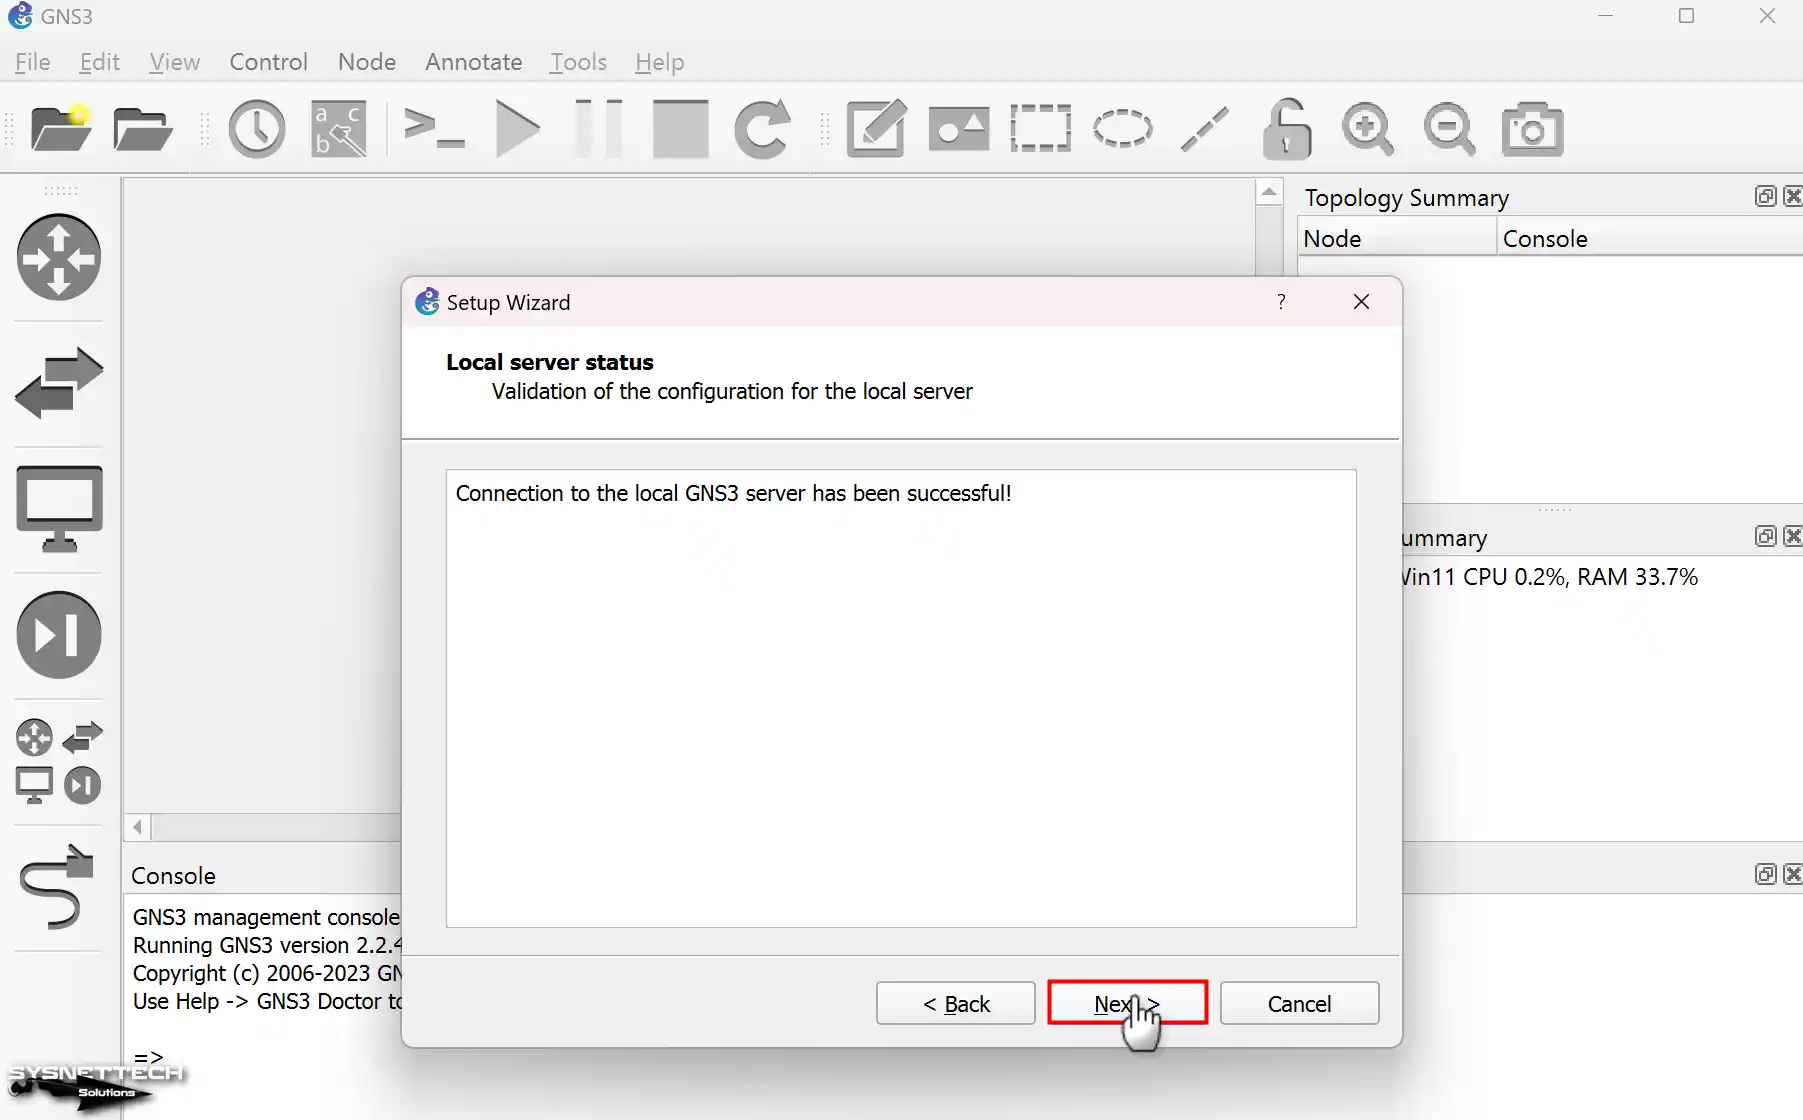
Step 3
Look at the Local Server Status window. This way, you see that the Graphical Network Simulator is working correctly.
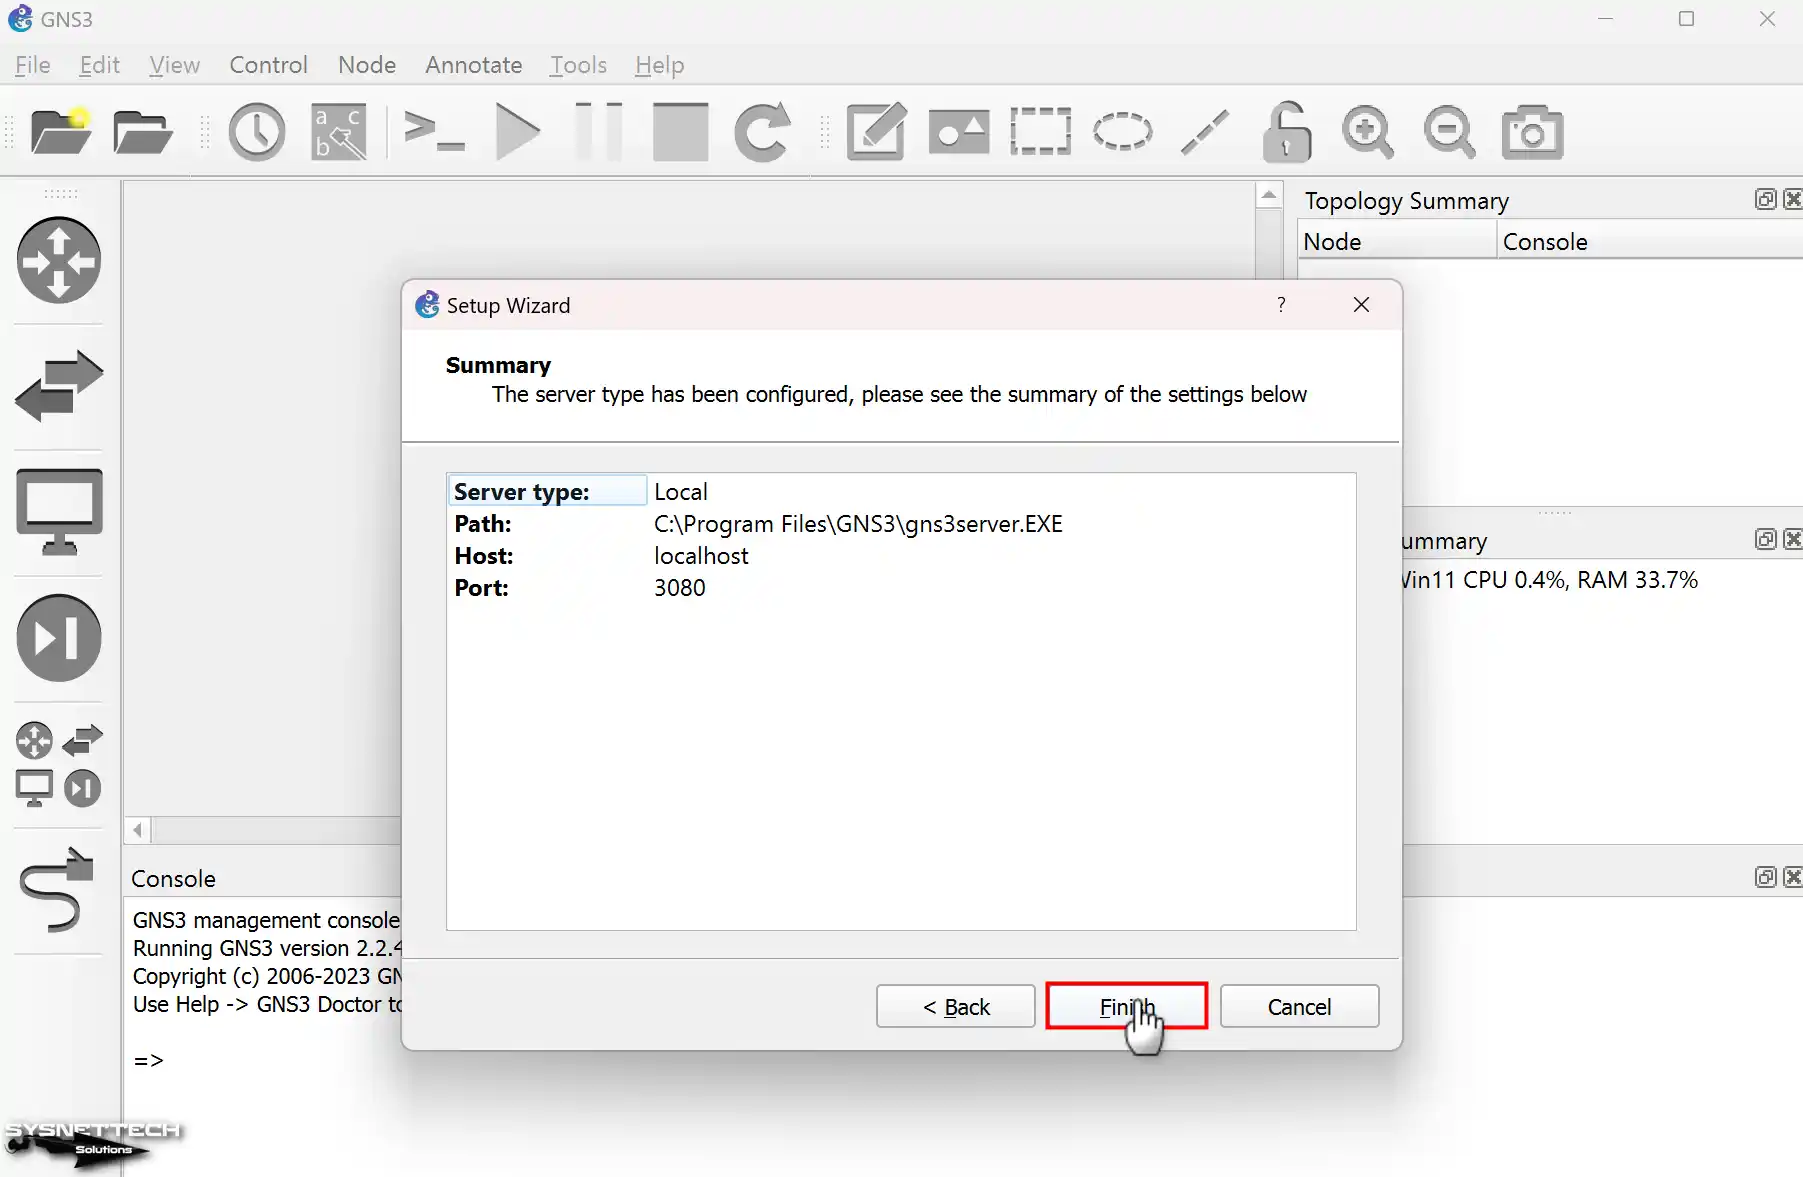
Step 4
Look close at the server details in the list window. For instance, the server type, path, and host status are here. Also, check the port number. Last, press Finish to say all settings are good.
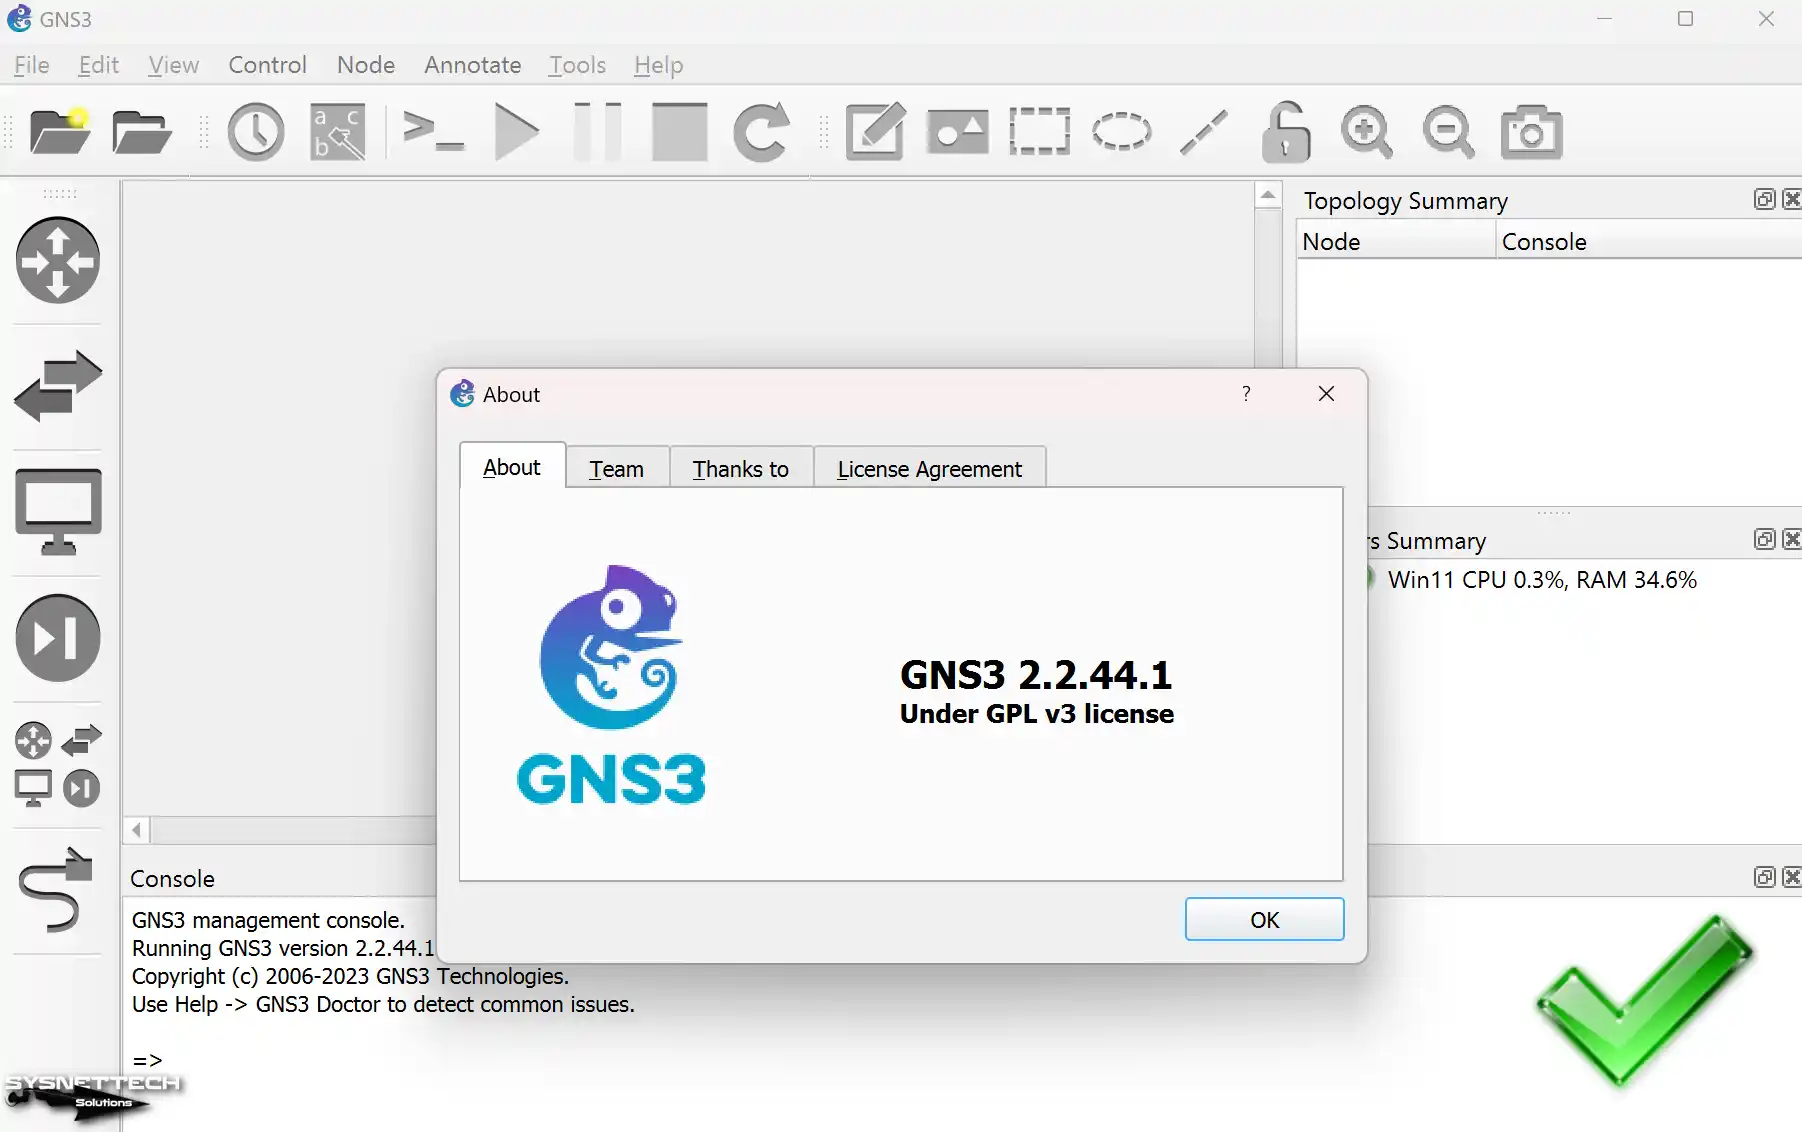
Step 5
Finally, if you want to check the program version, go to the “Help/About” section. This way, you can see the current version number.
5. Add a Router or Switch Image
After you install and start the Cisco simulator, add an IOS image to it.
Add and set up Cisco device IOS images to GNS3. After this key step, you can begin making your projects. Press on the picture below to add an IOS. Then, I recommend that you read our other writing for a complete how-to.

How to Add Routers to the Workspace and Connect Two Routers
After you put the Router’s IOS image correctly, press on the “Devices” choice. Here, you can see the device you added to the list.
1. Add Routers to the Work Area & Wire Them
Step 1
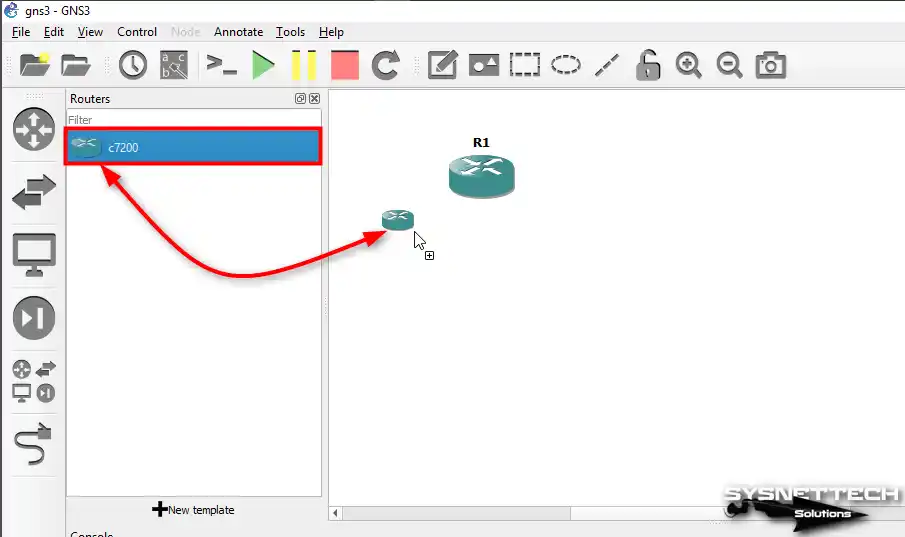
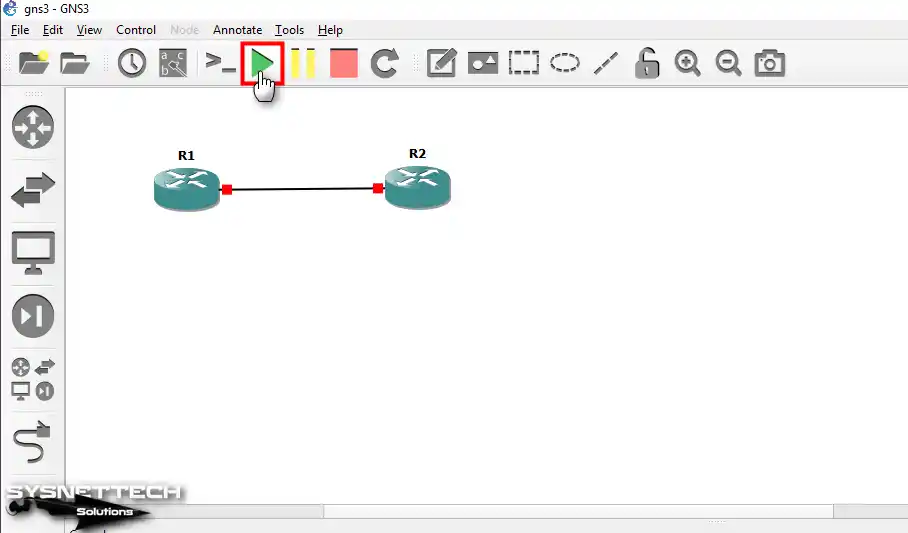
Now, start a new project in GNS3 and add two c7200 Routers to the workspace.
Step 2
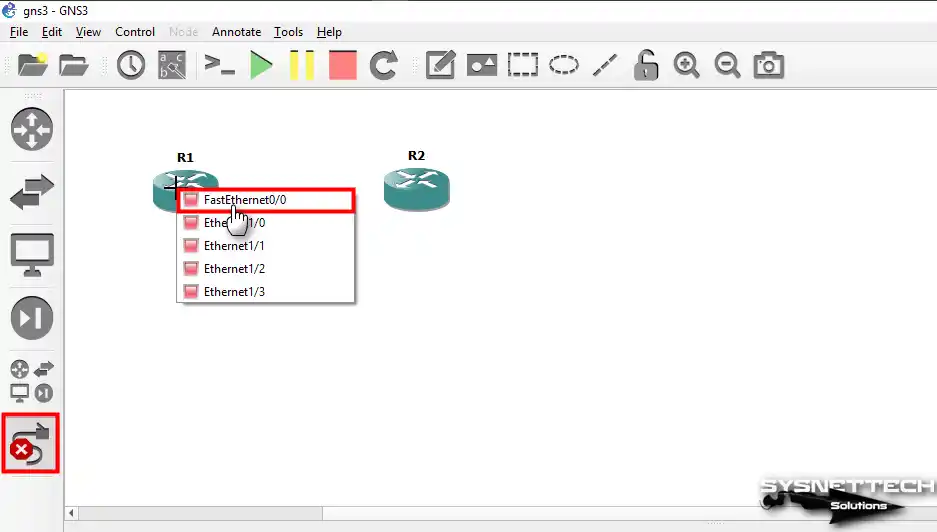
To connect the two routers, first click on the cable icon. Then, when you click on the R1 device, empty connection points will appear.
For example, connect one end of the network cable to R1’s FastEthernet0/0 port. Then, connect the other end to R2’s FastEthernet0/0 port.
Step 3
After you link the Cisco Routers with FastEthernet ports, press the green mark to turn them on.
2. Run the Routers & Configure Their Ports
Step 1
You can open the command box by hitting Router R1 twice. Or, you can press the right button on it and pick Console from the choices that show up.

Step 2
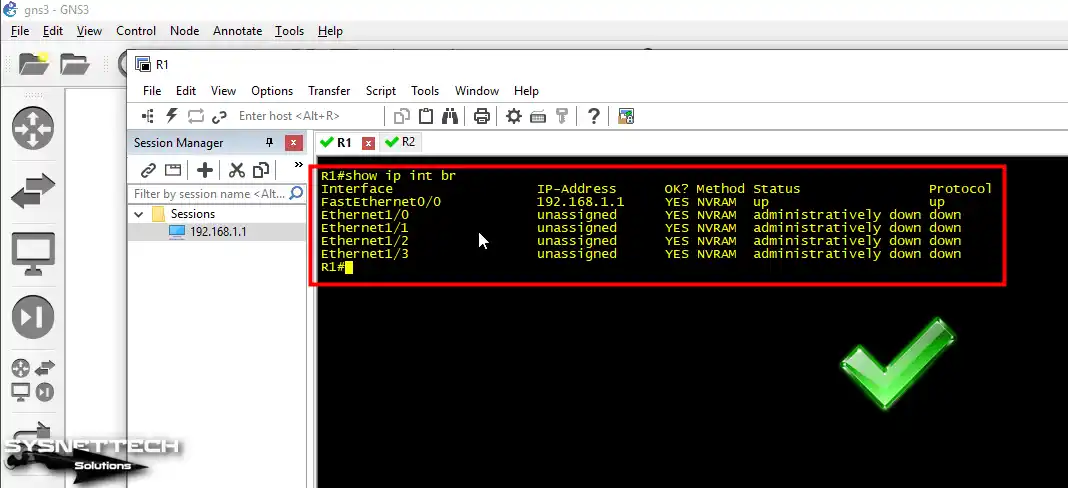
Configure the IP address for R1’s FastEthernet0/0. Then, use the provided commands to open the port. After that, set up the relevant interface with the settings I gave.
R1(config)# interface fastethernet 0/0
R1(config-if)# ip address 192.168.1.1 255.255.255.0
R1(config-if)# no shutdownTo verify that the Fa0/0 port is open, run the following command in the CLI:
R1# show ip interface brief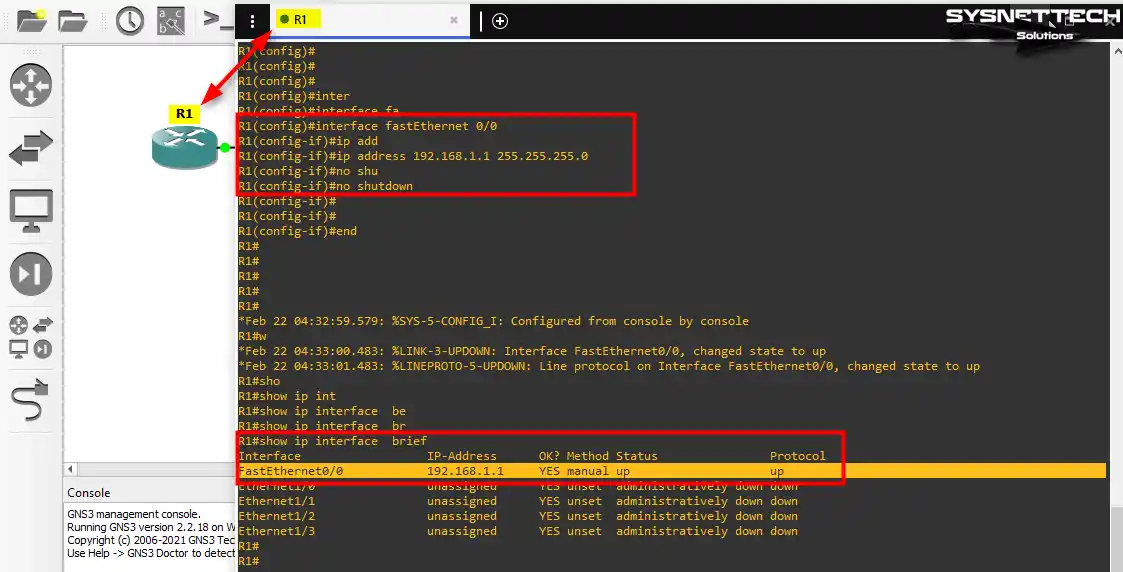
Step 3
Similarly, apply the settings you used on the R1 device to the R2 device as well.
R2(config)# interface fastethernet 0/0
R2(config-if)# ip address 192.168.1.2 255.255.255.0
R2(config-if)# no shutdown
Ping R1 via R2 to test the connection between the two routers.
R2# ping 192.168.1.1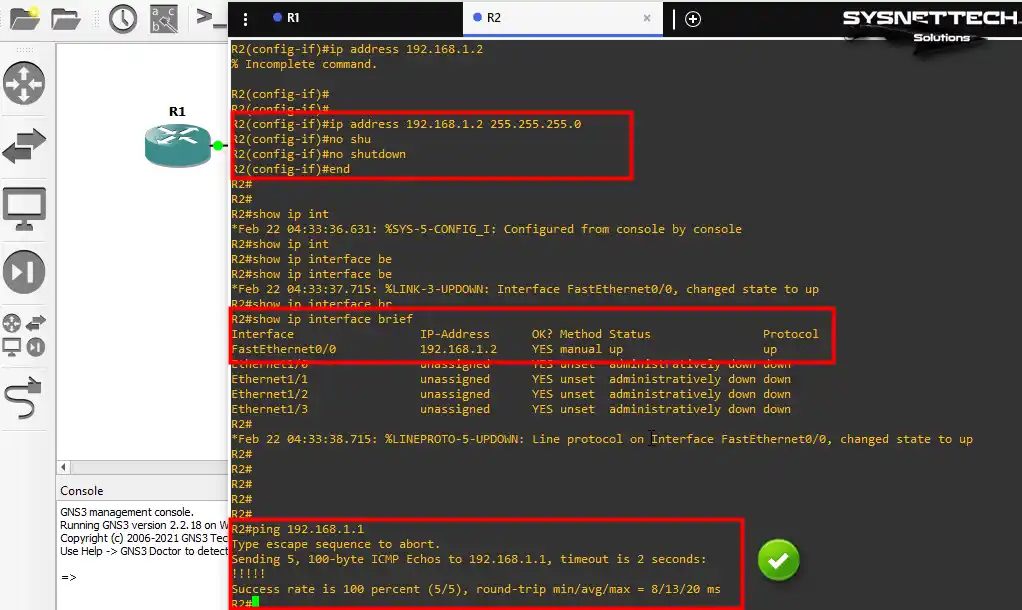
How to Use SecureCRT Instead of Solar-PuTTY in GNS3
When installing GNS3, make sure to add Solar-PuTTY as the console. However, if you don’t want to use that software, you can opt for SecureCRT instead.
Now, before you change the console app, I recommend installing SecureCRT on your PC.
Step 1
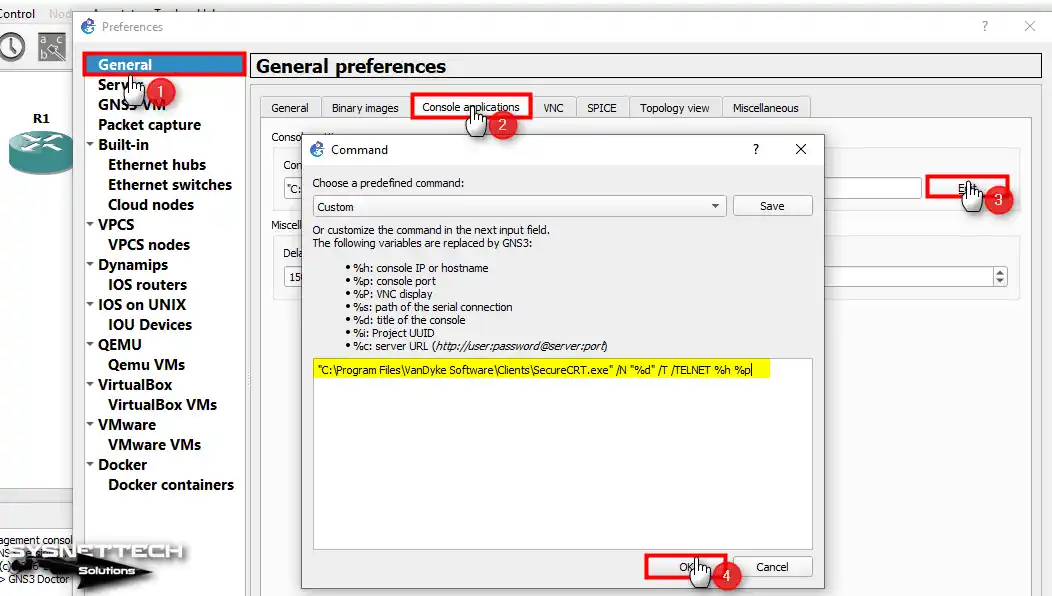
After you set up SecureCRT, start GNS3 again. Right after, press on the “Preferences” pick in the “Preferences” menu for console settings.
Then go to the “General / Console Applications” part. Here, press “Edit” in the General Preferences window.
Pick SecureCRT in the predefined select command. Then, specify where to put it and press OK to keep your picks.
Step 2
When you double-click on Router R1, you will see the SecureCRT console open. As shown in the image below, it works seamlessly on GNS3.
Video
Installing Older Versions
Frequently Asked Questions (FAQ) About GNS3
- Can GNS3 install and run on Windows 10?
- What is the best OS for GNS3?
- How much RAM do I need for GNS3?
- How do I use my PC on GNS3?
Conclusion
To sum up, GNS3 is a powerful and versatile tool. It is a perfect choice, mainly for network fans and experts.
The reason is that it lets us copy difficult network configs without needing real PC hardware. Because of this, it is beneficial for individuals studying for Cisco certification. Also, anyone wanting to get better at technical skills can use it easily.
What’s more, GNS3 stands out with its user-friendly interface. Since it receives constant updates, it doesn’t just give you practical experience.
It also gives a deep understanding of network protocols. With this tool, we can significantly move our problem-solving skills forward.
I very much recommend that you use the powers of this top-level simulator tool. This way, you can propel yourself to the forefront in the field of networking.
In summary, GNS3 gives you the chance for learning by doing. Of course, this experience will lead you to success in the real world!
You might want to try the graphical emulator software on another PC system. In that case, I suggest you take a look at our guide on how to install GNS3 on Ubuntu. In our guide, I have explained all the steps for you in a step-by-step and detailed manner. If you are preparing for Cisco exams with Linux OS, you can install this great software right away!

TolgaBagci
Hi, I'm Tolga, a computer expert with 20 years of experience. I help fix computer issues with things like hardware, systems, networks, virtualization, servers, and operating systems. Check out my website for helpful info, and feel free to ask me anything. Keep yourself in the loop about the newest technologies!