
Knowing network traffic is crucial in today’s digital world. For this reason, we need the right tools to keep things secure and efficient. One example is Wireshark, a potent tool for analyzing network data. With this software, we can closely examine the data moving through our network.
In this article, I will show you how to install Wireshark on Windows 10 and 11. This way, you can quickly watch and check your network traffic. Also, you can improve your security by finding LAN problems.

How to Set Up Wireshark on Windows 10 & 11
Wireshark is a network analysis tool that checks all incoming and outgoing IP packets. It works on any internet-connected interface. So, it helps you quickly monitor network traffic.
No matter what your operating system is, downloading Wireshark is easy. Installing it is also fast and straightforward so that you can set up the program quickly.
After installing the packet analyzer software on Windows 10 and 11, you can analyze data, filter network protocols like USB, Bluetooth, and Ethernet, and make data transfer easier.
It helps you find problems in your LAN quickly. Also, you can check web activities. That is, you can spot leaks easily.
The Wireshark packet sniffer improves your network security. It also works with Windows, Linux, macOS, and other systems. So, it ensures easy use on different platforms.
The software is open-source, so its code is free to access. Developers can change, improve, and adjust it to their needs. It also gives you the freedom to meet your personal needs. Thus, users can adjust it as needed.
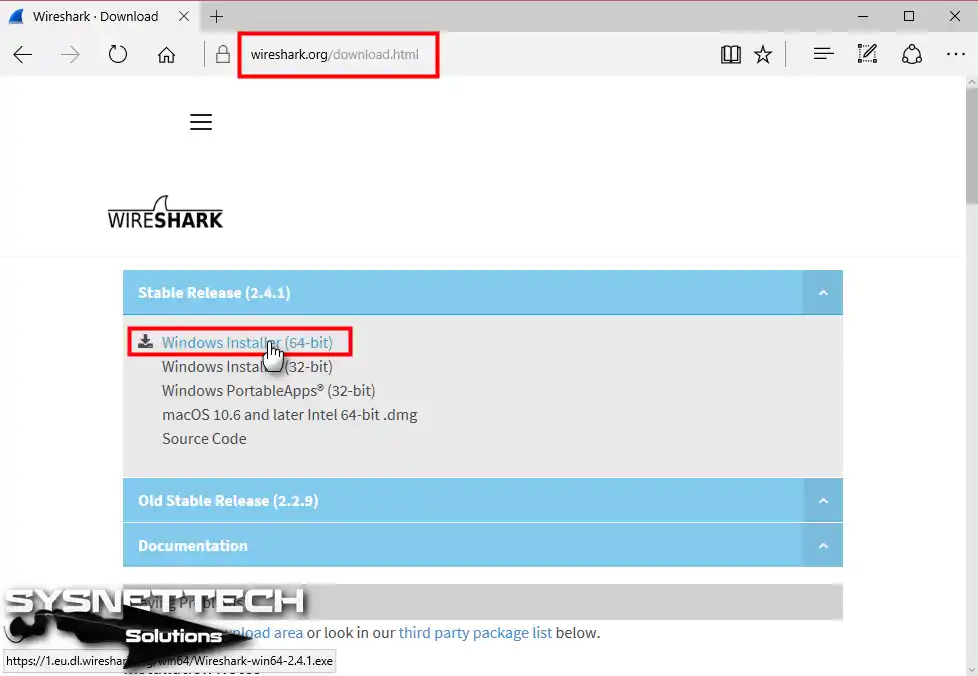
Stage 1: How to Download Wireshark for Windows 11 & 10
Ensure your processor speed is 1 GHz or higher. You also need 300-500 MB of free disk space. Thus, 1 GB or 2 GB of memory is required.
Now, you can start installing the packet analyzer software on your system.
Step 1
To download the setup file, check your PC’s OS. So, choose the version that fits you.
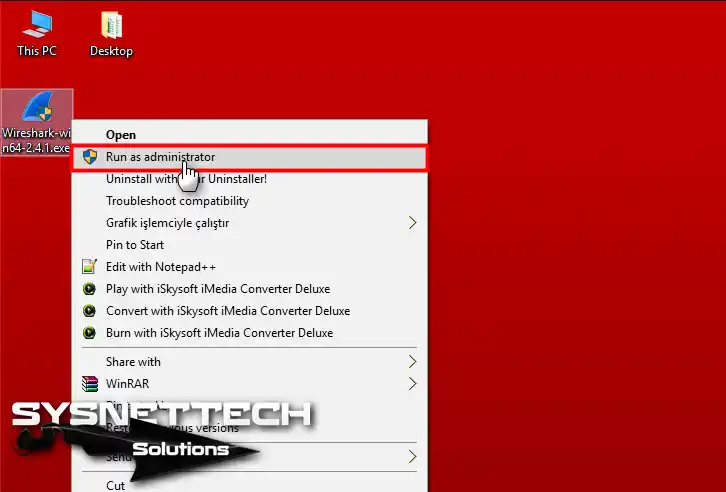
Step 2
Now, find the EXE file on your PC and right-click on it. After that, you can choose “Run as administrator” from the pop-up menu. That is, this gives the app the permissions it needs to work correctly.
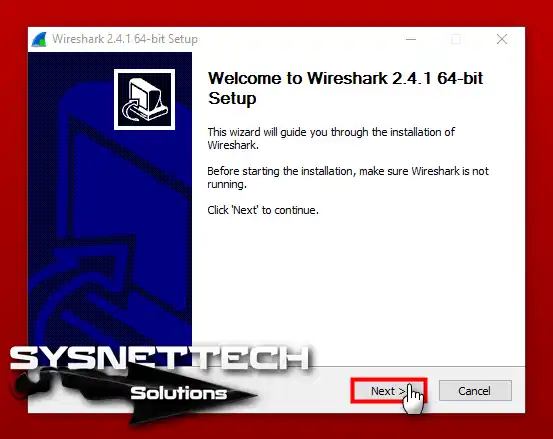
Stage 2: Run the Wireshark Setup File
Step 1
To start installing, find the Wireshark setup file and double-click it. When it opens, click “Next” to continue with the steps.
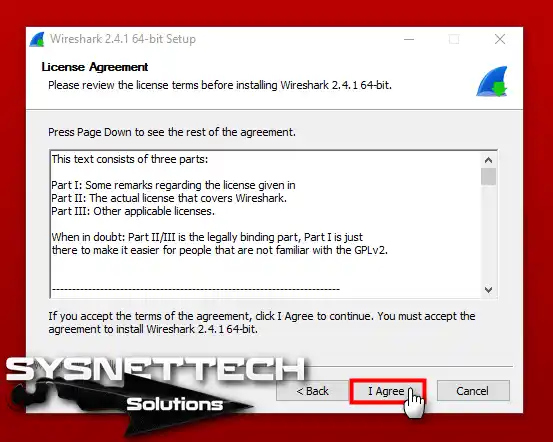
Step 2
Please read the packet analyzer app’s license text carefully and accept the terms.
Step 3
The Choose Components screen selects tools by default. But pick the right options to continue.

Step 4
In the Select Additional Tasks window, change the shortcuts you need. Also, set up file extension diagnostics on your PC.

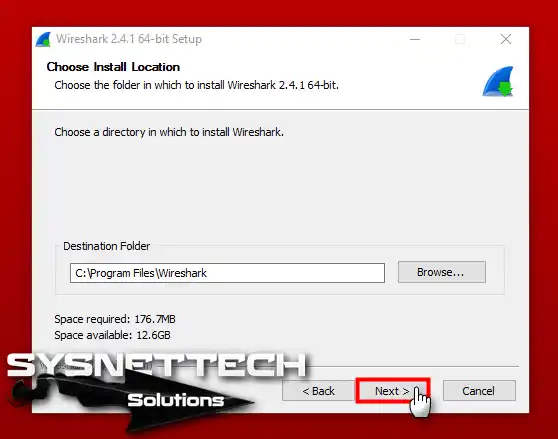
Step 5
On the Choose Install Location screen, keep the default location. Thus, the setup will work correctly and continue.
Stage 3: Install WinPcap & USBPcap
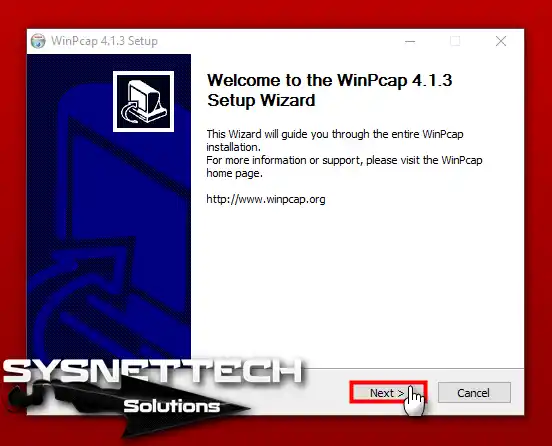
Step 1
WinPcap is the most essential tool in this software. We recommend installing it, so select the Install WinPcap option in this window and hit Next.

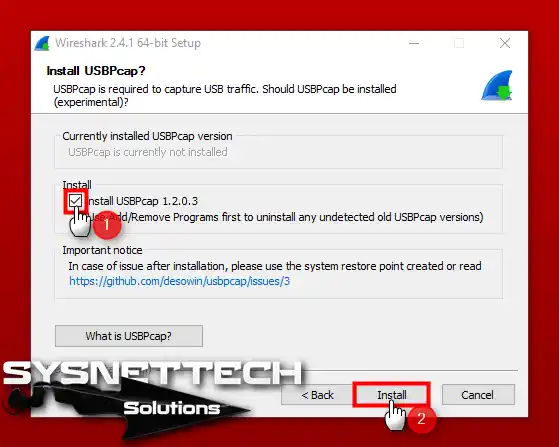
Step 2
The USBPcap software is needed to capture USB devices. If you want to install it, select the Install USBPcap option to continue.
Step 3
Please wait while the installation starts and the required files for the app are extracted.

Step 4
Click the Next button to install the WinPcap software.
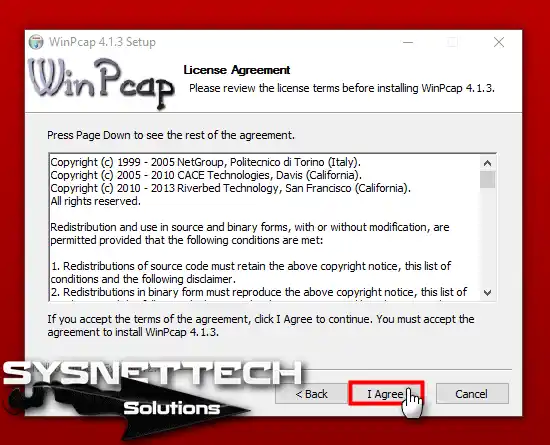
Step 5
Click “I Agree” to accept the WinPcap license agreement.
Step 6
Choose the option to start the WinPcap driver when your computer starts.

Step 7
When the WinPcap installation is done, click Finish to start the USBPcap installation.

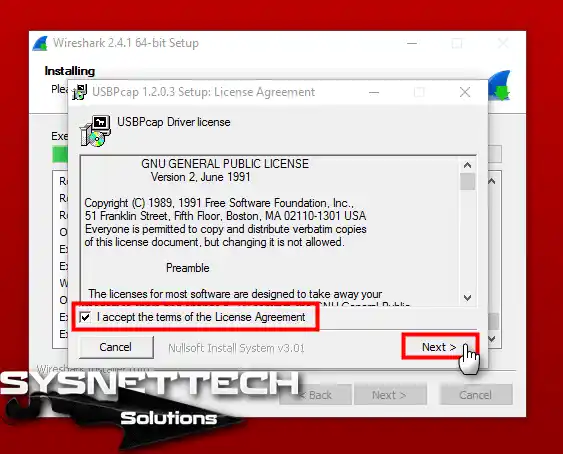
Step 8
Accept the USBPcap driver’s license agreement.
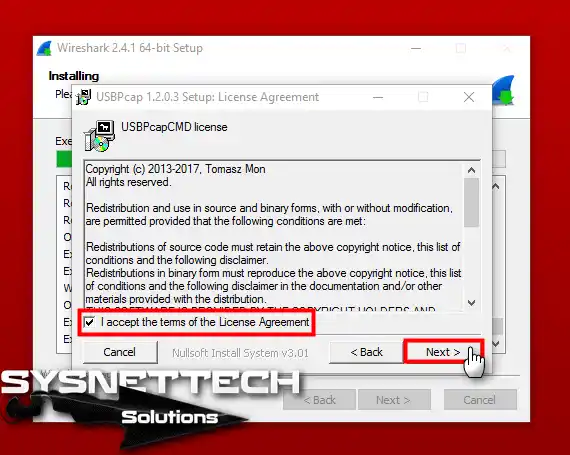
Step 9
Accept the USBPcapCMD license and proceed to the installation.
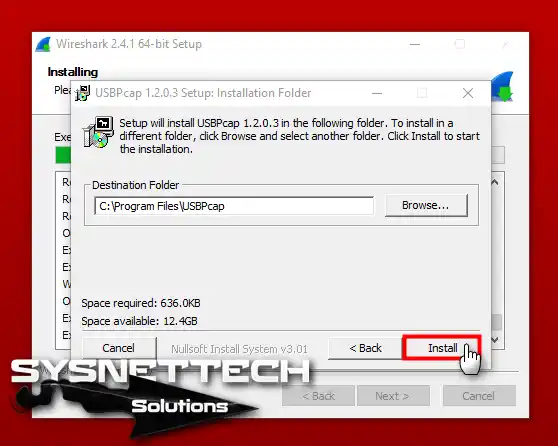
Step 10
Keep the USBPcap installation options as they are and continue with the installation.

Step 11
Start the USBPcap by following the setup steps.
Step 12
After the installation is complete, the wizard will continue to finish the setup.

Stage 4: Completing Wireshark Setup
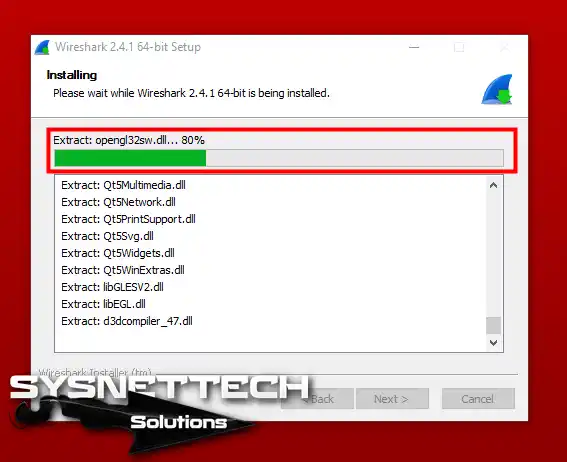
Step 1
Wait while the network analysis program copies the needed files to your system.
Step 2
After completing the installation, press Next to move to the next phase.

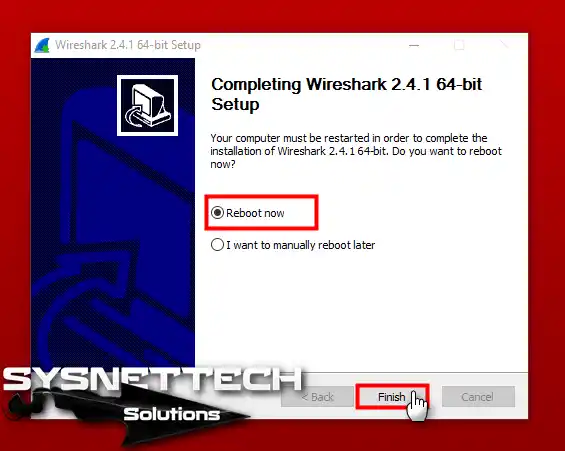
Step 3
Once the steps are finished, it is a good idea to restart your PC to make sure the changes work.
How to Use Wireshark in Windows 10 & 11
Step 1
After restarting your computer, open the network control program. The first screen will appear. Here, select the LAN card connected to your network. In short, this will allow you to analyze LAN and WAN traffic.
Provided you are utilizing a Wifi adapter for Internet connectivity, access the adapter by double-clicking on it.

Step 2
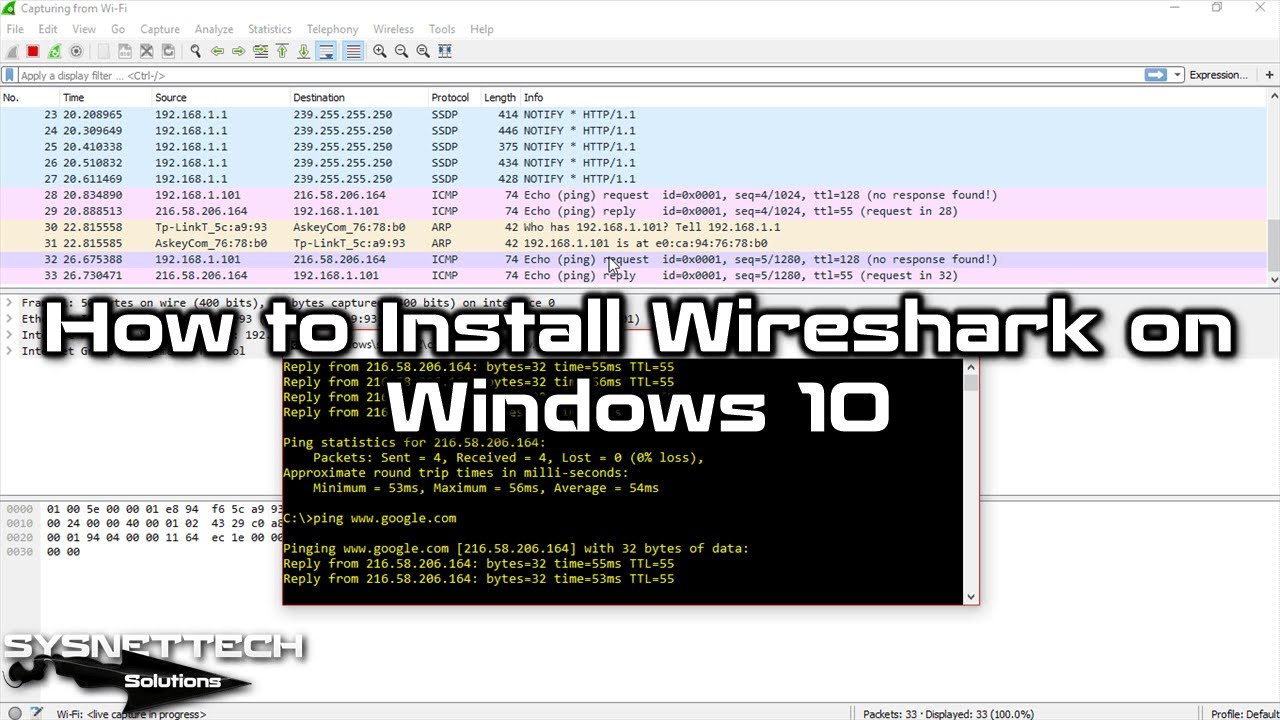
While using the Internet, the program checks IP packets. Also, it reports the results as follows.

Step 3
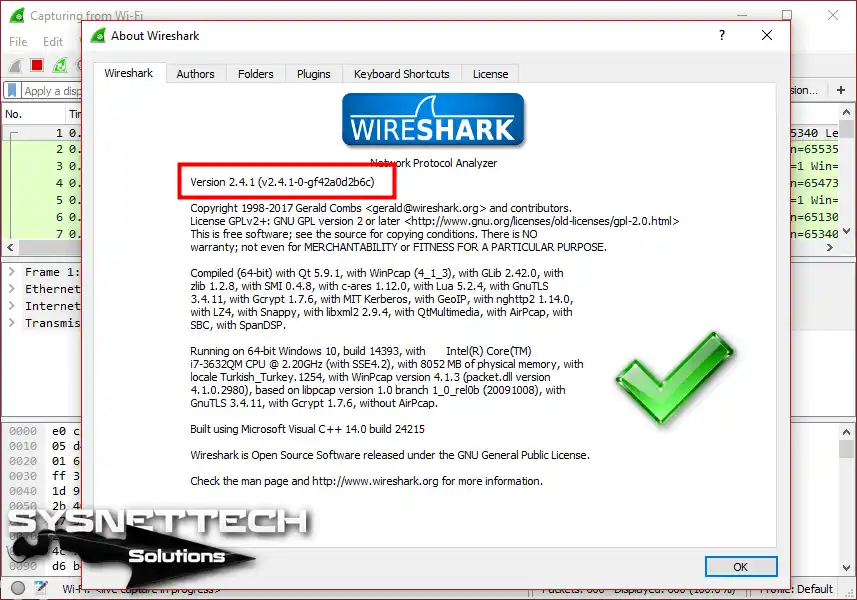
You can check the version of the program on your computer by going to Help / About.
Video
Frequently Asked Questions (FAQ)
- On which platforms can I use Wireshark?
- How do I download Wireshark?
- Are there any special system requirements for Wireshark?
- How do I install Wireshark on Windows?
- Do I need administrative privileges?
Conclusion
As a result, you can easily install Wireshark on your Microsoft OS and start checking your network. Also, you can do a detailed check to improve your system’s security.
By following our guide, you have taken the necessary steps to check your LAN traffic. This way, you can fix problems and analyze the data flow with this software.
As a result, you can protect your network from security risks. You will also make smart network decisions while exploring its features. Also, look out for future articles on its advanced uses and features!

Be the first to share your comment