In this article, we’ll examine step by step how to build and use Bridged Network on virtual machines running on VM Workstation.

How to Enable Bridged Networking in VMware Workstation/Player 15/14/12
After you create a new virtual machine with the VMware virtualization program, you use VMware’s Virtual Network Editor program to connect the virtual machine to the Intenet.
What is Bridge networking? It connects a virtual machine to a real network using the host’s network adapter of the host computer.
After you have set up the virtual machine with VMware virtualization, the network settings of the virtual machine are configured by default as NAT by VMware software. Because the virtual machine is configured as NAT, the IP address that you will get from the DHCP server will be different from the IP block of your real network that you are using.
Even if the virtual machine is configured as NAT, it will be able to access the Internet and communicate with your physical computer. However, in some cases, you may want the VM to obtain the IP address from a local DHCP server.
You can assign an IP address from a physical DHCP server to a virtual machine through this network configuration. Therefore, using the Network Editor program, simply configure the connection type of a VMnet to Bridged.
How to Use the Bridge Networking in Virtual Machine
If the VMware Bridged is not working and you are experiencing an Internet problem, you can setup the network connection settings of your virtual pc by following the steps below.
Step 1
When you install VM Workstation/Player, the Virtual Network Editor program defaults to settings such as in the following image.
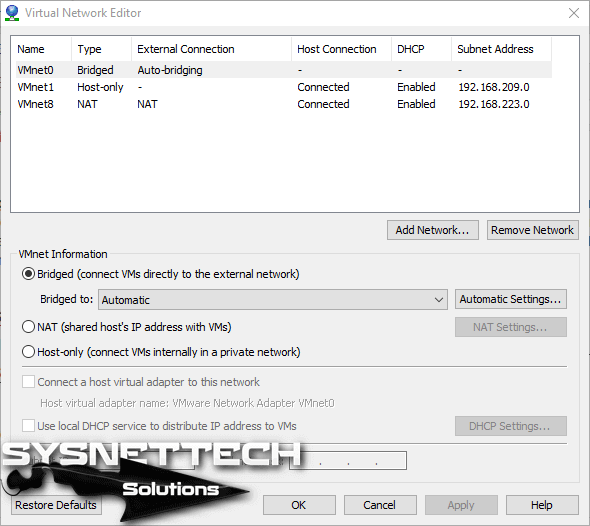
In the Editor program, you can see in the VMnet0 section that the Type is Bridged mode. VMnet0 will work between your physical computer and the virtual pc. For Network setting, VMnet0 is the default setting.
When you switch between the network cards in VMware virtualization software, the network connection with the Auto-Bridging option is automatically configured.
Step 2
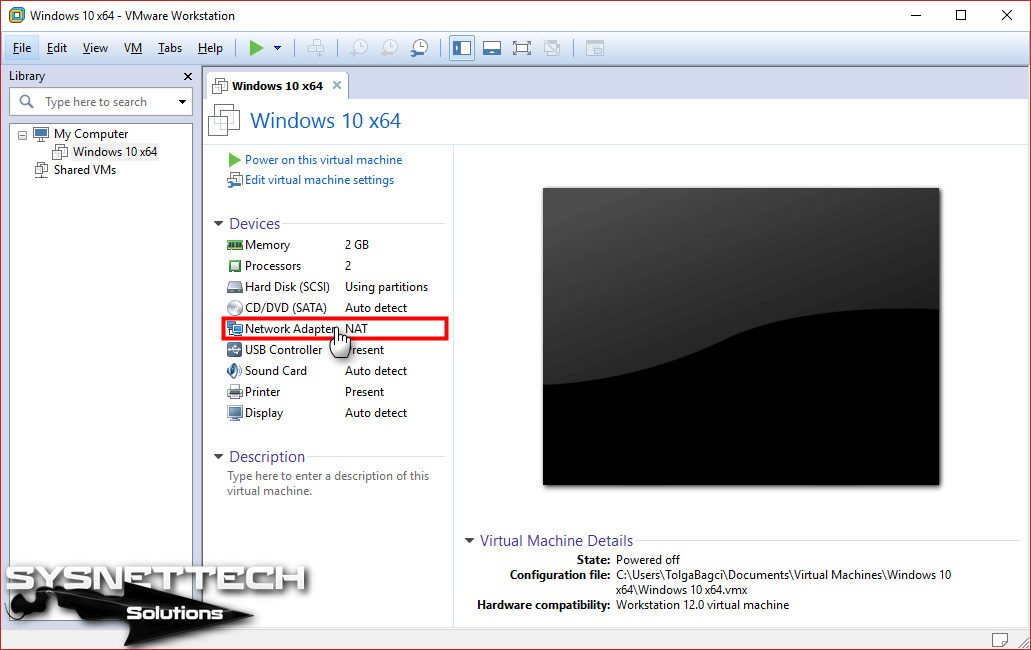
First, open the VM Workstation and click Network Adapter to configure the Windows 10 VM as bridged.
Step 3
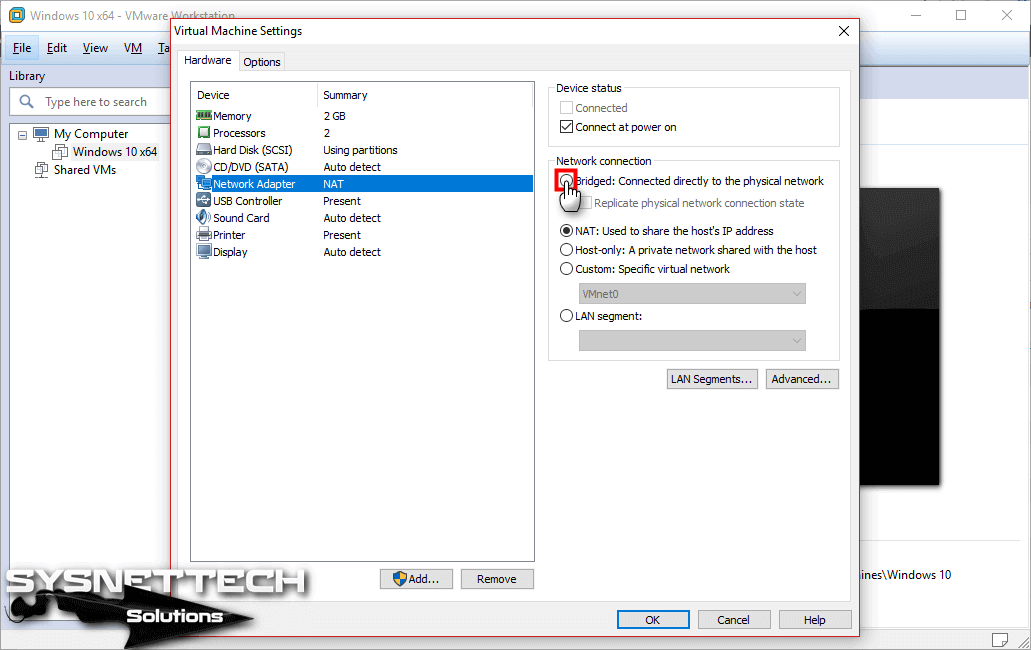
In the VM Settings window, click on Network Adapter again and check Bridged: Connected directly to the physical network.
Step 4
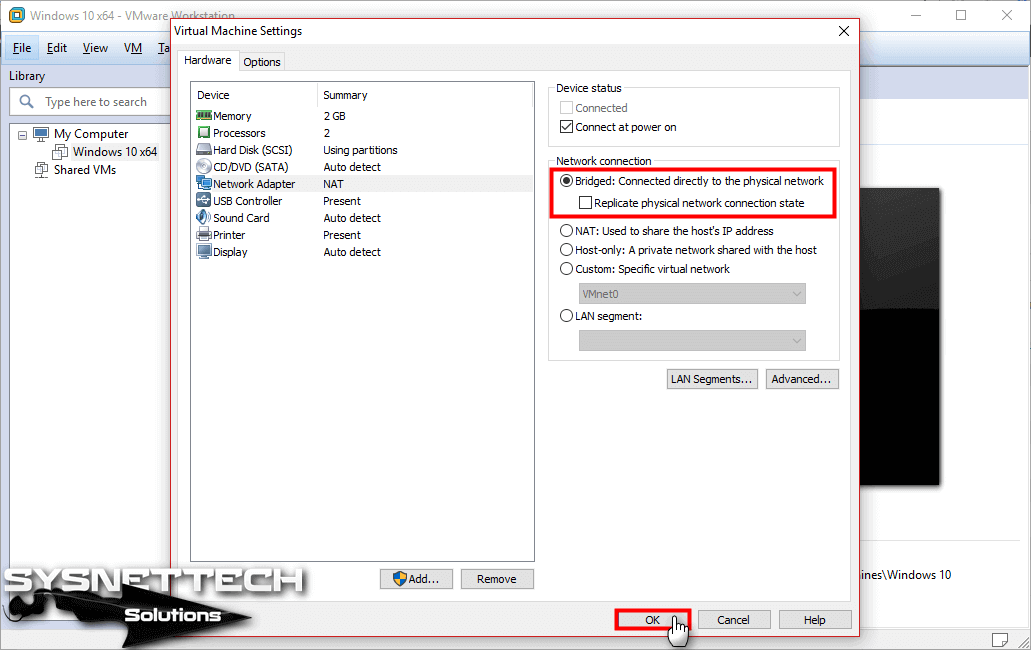
After you select Bridged: Connected directly to the physical network, click on the OK button and save the setting.
Step 5
Restart the virtual machine and open the CMD command prompt and execute the ipconfig command to check that you have an IP address from your real network.
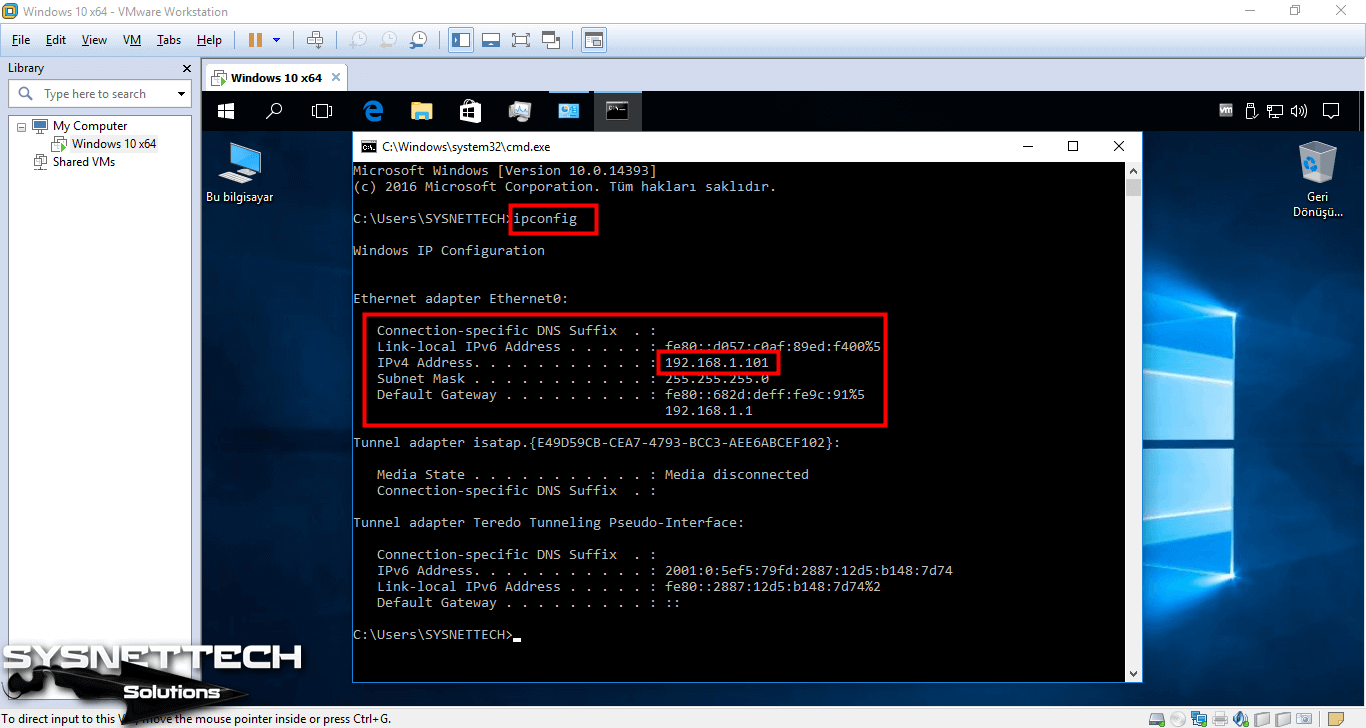
Step 6: How to Check Internet Connection
Once you have configured the Bridged networking connection, open your Internet browser and check your Internet connection. Since the virtual machine has an IP address from your real network, it will be able to access the Internet without any problems.
You can also check the network status by executing ping www.google.com at the CMD command prompt.
For more information on Bridged networking, please visit https://www.vmware.com/support/ws4/doc/network_bridged_ws.html.
Final Word
In this article, we have examined how to make a Bridged connection on the Workstation/Player virtualization program. It is important to remember that when you configure Bridged on the Virtual Network Editor, you also select Bridged on the virtual machine or VMnet you configure. Thanks for following us!
Related Articles
♦ How to Install Windows 10 on VMware
♦ How to Install Windows 8.1 on VMware
♦ How to Take Snapshot in VMware
♦ How to Configure NAT Network
♦ How to Configure Host-Only Network


nice work , thanks for sharing