In this article, we will examine how to install VMware Fusion 12, which allows you to create a virtual machine on the macOS Monterey 12 operating system used on Mac computers.
How to Set Up VMware Fusion 12.2.4 to Run Virtual Windows or Linux on macOS Monterey 12
One of the VMware Workstation or VirtualBox virtualization programs is usually used to run virtual computers on operating systems such as Windows and Linux/Ubuntu. However, in order to run virtual computers such as Windows and Linux on macOS operating systems on Apple Mac computers, you must use VM Fusion.
Fusion is a virtualization program developed by VMware for Apple systems, and this program allows you to use Windows and Linux-based operating systems on your computer virtually.
This virtualization program is more useful and more efficient for users when compared to Apple’s Boot Camp program.
After downloading the latest version of the Fusion virtualization program, 12 Pro, to your computer, you can create virtual machines on your host computer and install and use operating systems such as Windows, Linux, Solaris, or NetWare.
You can download this virtualization program from the VMware official website and purchase it after using it free of charge for 30 days.
How to Download and Install VMware Fusion
You can download Fusion virtualization software from different platforms, as well as from VMware’s official website. However, when you want to download this software, we recommend you to visit the official website.
Step 1
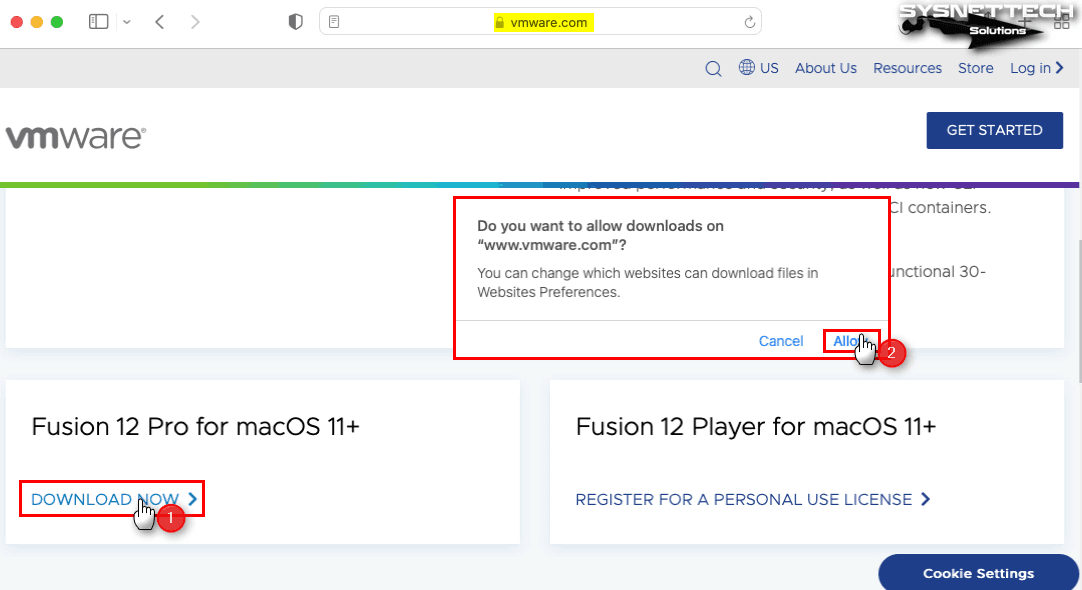
To download the Fusion virtual machine program, first, visit https://www.vmware.com/products/fusion/fusion-evaluation.html and then scroll down the webpage and click Download Now in Fusion 12 Pro for macOS 11+.
When you try to download a program from the Internet on your Mac computer, your macOS Monterey 12 system will prompt you as in the image below. Because Apple has greatly improved the system and data security of its users.
Since the VMware website is a trusted source, click Allow in the warning window to start the download.
Step 2
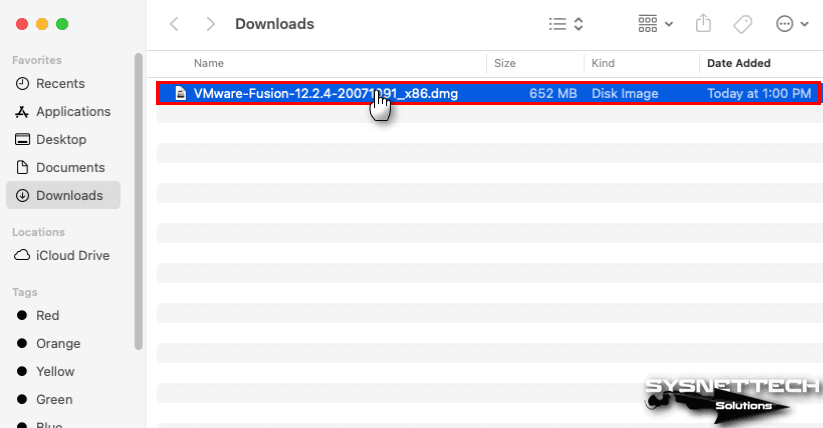
When the download starts in the Safari web browser, the program will be downloaded according to the Internet speed you have. Click Open in Finder to display the Downloads folder on the Dock to open the DMG file.
When you check the extension of the file downloaded to your computer, you can see that it is DMG. Because on macOS systems, DMG and PKG file extensions are usually used instead of EXE.
Double-click on the file to mount the Fusion.dmg file on your system and start the installation wizard.
Step 3
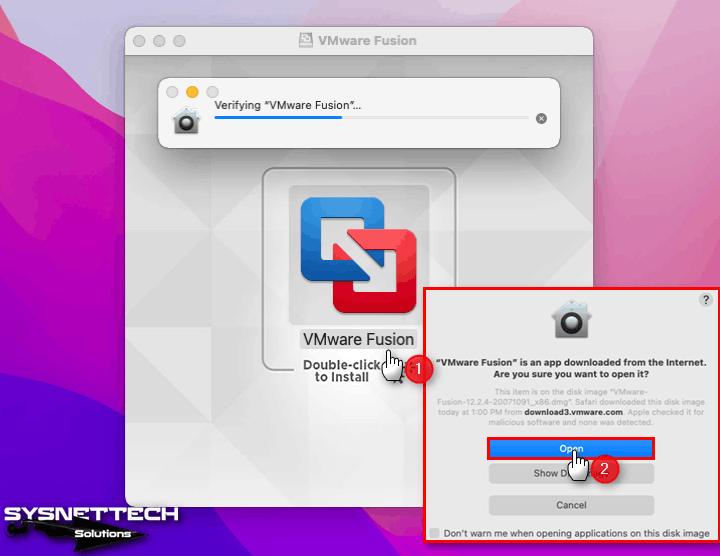
The integrity of the file will be verified on your macOS system when the program wizard opens. You will then see a notification in the upper right corner. If you want to receive warnings, sounds, or signs about the program, open Options and click Allow. After this process, when the wizard opens, double-click the Fusion icon to start the installation.
Since you downloaded the virtualization program from the Internet, a warning will appear on your system as follows. If you are sure that you downloaded the program from a secure site, click Open to confirm the opening of the file.
Step 4
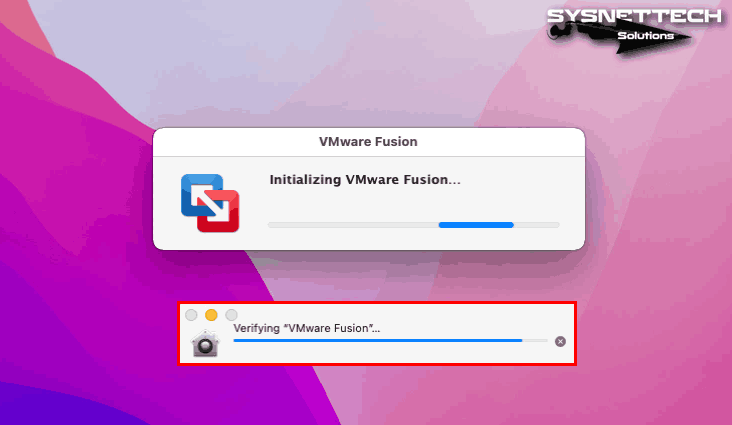
After the VMware Fusion files are verified, wait while the installation starts.
Step 5
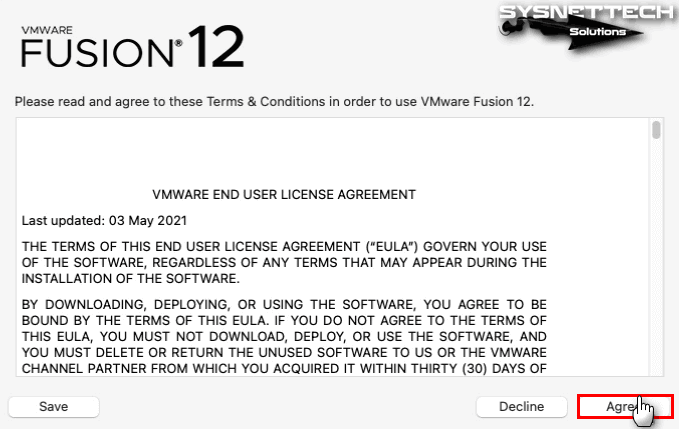
After reading the full text of the Fusion 12 license terms, click the Agree button to accept the agreement.
Step 6
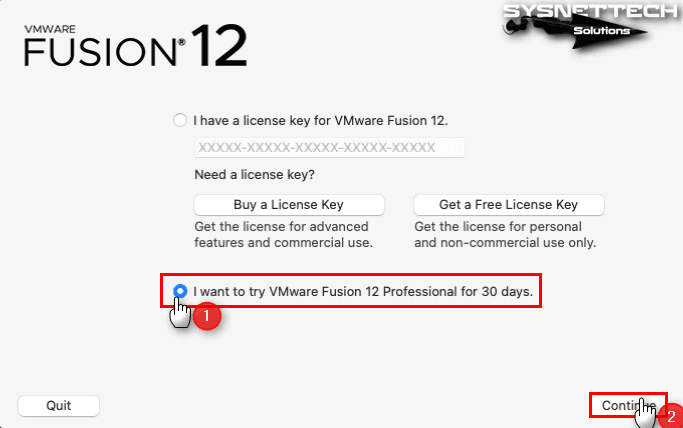
If you purchased VM Fusion Pro, enable the “I have a license key” option and type in your product key.
If you want to use and experience the VMware virtualization software for free for 30 days, activate the option below and type your account information after clicking the Continue button.
Step 7
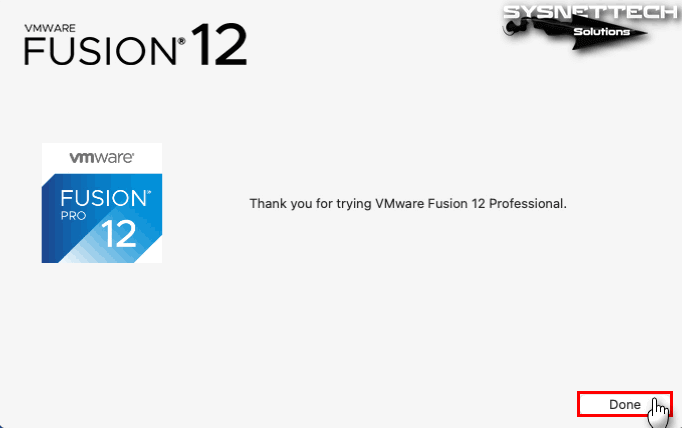
At the last stage of the installation wizard, click the Done button in the window that sends you a thank you message for trying the Fusion program.
Step 8
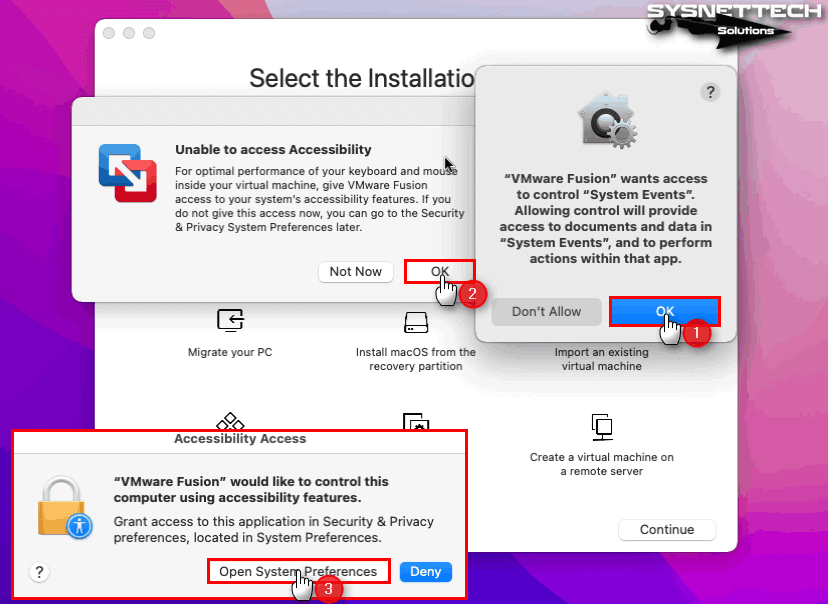
Let the program control System Events because you need to be able to access documents and data within the application. Click OK in the warning window, then click OK again in the Unable to access Accessibility window.
Click Open System Preferences to allow the Fusion Pro software in the Accessibility Access window.
Step 9
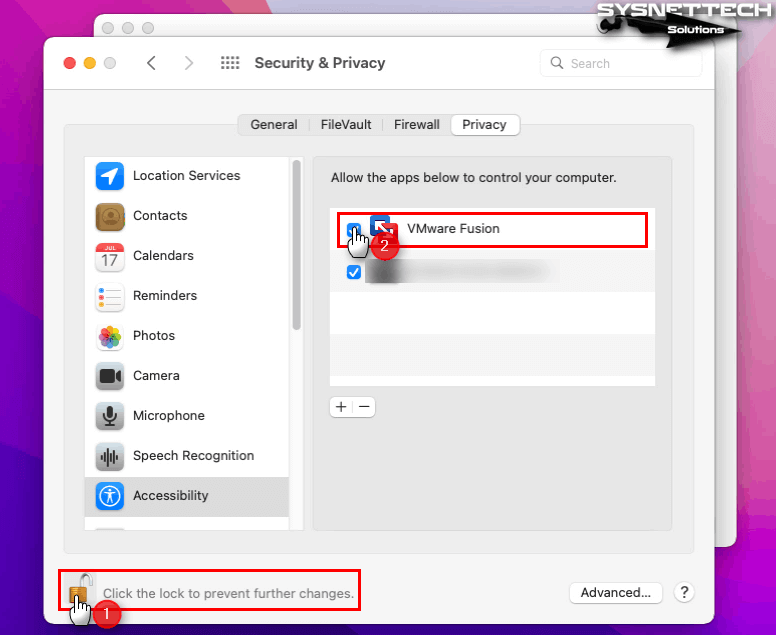
In the Security & Privacy window, you need to open the necessary permissions to make changes to your system. So, click on the lock icon in the lower-left corner of this window and type in your system’s user account password.
Click Accessibility and tick the checkbox to allow VMware Fusion to control your computer.
Step 10
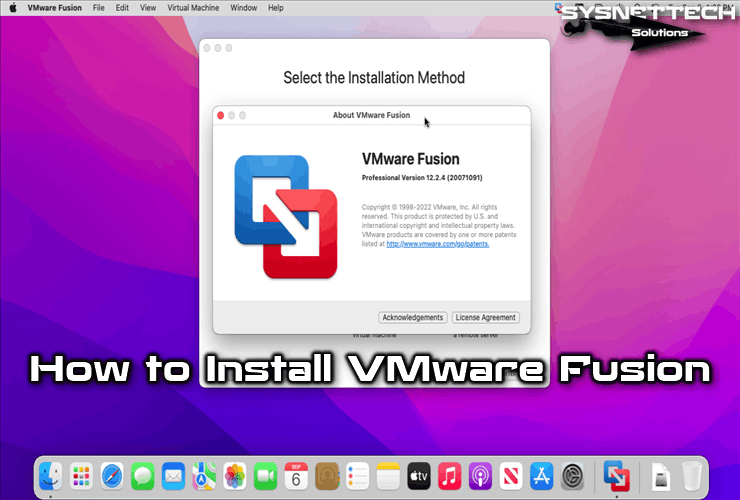
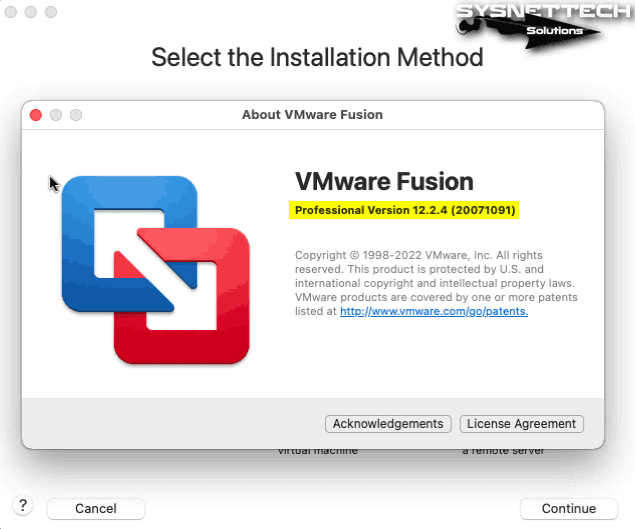
After installing Fusion Pro on macOS, you can check the version of the program from About in the toolbar.
How to Create a New Virtual Machine
After installing the Fusion software on your Mac, you can install either a Windows or a Linux distribution. So you can continue to use your Windows-compatible software on your MacBook computer or experience many distributions of Linux.
Step 1
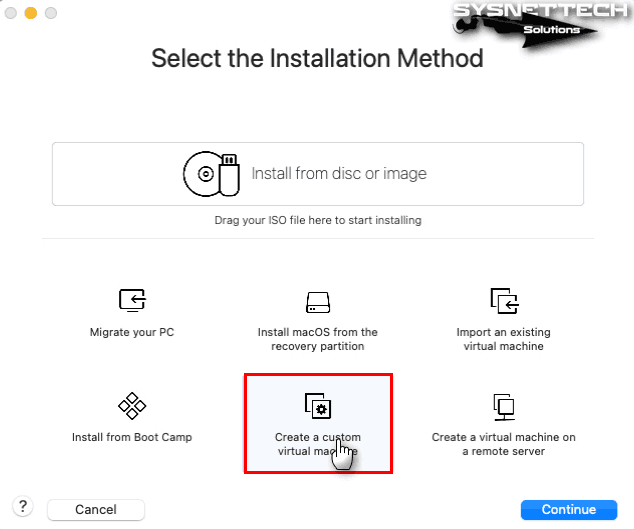
To prepare a virtual machine, open the Fusion program and select Create a custom virtual machine and click the Continue button.
Step 2
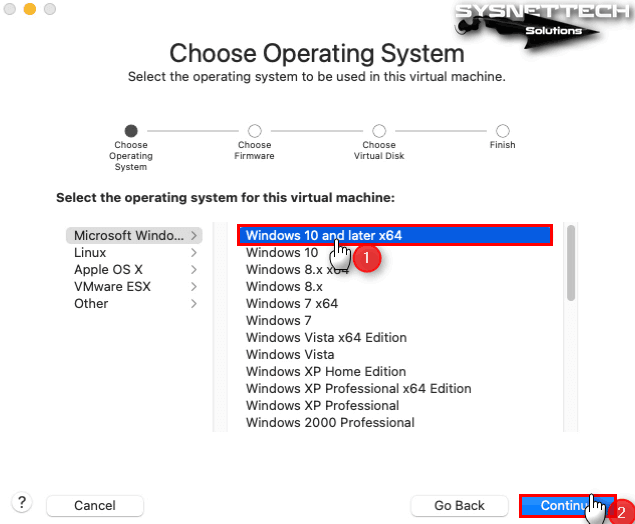
Select the guest operating system you will use on your Mac and click Continue.
Step 3
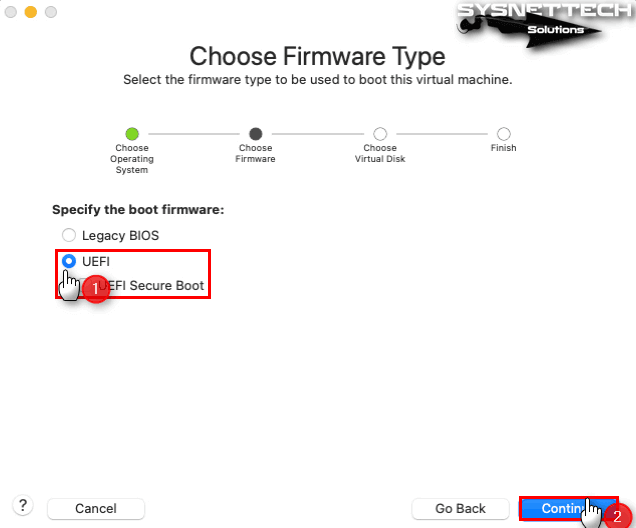
Since you have chosen the Windows 10 system, select UEFI for the Boot Firmware type and click Continue.
Step 4
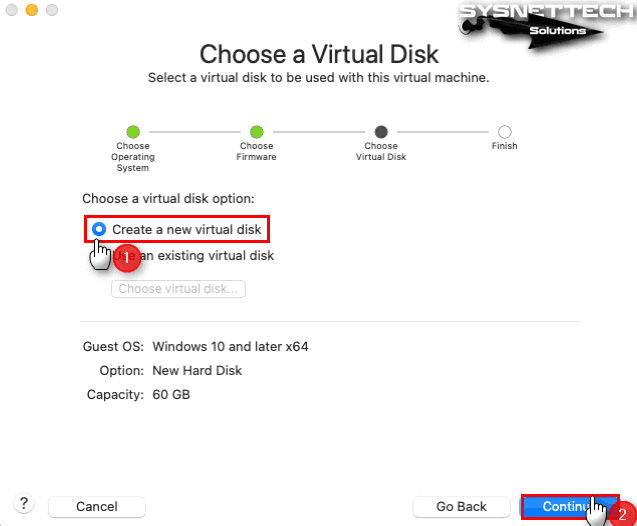
Since you will install a new operating system, select creating a new virtual disk at this stage and continue.
Step 5
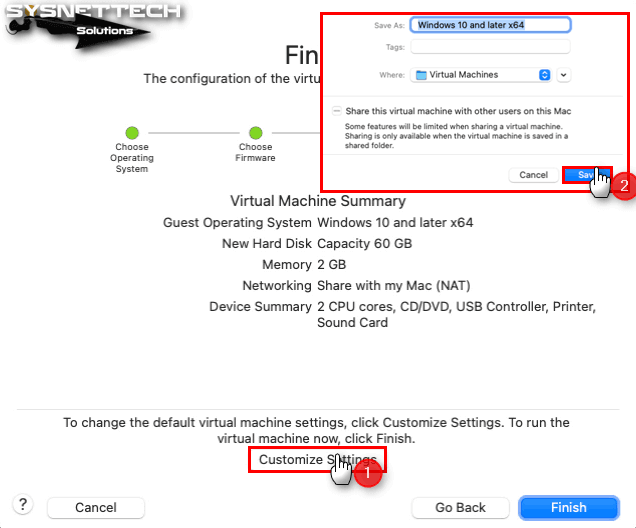
In the information window containing the hardware summary of the virtual machine, click the Customize Settings button to make the virtual hardware settings and select the location where your virtual system will be installed in the window that opens and save it.
Step 6
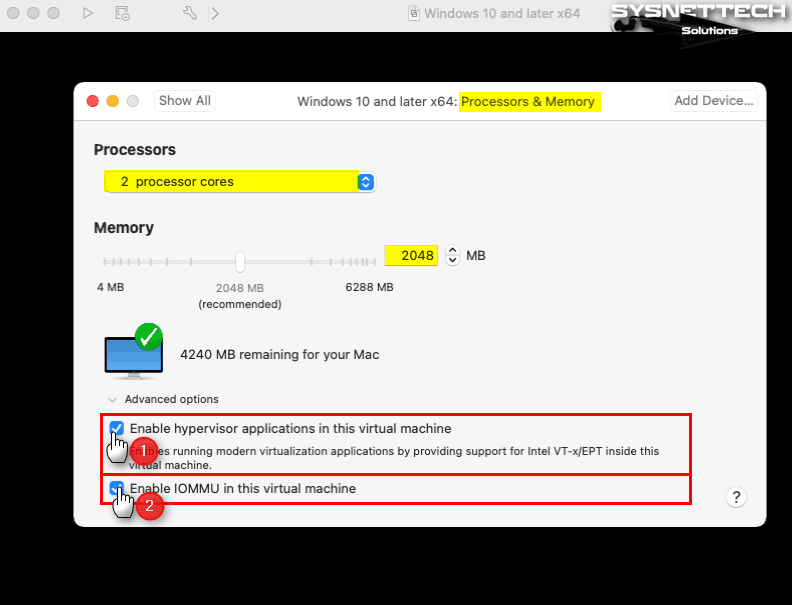
Click Processors & Memory, one of the Windows 10 virtual hardware types, and configure an appropriate number of virtual cores and memory size according to the hardware capacity of your host PC. Also, enable using hypervisor applications in this VM from advanced options and enable the IOMMU feature for system performance.
Step 7
Open the advanced settings of your Windows 10 system and disable the Side Channel Mitigations feature and additionally the Troubleshooting feature to increase the virtual machine performance.

Step 8
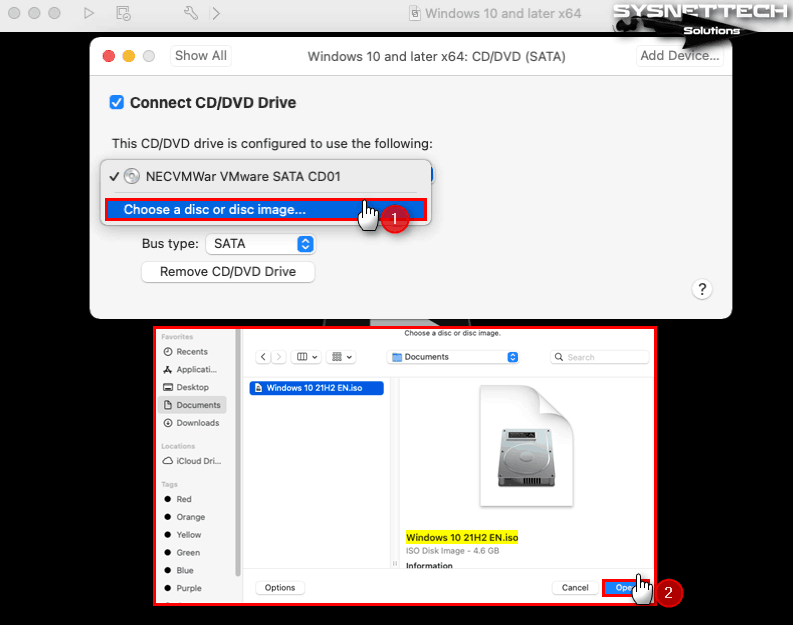
View the CD/DVD virtual device settings and click Choose a disc or disc image from the drop-down options to add a Windows 10 ISO file to your VM.
Step 9
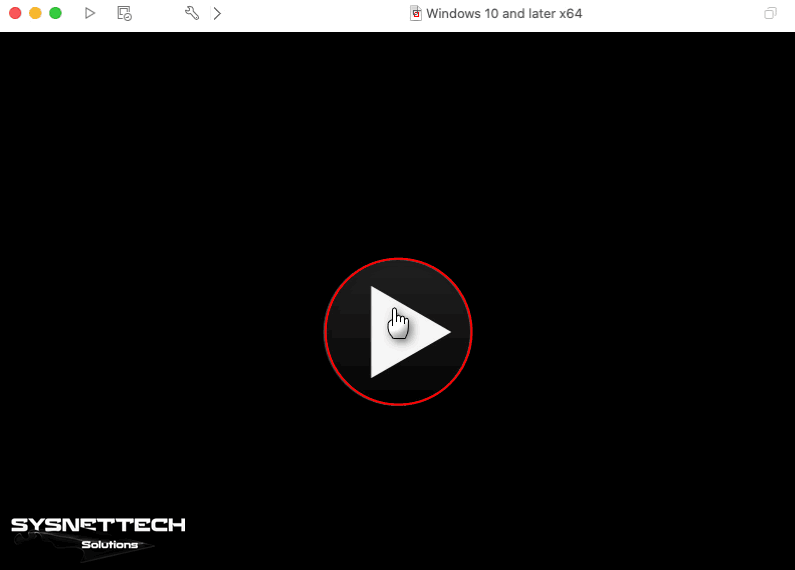
After adjusting the settings of your virtual computer, run your virtual PC to boot your system from the ISO file.
Step 10
When the Microsoft Windows 10 setup wizard opens, you can continue with the system setup by selecting the system display language, time zone, and keyboard layout you want to use.

How to Delete the Virtual Machine
When you stop using the virtual machines you have prepared on your Mac, or you decide to delete only a VM, you can completely delete your virtual system from your host disk from the virtual machine library.
Step 1
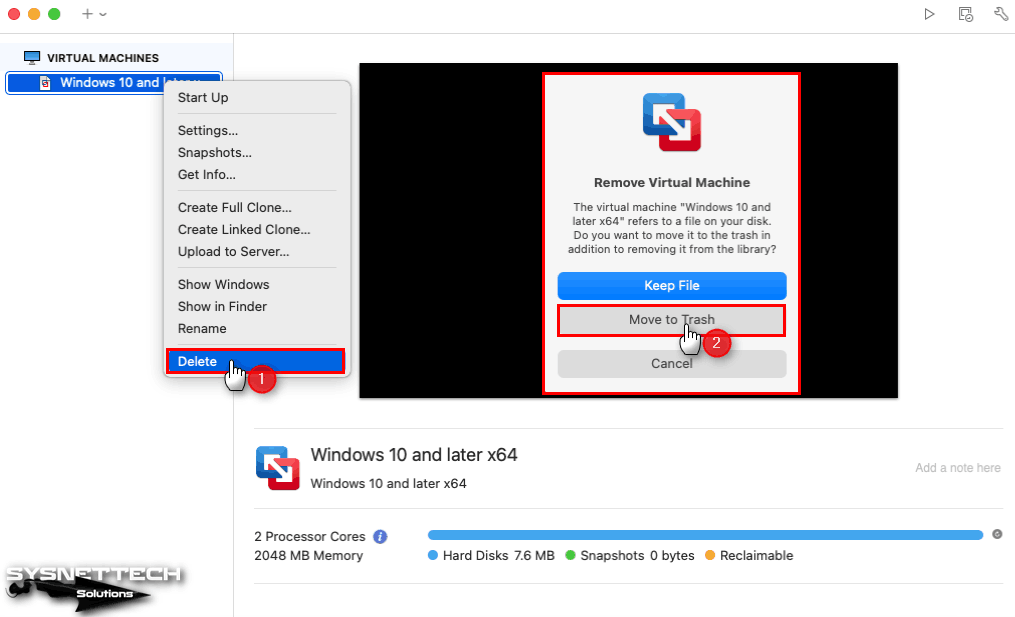
Right-click on the Fusion icon on the dock and open the library. Next, select the virtual system you want to delete and right-click on it, click Delete, and then click Move to Trash.
Step 2
Go to the location where you installed your Windows 10 VM and check that all files have been deleted, and you can see that the process was successful.

How to Uninstall VMware Fusion
It is recommended that you back up the virtual computers you have created when you decide to remove the program from your system after installing VMware Fusion. If you do not want any files belonging to this program to be on your system, you must find the relevant files and delete them.
In addition, you can completely delete the Fusion program on your system by using third-party software.
Step 1
You often use Applications when trying to uninstall any program on your Mac computer, but this process does not remove all files belonging to the program and takes up space on your system’s disk.
First, to uninstall or delete VM Fusion, open Applications as usual and right-click on the program, and type your password.

Step 2
It is very easy to uninstall a program on Mac computers, but as we said, you need to delete unnecessary files or folders belonging to the program on your system.
In macOS, you need to use the mdfind command in the terminal to find all the junk files or folders of a program. To open Terminal quickly, press the Command + Space keys together and after opening Spotlight, type terminal in the search box and run the tool.
Execute the “mdfind VMware Fusion” command in Terminal and find any unnecessary files or folders on your system. When you examine the image below, you can see the data is still available in the system after uninstalling the program.
mdfind VMware FusionUse the “sudo rm -rf” command to completely clean the residual files of the Fusion software from your system. Finally, when you search for residual files with the mdfind command again, you can see that all files and directories are deleted.
sudo rm -rf '/Users/macOS/Library/Application Support/CrashReporter/'
sudo rm -rf '/Users/macOS/Library/Application Support/VMware Fusion Applications Menu'
sudo rm -rf '/Users/macOS/Library/Application Support/VMware Fusion'
sudo rm -rf '/private/etc/paths.d/com.vmware.fusion.public'
sudo rm -rf '/Library/Application Support/VMware/VMware Fusion'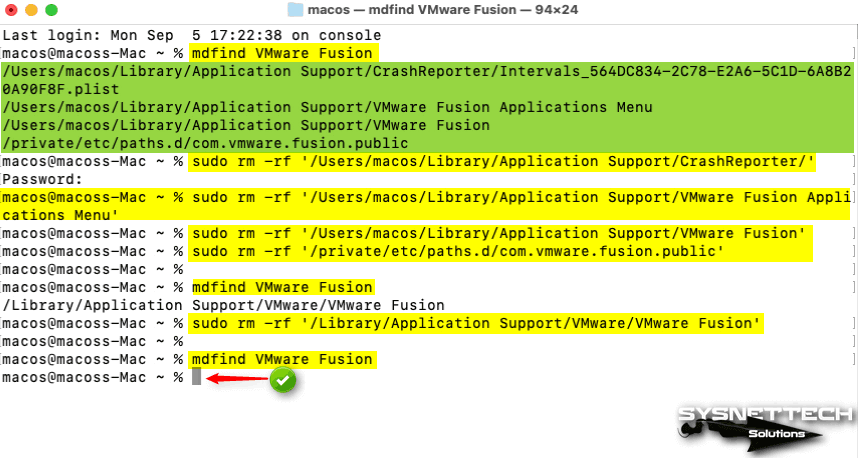
Video
Installing Old Versions
Related Articles
♦ Download macOS High Sierra
♦ Download macOS Sierra
♦ How to Install macOS on Virtual Machine with VMware
♦ How to Install macOS on Virtual Machine with VirtualBox
♦ How to Create a Virtual Machine on Mac

