

Every day, you watch dozens of videos on your phone, your computer, even your TV. Almost all those videos use the same container format. This MP4 digital video file has seeped into every part of your life. But what exactly are you dealing with?
Most people see the MP4 file extension and move on. Yet amazing engineering lies behind the scenes. A single box holds audio, video, subtitles, and metadata. Moreover, you can open this box on almost any device without issues. That is exactly why it became the industry standard.
In 2026, MP4 still holds its throne. New codecs emerge, and artificial intelligence steps in. However, this multimedia container does not give up its place. Let me share all the details of this tech with the latest data.
In this guide, you will find everything from atom structure to codec wars. Also, we will discuss social media optimization and security. Especially on this journey, we will decode the DNA of the video world.
We will touch on new-generation tech like H.265 and AV1. Along with that, we will talk about streaming protocols and web performance. Everything you need to know about this format is in this guide. Let’s begin!
What is MP4? — Basic Definition & Importance
The MP4 format actually carries a more layered answer than you think. Most users think this structure is a video format. However, that is not exactly true. The tech in question is a container format. In other words, it’s a digital box. You can put many data types in it.
Inside this box, video, audio, subtitles, and even still images live together. Besides, the system syncs all this data with timestamps. Therefore, the viewing experience becomes flawless. Also, the MP4 format stores metadata, the information layer.
Today, almost every platform supports this structure. It appears everywhere from YouTube to Instagram, from Netflix to TikTok. This has made it the common language of the digital video world. Even security cameras now use this format.
Official Definition and Standard of MP4
Its official name is MPEG-4 Part 14. Developers define this format with the ISO/IEC 14496-14 standard. The Moving Picture Experts Group published this specification in 2001. Since then, they have updated and expanded it continuously.
This ISO standard does much more than carry video. It holds audio streams, subtitle tracks, and still images. Moreover, you can even store 3D objects and user interaction data. But in practice, we use it most for video and audio.
The standard’s greatest strength is its modular structure. Each component sits in a separate atom or box. This allows us to easily add new codecs. The journey that started with H.264 now reaches AV1. Structural flexibility makes this format immortal.
Why Is MP4 So Widespread?
The first reason is cross-platform compatibility—whether you use Windows, macOS, or Android, the file works smoothly. No matter which device you open it on, the file works smoothly. This broad support makes it vital.
The second reason is amazing compression efficiency. You can reduce a high-quality movie to small sizes with almost no loss in image quality. This gives a significant advantage in storage and bandwidth.
The third reason is its perfect integration with streaming technologies. Protocols such as HLS and DASH rely on this container. Therefore, giants such as Netflix and YouTube prefer it. Also, the HTML5 video tag offers direct support.
- Cross-Platform Support: All operating systems and devices play this format.
- High Compression: It provides small file size without sacrificing quality.
- Streaming Compatibility: It works perfectly with HLS, DASH, and fMP4.
- Flexible Codec Support: We can use H.264, H.265, and AV1 in this container.
- Rich Metadata: It can carry subtitles, cover art, and location information.
MP4 File Structure — What’s Inside an MP4?
You can compare this file to a matryoshka doll. From the outside, it looks like a single file. But when you open it, you encounter layer upon layer of data. Each layer takes on a specific task and communicates with the others.
We call the basic building block “atom” or “box”. These atoms are in a hierarchical order. Some specify the file type, others carry media data. Also, these atoms store indexing and timing information.
Thanks to this modular architecture, players quickly parse the structure. First, they read the structural atoms, then move to media data. This is critical for fast startup, mainly on the web. Now let’s look at these atoms more closely.
What Are Atoms and Boxes?
Each atom starts with a header made of four parts. The first four bytes tell the atom’s size. The next four bytes specify the atom type. For example, “ftyp” defines the file type, and “moov” defines the movie metadata.
Some atoms can contain other atoms. We call these container atoms. The “moov” atom is exactly such a structure. It holds timing, track information, and codec definitions. The player follows this hierarchy to decode the media.
They designed the atom structure to be extensible. When you want to add a new feature, you define a new atom type. Old players skip atoms they don’t recognize. This way, backward compatibility never breaks. Isn’t that really clever engineering?
Root-Level Atoms: ftyp, moov, mdat, and Others
At the top level of the file, there are four critical atoms. The “ftyp” atom specifies the file type and compatibility brands. The player recognizes the file by reading this atom. It also learns which specifications it complies with from here.
The “moov” atom stores all the movie’s metadata. Duration, track count, codec information — all are here. Also, timestamp and sync data reside in this atom. For web fast start, we move this atom to the beginning of the file.
The “mdat” atom contains raw media data. Video frames and audio samples are here. This atom makes up most of the file. In some cases, you may also see auxiliary atoms such as “free” or “skip”.
Metadata and Media Data Distinction
Metadata is like the file’s ID card. Creation date, codec information, geographic location all reside here. Also, camera model and shooting settings are stored in metadata. This information guides the media player.
Media data, on the other hand, is the raw part. Compressed video frames and audio samples are here. Additionally, you can store subtitle texts as media data. Clear lines separate these two layers.
This distinction is also critical for performance. The player first reads the metadata, then moves to the media. If metadata sits at the end of the file, the video starts late. For this reason, developers move the moov atom to the beginning for web videos.
Historical Development of MP4 — From 1999 to 2026
The birth of this format actually started as part of the MPEG-4 standard. They took the first steps in 1999. Back then, nobody could have predicted its dominance today. But they laid its foundations very solidly.
QuickTime’s .mov structure inspired this format. Apple engineers actively participated in the MPEG-4 development process. As a result, a hybrid structure emerged. Thanks to this marriage, they offered flexibility and compatibility together.
Over time, the addition of H.264 codec triggered an explosion. Then, new-generation codecs such as H.265 and AV1 arrived. Each update made the MP4 format even stronger. Now let’s examine this journey step by step.
| Year | MP4 Development | Importance |
|---|---|---|
| 1999 | MPEG-4 Part 1 approved | Foundations laid |
| 2001 | MPEG-4 Part 14 published | First official specification |
| 2003 | H.264 codec added | Golden age began |
| 2013 | H.265 (HEVC) support | 4K and 8K became possible |
| 2018 | AV1 codec integrated | Royalty-free future started |
| 2026 | AI-assisted coding | Peak quality and efficiency |
HDTV standards define 720p and 1080p broadcasts. Today, 4K UHD is becoming widespread. MP4 carries these high resolutions without issues. In short, high-resolution TV formats affect your video codec choice.
1999: MPEG-4 Part 1 and the First MP4
They approved the first part of the MPEG-4 standard in 1999. This part defined the system architecture and basic building blocks. The main goal was to deliver quality video at low bandwidth. Also, the idea of interactive content existed in this standard.
The first version was quite modest. It included video objects, audio objects, and scene descriptions. However, the file format had not yet taken its current form. Still, the basic atom structure and hierarchical architecture took shape in those days.
The biggest shortcoming was the lack of widespread codec support. Also, hardware compatibility was quite limited. Despite this, the standard became a door to the multimedia world of the future. In fact, we still go through that door today.
In the early 2000s, DivX was a popular video codec. This MPEG-4 Part 2-based compression shrank files considerably. It reshaped movie sharing.
2001-2003: QuickTime Base and MP4 Version 2
In 2001, they officially published MPEG-4 Part 14. They based it on Apple’s QuickTime file structure. This decision completely changed the format’s fate because QuickTime was already a mature and tested infrastructure.
The second version arrived in 2003. With this version, they added H.264 codec support. Also, AAC audio codec became standard. This duo became the driving force that started the format’s golden age. iPods and early smartphones adopted these codecs.
Thanks to the QuickTime base, they always kept similarities with .mov. Even today, a structural kinship exists between the two formats. However, the MP4 format went beyond the Apple ecosystem and became universal. This became the biggest feature that set it apart from rivals.
2004-Present: ISO Base Media File Format and Evolution
In 2004, they defined the ISO Base Media File Format. They built many formats on this abstract base. The container in question also rose on this foundation. Additionally, formats like .mov, .3gp, and .mj2 use the same base.
After 2008, a big explosion occurred with YouTube’s switch to H.264. Platforms began serving billions of videos in MP4 format. In 2013, they added H.265 (HEVC) support. In 2018, they officially started supporting AV1 codec. Each step made the format even stronger.
In 2026, we now use it with AI-assisted coding tools. The fragmented structure has become standard in live broadcasts.
It also smoothly supports technologies such as HDR and Dolby Vision. This evolution seems to continue without slowing down.
MP4 Codecs — H.264, H.265, AAC, and AV1
Codec choice forms the heart of the MP4 format. Different codecs can work together in the same file. You choose a separate codec for video and audio. Also, you can use special formats for subtitles and metadata.
Four main video codecs stand out in the market. H.264 is still the most common. H.265 is ideal for 4K and above. AV1 represents the royalty-free future. On the audio side, AAC is by far the leader. Now let’s lay out these codecs one by one.
Remember that codec and container are different things. The container format carries data, while the codec compresses it. Understanding this distinction is key to grasping the video world. Also, learning the basics of codec technology gives you a significant advantage.
H.264 (AVC) — The Most Common Codec
They introduced H.264, also known as Advanced Video Coding, in 2003. Since then, it has been the undisputed king of the video world. Almost every device supports this codec at the hardware level. It works everywhere from your smartphone to your game console.
H.264 offers a perfect compression-quality balance. It creates files half the size of MPEG-2 at the same quality. Also, thanks to hardware-accelerated decoding support, it uses battery efficiently. This is a critical advantage for mobile devices.
Thanks to different profiles, it adapts to every scenario. Baseline profile is for low-power devices. High profile offers broadcast and archive quality. I generally recommend using High Profile in the MP4 format. In short, it is both high quality and compatible.
H.265 (HEVC) — New Generation for 4K and 8K
HEVC stands for High Efficiency Video Coding. They standardized it in 2013. It provides 50% more compression than H.264 at the same quality. This is vital for 4K and 8K content. Also, it offers HDR and wide color gamut support.
However, H.265 has a disadvantage. Its patent situation is quite complex and expensive. Three different patent pools demand license fees. Because of this, some browsers and platforms delayed support. Still, hardware support is gradually spreading.
Today, most 4K TVs and smartphones can decode HEVC. Also, you can play files encoded with this codec without issues. We especially prefer it for archiving and high-resolution broadcasts. Cutting file size in half while keeping quality is truly fascinating.
Audio Codecs: AAC, MP3, ALAC, Opus
On the audio side, AAC is the undisputed leader. They developed Advanced Audio Coding as the successor to MP3. It offers better quality sound than MP3 at the same bit rate. Also, it has multi-channel surround sound support.
You can still use MP3 in the MP4 format. However, it falls behind AAC in efficiency. Still, you may prefer it for broad compatibility. Especially if you deal with old devices, MP3 is safer.
Opus codec, on the other hand, is a new-generation alternative. Especially at low bit rates, it shows incredible performance. You can choose ALAC (Apple Lossless) for lossless audio. The MP4 format also supports LPCM. Options are plenty; the decision is yours.
- AAC: The most common audio codec, offers high efficiency and quality.
- MP3: Old but still compatible and usable.
- Opus: Gives the best sound performance at low bit rates.
- ALAC: Apple codec preferred for lossless audio.
- LPCM: Experts generally prefer the uncompressed audio format in professional applications.
AV1 — The Royalty-Free Future Codec
We know AOMedia Video 1 briefly as AV1. The Alliance for Open Media officially released this format in 2018. Its biggest advantage is being completely royalty-free. Giants such as Google, Netflix, Amazon, and Apple back this codec.
AV1 offers 30% more efficient compression than HEVC. You get smaller files at the same quality. Moreover, you can use it without paying any patent fees. YouTube and Netflix are already switching to AV1. In 2026, this transition continues to accelerate.
Hardware support has also become widespread now. New-generation processors and graphics cards can decode AV1. Also, software-based decoding performance is quite good. This codec works in perfect harmony with MP4. The future is definitely in AV1.
MP4 and Streaming Technologies — fMP4, HLS, DASH
Streaming technologies have radically changed our video consumption habits. We now start watching before the file fully downloads. Complex protocols and formats work behind this experience. Therefore, MP4 sits at the very center of this ecosystem.
The traditional structure was not very suitable for streaming because metadata usually sat at the end of the file. The whole file had to download before playback began. Luckily, fragmented MP4 solved this problem. Now let’s dive into the details.
What Is fMP4 (Fragmented MP4)?
Fragmented MP4 is the standard structure split into pieces. Normally, the moov atom covers the entire media duration. In fMP4, the media is divided into short segments. So each segment has its own mini moov information.
Thanks to this structure, the player takes one segment and starts playback right away. At the same time, it downloads the next segments in the background. This way, you get a seamless viewing experience. Also, instant switching between quality levels becomes possible.
In live broadcasts, the fragmented structure is indispensable. The camera captures the image, and the encoder divides it into segments. Each segment uploads to the server instantly. The viewer follows the broadcast almost in real time. Without this tech, you cannot even imagine platforms such as Twitch or YouTube Live.
HLS (HTTP Live Streaming) and MP4
Apple’s HLS protocol is now the industry standard. Initially, it used only TS segments. But in recent years, developers have also supported fragmented MP4 segments. This was a significant step for quality and compatibility.
HLS adjusts quality based on your connection speed, thanks to adaptive bitrate. When your internet slows, it switches to lower resolution. When the connection improves, it automatically raises the quality. All this happens in the background without you noticing.
MP4 format works in perfect harmony with HLS. fMP4 segments, especially, are both light and high-quality. Also, they are ideal for CDN distribution. This way, users worldwide access the content at the same quality.
MPEG-DASH and Adaptive Bitrate Streaming
DASH is an open standard developed by MPEG. Its difference from HLS is being codec and container agnostic. That is, whether you use this container or WebM, it doesn’t matter. In fact, DASH supports them all and gives you freedom.
Adaptive bitrate is the core feature of this protocol. You can prepare the same content at different quality levels. The player selects the most suitable quality based on the current bandwidth. Thus, you almost completely prevent freezing and stuttering issues.
Giant platforms such as Netflix and YouTube use DASH-like technologies. Although they make their own custom adaptations, the basic principle is the same. The media container in question works smoothly with this protocol. Therefore, it remains the top choice in professional broadcasting.
MP4 Comparison — Which Format to Use When?

Dozens of container formats circulate in the video world. Each has its strengths and weaknesses. Choosing the right format directly affects your workflow. A wrong choice leads to incompatibility and performance issues.
In this section, I will compare the most popular alternatives. I’ll put MKV, MOV, WEBM, and AVI side by side with this format. I’ll clearly explain which one you should pick for which scenario. Also, I’ll share my personal experiences with you.
MP4 vs MKV — Which Format for Which Purpose?
MKV (Matroska) is an open source and extremely flexible container. It can take almost any codec and data type. It even supports menu structures and chapter markers. However, hardware support is limited.
MP4 format, on the other hand, is unrivaled in hardware compatibility. Your smart TV, game console, and phone open it. MKV generally stays limited to computers and media players. Therefore, MP4 is better for daily use and sharing.
When it comes to archiving, MKV stands out. It manages multiple audio tracks, subtitles, and extra data layers better. Also, its ability to tolerate corrupted files is high. If you build a movie collection, MKV is the right choice; for daily sharing, MP4 is the better option.
| Feature | MP4 | MKV |
|---|---|---|
| Hardware Support | Very High | Medium |
| Codec Flexibility | High | Very High |
| Multi-Subtitle | Supports | Excellent Support |
| Streaming Compatibility | Excellent | Limited |
| Web Support | Native | None |
MP4 vs MOV — Apple Ecosystem and Universal Use
MOV is the container format Apple developed for QuickTime. Structurally, it is almost a twin to this format. Both use the same atom structure and the same codecs. However, MOV is more tightly tied to the Apple world.
In professional video editing, MOV is still common. Especially with ProRes codec, we use it as an editing format. But the web and mobile devices are not always compatible with MOV. So for final output, MP4 is a better choice.
If you’re an Apple user, MOV won’t cause you trouble. But if you send the file to a Windows or Android user, MP4 is safer. Also, MP4 has the advantage in file size and streaming performance. I suggest using MOV in the editing phase and MP4 for distribution.
MP4 vs WEBM — Web Performance and SEO
WebM is an open source container developed by Google for the web. It works with VP8, VP9, and AV1 codecs. It is especially ideal for background videos on websites. Also, its royalty-free nature offers a cost advantage.
However, WebM’s biggest problem is limited hardware support. iOS devices cannot play WebM directly. This means losing half of mobile users. Therefore, you need to offer both formats on your website.
For SEO, using MP4 with the HTML5 video tag is safer. Search engines process this format much better. Also, social media platforms prefer MP4 over WebM. For web videos, MP4 should be the main format and WebM the alternative.
MP4 vs AVI — Old and New Generation
AVI is an old container introduced by Microsoft in 1992. It was revolutionary for its time but is now outdated. It does not support modern codecs and streaming technologies. Also, file size management is quite poor.
There is a world of difference between AVI and MP4 format. MP4 offers much more efficient compression and better quality. Also, AVI lacks subtitle and multi-audio track support. There is no valid reason left to use AVI anymore.
Still, you may encounter AVI in old security camera recordings or archives. In that case, I suggest converting the file to MP4. You save space and solve compatibility issues. FFmpeg is a great tool for conversion.
How to Open, Play, and Convert MP4 Files
Opening the MP4 format is generally very easy. Most operating systems support it with a built-in player. On Windows, Media Player comes ready; on macOS, QuickTime comes ready. Android and iOS play it directly via the gallery app.
But sometimes codec mismatch can cause trouble. Especially files encoded with H.265 or AV1 may not open on old systems. In that case, you need to install a third-party player. Also, a missing codec pack causes similar issues.
Conversion, on the other hand, is a whole different world. From online tools to professional software, many options exist. Now let’s address all these topics step by step. Also, I’ll share my own favorite tools with you.
Which Programs Open MP4 Files?
VLC Media Player is a free and powerful option on every platform. It carries its own codecs and requires no extra setup. It even has the ability to play corrupted files.
For Windows users, Media Player Classic and PotPlayer are also great. On the macOS side, modern players such as IINA and Infuse stand out. On mobile devices, MX Player and VLC for Mobile are effective. All are free and offer high performance.
Browsers can now also play this format directly. Chrome, Firefox, Safari, and Edge work smoothly with the HTML5 video tag. So most of the time, you don’t need extra software. But if you get a codec error, VLC always becomes your savior.
- VLC Media Player: The most reliable free player on all platforms.
- PotPlayer: Offers advanced features on Windows.
- IINA: A stylish and modern playback experience for macOS users.
- MX Player: Ideal for hardware-accelerated playback on Android.
- Browsers: Chrome, Safari, and Edge play without plugins.
How to Convert MP4 Files
The tool I trust most for conversion is FFmpeg. It runs on the command line but is incredibly powerful. With a single command, you change codec, resolution, and bit rate. You can also do batch conversion and automation.
If you prefer a graphical interface, I suggest HandBrake. It is free, open source, and extremely user-friendly. Thanks to ready presets, you pick the right settings for your device in one click. Also, with the queue system, it processes multiple files in order.
Online converters are ideal for emergencies. Tools such as CloudConvert and Convertio work from the browser. But they aren’t very suitable for large files. Also, you should be careful about privacy. Don’t upload sensitive videos to cloud-based converters.
- Download and install FFmpeg from its official site. Then access the command line.
- Define the target format and codec:
ffmpeg -i source.mp4 -c:v libx264 -c:a aac target.mp4 - Add bit rate and resolution:
-b:v 5M -s 1920x1080parameters. - For batch processing, select all files in a folder and run with a loop.
- Check the output quality and fine-tune with CRF value if needed.
Extracting MP3 Audio from MP4
Sometimes you only want the audio from a video. It could be a conference recording or a music video. With FFmpeg, you accomplish this task with a single command. In short, quality control is entirely in your hands.
Typing ffmpeg -i video.mp4 -q:a 0 -map a audio.mp3 on the command line is enough. This command extracts MP3 at the highest quality. You can also cut and take a specific time range. You can choose AAC or Opus as the audio codec too.
For those who love graphical interfaces, VLC’s conversion feature also works. Use the Convert/Save option from the Media menu. Choose MP3 as the audio profile and save. Also, audio editing software such as Audacity can do this. All are free and effective.
- Open VLC and click “Convert/Save” from the “Media” menu.
- Add the source MP4 file and press the “Convert” button.
- Select “Audio – MP3” as the profile.
- Specify the target file path and start the process.
- Test the output MP3 file in an audio player.
How to Reduce MP4 File Size — Compression Guide
File size is always a critical topic. Small size is a must, especially for websites and email attachments. But you also want to preserve quality. To strike this balance, you need to know the right compression settings.
You can compress in two ways. The first is lossy compression at the codec level. The second is cleaning inefficient data at the container level. If you use both methods correctly, you get great results.
Remember that MP4 format uses lossy compression. So as you compress, you lose some quality. But with the right settings, you reduce this loss to an almost invisible level. That’s exactly why the bitrate setting is very important.
What Is Bitrate and How to Adjust It?
Bitrate refers to the amount of data processed per second. We use Mbps or Kbps as the unit. High bitrate means a higher quality image. But the file size increases at the same rate.
For a 1080p video, 8-12 Mbps is ideal. For 4K content, I suggest the 35-45 Mbps range. But for social media, much lower values suffice. Plus, Instagram gives very good results at 3.5 Mbps.
There are three main methods in bitrate control. Constant bitrate (CBR) is simple but inefficient. Variable bitrate (VBR) optimizes quality. CRF, on the other hand, strikes the best balance with a constant quality factor. I especially recommend using VBR or CRF for professional work.
Two-Pass Encoding
Two-pass encoding finds the most efficient compression by processing the video twice. In the first pass, the system analyzes the video and creates a complexity map. In the second pass, it smartly distributes the bitrate according to this map. As a result, you get better quality at the same size.
This method gives great results, especially when combined with VBR. Complex scenes get more bits, static scenes fewer. However, the encoding time doubles. Still, this sacrifice is worth it for quality.
In FFmpeg, you use -pass 1 and -pass 2 parameters for two-pass encoding. HandBrake offers this feature via the graphical interface. If you are patient and want the best quality, definitely try this method. It is my indispensable tool in archiving projects.
- For the first pass:
ffmpeg -i source.mp4 -c:v libx264 -b:v 5M -pass 1 -f mp4 NUL - For the second pass:
ffmpeg -i source.mp4 -c:v libx264 -b:v 5M -pass 2 target.mp4 - In HandBrake, check the “2-Pass Encoding” box under the “Video” tab.
- Target the bitrate and start encoding.
- Review the output file and optimize the bitrate if needed.
Quality Control with CRF (Constant Rate Factor)
CRF stands for Constant Rate Factor. Instead of targeting bitrate, you target a quality level. The encoder automatically adjusts the needed rate to maintain this quality. This way, every scene gets the rate it deserves.
In the x264 encoder, the CRF value ranges from 0 to 51. 0 is lossless, 51 is the lowest quality. Values between 18 and 23 are visually near lossless. I generally use the 20-22 range and am very pleased.
A similar CRF logic applies to x265 and AV1. However, the value ranges differ. For example, the 24-28 range gives good results in x265. When using CRF, predicting the final file size is difficult. But it is the best method for quality consistency.
MP4 and Social Media — Optimization for YouTube, Instagram, TikTok

Each social media platform has its own unique needs. The platform recompresses your video if you upload with wrong settings. This means quality loss and a blurry image. If you know the right settings, you avoid this trouble.
I closely follow the specifications each platform recommends because algorithms change and update constantly. In 2026, this change has accelerated even more. Now I will tell you the most up-to-date settings platform by platform.
Best MP4 Settings for YouTube
YouTube re-encodes your uploaded video in any case. Therefore, you need to upload the highest quality source file. Use H.264 High Profile as the codec. Also, keep the frame rate at its original value.
Be generous with the bitrate. I suggest 15 Mbps for 1080p and 53-68 Mbps for 4K. YouTube processes this high rate to create efficient versions. AAC-LC 384 Kbps is ideal as the audio codec. With these settings, you get the best result.
Don’t forget to optimize your file for progressive download. If the moov atom is at the front, YouTube’s processing time shortens. The -movflags +faststart parameter in FFmpeg handles this job. Also, understanding the basics of streaming technology helps you with YouTube optimization.
| Resolution | Video Bitrate (Mbps) | Audio Bitrate (Kbps) | Codec |
|---|---|---|---|
| 1080p 30fps | 15 | 384 | H.264 High Profile |
| 1080p 60fps | 20 | 384 | H.264 High Profile |
| 4K 30fps | 53 | 384 | H.264 High Profile |
| 4K 60fps | 68 | 384 | H.265 or AV1 |
MP4 Optimization for Instagram Reels and TikTok
Instagram and TikTok want vertical video format. 1080×1920 pixels is the standard resolution. 30 fps is enough; 60 fps wastes unnecessary bandwidth. Also, these platforms are quite sensitive about file size.
Target the 3.5-5 Mbps range for bitrate. Otherwise, the platform detects higher rates and recompresses your video. Use H.264 High Profile as the codec; avoid H.265 for now. AAC 128 Kbps is more than enough for audio.
Instagram’s video compression algorithm is quite aggressive. Therefore, make your source file as clean as possible. Strip unnecessary color profiles and metadata. Also, transfer the file to your phone via cable; don’t send it through WhatsApp. Especially WhatsApp lowers quality and wastes all your effort.
- Create a new project at 1080×1920 resolution.
- Choose 30 fps frame rate and H.264 codec.
- Set the bitrate to 4 Mbps and audio bitrate to 128 Kbps.
- Use “High” as profile and “4.1” as level.
- Check “Web Optimized” to move the moov atom to the front.
Website MP4 Optimization and Core Web Vitals
Using video on your website is great for SEO and user experience. However, wrong optimization ruins your page speed. Your Core Web Vitals scores drop, and your ranking falls. Therefore, you must pay extra attention to web videos.
First, move the moov atom to the front. This way, the video starts playing immediately. Then, load the video only when visible with lazy loading. Also, use a poster image with the HTML5 video tag. This positively affects your LCP score.
720p and 2-3 Mbps are enough for background videos. Also, mute or completely remove the audio. Serve the file as both MP4 and WebM. This way, it works smoothly in all browsers. Using a CDN also seriously increases your loading speed.
- Convert the video to 720p resolution and H.264 codec.
- Limit bitrate to 2.5 Mbps and remove the audio track.
- Move the moov atom to the front with the
-movflags +faststartparameter. - Add
preload="metadata"andloading="lazy"to the HTML5 video tag. - Create a WebM version of the same video and serve it with
.
MP4 Troubleshooting — Common Errors and Solutions

Nothing is as annoying as video playback issues, especially if it’s an important file and you need to watch it urgently. Codec mismatch, broken index, or missing atom structure is a common problem. Luckily, most have a simple solution.
Over the years, I have dealt with hundreds of broken video files. Sometimes it was a wedding video, sometimes a critical business recording. Based on my experience, I compiled the most common errors and their solutions.
Why Won’t an MP4 File Open? — Codec Incompatibility
The most common cause is a missing codec. Especially files encoded with H.265 or AV1 may not open on old systems. Your operating system doesn’t recognize the codec and gives an error. Installing VLC Media Player is enough for the solution.
The second cause is a broken file structure. The download may have been interrupted or the storage unit may have failed. In this case, you need to repair the file. The ffmpeg -i broken.mp4 -c copy fixed.mp4 command in FFmpeg often works.
The third cause could be DRM protection. Some platforms protect their videos by encrypting them. Users can only open these files in authorized applications. If you legally purchased the content, you must use the relevant platform’s player. Otherwise, you cannot access it.
- Try opening the file with VLC; VLC uses its own codecs.
- If it doesn’t work, install K-Lite Codec Pack and restart the system.
- Check which codec the file uses with MediaInfo.
- If the codec is incompatible, convert to H.264 format with HandBrake.
- For DRM-protected files, use only the authorized player.
Audio but No Video Error in MP4
This error usually stems from the video codec not being recognized. The player can decode the audio codec but not the video codec. As a result, you only hear the sound and see no image. Installing a missing codec pack generally solves it.
You can fix the issue by installing K-Lite Codec Pack or VLC. Also, updating your graphics card drivers helps. Sometimes hardware acceleration settings cause this error too. Turn off this setting in your player and try again.
If the problem persists, try converting the file. Converting to H.264 format with HandBrake often provides a definitive solution. This process re-encodes the video and removes all incompatibilities. However, you may experience some quality loss during conversion.
- In VLC, go to the “Video” tab in the toolbar.
- Check the “Disable hardware acceleration” option.
- Restart and play the video again.
- If there’s still no image, convert to H.264 format with HandBrake.
- Test the converted file in a different player.
How to Repair a Corrupted MP4 File
A corrupted video file can be a complete nightmare, especially if you didn’t back it up and it’s an important memory. Luckily, in most cases, the data still sits inside the file. Only the index structure or atom headers are damaged.
As a first step, try FFmpeg’s copy mode. This mode doesn’t re-encode the video; it just repairs the structure. Start with the command ffmpeg -i broken.mp4 -c copy -map 0 fixed.mp4. This simple step often solves the problem.
More serious damage requires special repair tools. Software such as Treasured, Stellar Repair, and Remo Repair are effective. But they are paid. As a free alternative, you can also try open source tools such as MP4Box or recover_mp4. Despite everything, regular backup is the best solution.
- First, take a backup: Copy the original file and put it somewhere safe.
- Repair with FFmpeg:
ffmpeg -i broken.mp4 -c copy -map 0 fixed.mp4 - If it doesn’t work, use MP4Box:
mp4box -raw 1 broken.mp4to extract raw data. - Try the recover_mp4 tool:
recover_mp4 broken.mp4 fixed.mp4 - As a last resort, use a paid repair software (Stellar Repair).
MP4 and Security — Viruses, Steganography, and DRM

Video files look innocent but can carry security risks. Malicious actors can hide harmful code inside the file. Also, your personal information can leak through metadata. Now I will cover the security topic from all angles.
Understanding the concept of a computer virus helps you grasp this section better. Also, knowing the types of malware makes you a conscious user. Now let’s focus specifically on risks in video files.
Can an MP4 File Carry a Virus?
The short answer is yes, but not directly. The video file itself does not contain executable code. So when you double-click the file, the virus doesn’t infect automatically. However, it can sneak into your system through a vulnerability in the player software.
Malicious code can be hidden inside the video via steganography. Attackers hide this code in video pixels or metadata fields. Special software extracts and runs this hidden code. This is quite a sophisticated attack method.
To protect yourself, keep your players updated. Also, don’t download videos from sources you don’t trust. Regularly update your antivirus software and scan. Test suspicious files in a virtual machine or online scanners.
- Download from trusted sources: Prefer official platforms.
- Use an up-to-date antivirus: Auto-scan all downloaded files.
- Update the player: Install the latest versions of VLC and other players.
- Clean metadata: Delete suspicious metadata with ExifTool.
- Test in a virtual machine: Open the suspicious file in an isolated environment.
MP4 and DRM (Digital Rights Management)
DRM is a protection system that prevents unauthorized use of digital content. Platforms such as Netflix, Amazon Prime, and Disney+ use DRM. Widevine, PlayReady, and FairPlay are the most common DRM technologies. These systems encrypt the video and open it only in authorized players.
You cannot copy or convert a DRM-protected file. The system pulls the decryption key instantly from the server. Along with this, the system also blocks screenshot attempts. This strict protection is to protect the rights of content creators.
Breaking the DRM of legally purchased content is a crime. Also, it carries heavy criminal penalties in most countries. If you want to protect your own content, DRM solutions are available. But these solutions are generally expensive and complex.
MP4 Metadata and Privacy Risks
Every video file carries an invisible information packet alongside it. This metadata can contain sensitive information such as shooting date, location, and camera model. Malicious actors can even detect your home address from a video you share on social media. This is a serious privacy risk.
Make sure to clean metadata before sharing. You can delete this information with ExifTool or FFmpeg. Also, most social media platforms automatically clean metadata during upload. Still, I suggest you manually delete it to avoid risk.
MediaInfo is a great tool for reading metadata. You can also access some information by right-clicking the file and checking properties. But for full details, you should use MediaInfo or FFprobe. Before sharing, do a quick check with these tools and clean sensitive data.
- Download and install ExifTool.
- Type
exiftool -all= video.mp4on the command line and run it. - To verify cleaning, check again with
exiftool video.mp4. - You can also use FFmpeg:
ffmpeg -i video.mp4 -map_metadata -1 output.mp4 - Before sharing, make sure the metadata is truly deleted with MediaInfo.
The Future of MP4 — AI, AV1, & Beyond

Video technology is developing at an incredible speed. AI touches everything from codecs to quality enhancement. The MP4 format is also taking its share of this change. My predictions for 2026 and beyond are quite exciting.
As AV1 codec becomes widespread, file sizes will shrink even more. Old videos will gain 4K quality with AI-powered upscaling. Also, hardware acceleration support has reached mobile devices. The future looks really bright.
AI Upscaling MP4 Quality
Thanks to AI video upscaling algorithms, you can bring low-resolution videos to high resolution. This process is not a simple enlargement. AI predicts missing pixels and adds realistic details. As a result, a 480p video approaches 1080p or even 4K quality.
Topaz Video AI and NVIDIA RTX Video Super Resolution stand out in this area. These tools use GPU power to perform real-time improvement. You can also use AI upscaling plugins with FFmpeg. It is a great technology to revive your old family videos.
But remember that AI upscaling has limits. Don’t expect a miracle from a very low-quality source. Still, the results are truly impressive and improve every day. This technology is a candidate to revolutionize video archiving.
- Download and install Topaz Video AI software.
- Import the low-resolution source file into the program.
- Select the AI model: “Proteus” or “Gaia” models are ideal.
- Set the target resolution and frame rate (e.g., 1080p to 4K).
- Preview and start the process; save the output as MP4.
AV1 Codec and the Future of MP4
AV1 codec works in perfect harmony with the MP4 format. Thanks to its royalty-free nature, all platforms are adopting it. Netflix and YouTube have already switched to AV1. By 2026, most new devices come with hardware AV1 support.
AV1’s biggest advantage is its efficiency. It creates files 30% smaller than HEVC and 50% smaller than H.264 at the same quality. This both lowers storage costs and increases streaming quality. Also, being an open source video codec encourages community contribution.
In the future, I expect AV1 to become the default codec for MP4 format. You can still use H.264 for compatibility, but your primary choice should be AV1. This transition will continue to accelerate between 2026 and 2028. I strongly advise you to prepare yourself for this change.
MP4 in 2026 and Beyond — What Will Change?
MP4 format’s lifespan is still very long. By its nature, it easily adapts to new codecs and technologies. As 8K and higher resolutions become common, codec efficiency will gain even more importance. Luckily, AV1 and beyond will meet this need.
Developers will also deliver augmented reality and virtual reality content via MP4 format. Thanks to the fragmented structure, interactive and multi-angle videos will become possible. Also, cloud-based video editing and AI integration will deepen.
In short, this format will keep its throne for the next decade. New rivals may emerge, but no one can easily overcome the power of the existing ecosystem. You can continue to use this standard with confidence in your projects. MP4 will continue to shape the future.
MP4 and Special Use Cases — CCTV, Medicine, Education, Gaming

People don’t use MP4 format only for entertainment. It plays a critical role in industrial and professional applications too. Security cameras, medical imaging, and education platforms all prefer this format. Now let’s examine these special use cases.
Each sector has its own unique needs and challenges. MP4 adapts to all thanks to its flexible structure. Also, broad hardware support is vital for industrial applications. Let’s look at the details together.
MP4 Use in CCTV and Security Cameras
Modern security cameras widely use this format. Systems generally encode the IP camera recording file with H.264 or H.265 codec. Efficient compression is essential for continuously recording systems. Also, the fragmented structure provides fast access during an incident.
DVR and NVR devices support MP4 as standard. The system stores recordings with timestamps. So you can easily search these records. Moreover, the system embeds smart features such as motion detection as metadata. This greatly eases the work of security personnel.
For long-term storage of CCTV recordings, H.265 codec is ideal. It takes up half the space of H.264 at the same quality. Also, AV1 codec is slowly finding its place in this area. Moreover, storage costs are dropping significantly.
- Select H.265 codec and 15 fps from the camera settings.
- Set the resolution to 1080p or 4K as needed.
- Activate metadata embedding for motion-detected recording.
- Regularly archive your recordings in MP4 format.
- Plan conversion to AV1 codec for long-term storage.
MP4 in Medicine and Education
High quality and accuracy are essential in medical imaging. Ultrasound, endoscopy, and surgical recordings are stored in MP4 format. Medical professionals prefer lossless or high-bitrate compression because every pixel can be critical for a medical decision.
In the education sector, the universality of this format stands out. Students access lecture videos from different devices. To avoid compatibility issues, MP4 is the safest choice. Also, subtitle support offers a significant advantage for accessibility.
Distance learning platforms use adaptive bitrate technology. Quality adjusts automatically based on the student’s internet speed. This way, they provide a seamless learning experience. Also, they keep lecture recordings quickly accessible via the fragmented structure.
- For medical recordings, use H.264 lossless profile or H.265 10-bit.
- Encode educational videos at 1080p, 30 fps, and 5 Mbps bitrate.
- Embed the SRT file or use soft subtitles to add subtitles.
- For adaptive streaming, do HLS packaging and create fragmented MP4 segments.
- Add an audio description track for accessibility.
MP4 Support on Game Consoles

PlayStation, Xbox, and Nintendo Switch directly support this format. In-game recordings and screenshots are stored in MP4. Also, it is ideal for sharing game clips on social media. Thanks to hardware-accelerated encoding, this process doesn’t lower game performance.
New-generation consoles offer H.265 and AV1 codec support. This way, even 4K 60fps game recordings stay at reasonable sizes. Besides, these new-generation consoles also successfully preserve HDR and wide color gamut. This format has become an indispensable standard for the gaming world.
Cloud gaming platforms also heavily use this technology. The system renders the game image on the server. Then it transmits this image to the player as video. For low latency, efficient codec and fragmented structure are essential. MP4 offers the best solution in this scenario too.
- Select 4K resolution and 60 fps from your console’s recording settings.
- Prefer H.265 or AV1 as the codec (if supported).
- Activate HDR recording and set color depth to 10-bit.
- When sharing clips, use 1080p, H.264, and 30 fps profile for social media.
- For cloud gaming, keep the bitrate between 15-20 Mbps for low latency.
MP4 and Mobile Devices — Android, iPhone Optimization
Mobile devices have become the main platform for video consumption. Most users watch videos on their phones. Therefore, mobile optimization is no longer a luxury but a necessity. Luckily, this format is natively compatible with the mobile world.
However, each mobile operating system has its own quirks. Codec support may differ between Android and iOS. Also, file size and battery consumption are critically important on mobile.
MP4 Playback Issues on Android and Solutions
Android devices generally play this format without issues. But some manufacturers’ custom software may restrict codec support. Especially old Android versions don’t support H.265 and AV1 codecs. In this case, you need to install VLC or MX Player.
Audio codec mismatch is also a common problem. Some devices can’t play certain AAC profiles. The sound may be there but very faint or distorted. For a solution, change the audio codec to MP3 or AAC-LC.
Checking hardware acceleration settings also helps. Sometimes software decoding gives more compatible results. Turn off this option in the player settings and try. Also, keeping your Android version updated increases compatibility.
- Download and install VLC or MX Player from the Play Store.
- Set hardware acceleration to “Disabled” in the player settings.
- For audio codec mismatch, re-encode the file as AAC-LC.
- For video codec issues, use H.264 baseline profile with HandBrake.
- Check your Android version; version 10 and above support AV1 in software.
MP4 Compatibility on iPhone and iPad
Apple devices are in perfect harmony with the MP4 format. iOS and iPadOS support H.264 and H.265 codecs at the hardware level. Also, AAC audio codec works smoothly. You generally don’t need an extra app.
However, AV1 codec support is not yet on all Apple devices. iPhone 15 and later models can decode AV1. For older devices, continue using H.264 or H.265 codec. For example, you usually solve an MP4 playback issue on an iPhone with a new iOS update.
No quality loss occurs when transferring files via AirDrop and iCloud. The Apple ecosystem embraces this format natively. But third-party apps such as WhatsApp may compress the video. To preserve quality, send the file directly or via email.
- For old iPhones, encode the video with H.264 High Profile, Level 4.1.
- For iPhone 15 and later, you can use AV1 or H.265.
- To prevent WhatsApp quality loss, send the file as a document.
- When you transfer via AirDrop, the system fully preserves the file’s original format and quality.
- Activate the “Download Originals” option in iCloud Photos settings.
MP4 File Size Optimization on Mobile Devices
Storage space is limited on mobile devices. Therefore, optimizing file size becomes important. 720p or 1080p is enough as a target resolution because users cannot notice higher resolutions on a mobile screen.
Keep the bitrate in the 2-4 Mbps range. This value offers sufficient quality for mobile screens. Also, by using H.265 codec, you get smaller files at the same quality. 96-128 Kbps is ideal for audio bitrate. With these settings, you save space and extend battery life.
You can use HandBrake’s ready presets for mobile optimization. Also, creating custom mobile profiles with FFmpeg is possible. Knowing the target device’s specs gives the best result. Remember, a small file always performs best on mobile.
- In HandBrake, select “Android” or “iPhone” from the “Preset” menu.
- Limit resolution to 720p or 1080p; set frame rate to 30 fps.
- Choose H.265 (HEVC) as the video codec; set bitrate to 2.5 Mbps.
- Use AAC 96 Kbps as the audio codec.
- Check the “Fast Decode” box in advanced settings and start encoding.
MP4 and Professional Video Editing — Premiere Pro, After Effects Settings

In the professional video editing world, this format’s place is debatable. Editors generally don’t choose this format in the editing phase. Yet, this file is ideal for the final output. Software such as Premiere Pro and After Effects support MP4. With the right settings, you get impressive results.
Editors generally don’t choose this format in the editing phase. Yet, this file is ideal for the final output. Codecs such as ProRes or DNxHD apply less compression. But when the project is complete, MP4 is the most appropriate choice for the final output. Now I will share the best export settings in these software programs.
Best MP4 Export Settings in Premiere Pro
In Premiere Pro, start by selecting the H.264 format. As a preset, “Match Source – High Bitrate” is an ideal start. This preset preserves the source video’s properties and offers high quality. Also, frame rate and resolution match automatically.
I recommend using VBR 2-pass for bitrate encoding. Set the target to 15-20 Mbps for 1080p and 40-60 Mbps for 4K. Make the maximum bitrate 1.5 times the target. Choose AAC 320 Kbps for audio. Also, check “Render at Maximum Depth” and “Use Maximum Render Quality”.
During export, make sure to activate the “Fast Start” or “Web Optimized” option. This option moves the moov atom to the front and speeds up web playback. Finally, check the estimated size before saving. If needed, find the balance by lowering the bitrate slightly.
- In Premiere Pro, follow the path “File > Export > Media”.
- Select “H.264” as the format; use “Match Source – High Bitrate” as the preset.
- Set bitrate encoding to “VBR, 2 Pass” and enter the target rate.
- Check “Use Maximum Render Quality” and “Render at Maximum Depth”.
- Add the “Video > Limiter” effect from the “Effects” tab and start the export.
Exporting MP4 Output from After Effects
After Effects cannot directly export this format. You need to send it to the Media Encoder queue first. Use the “Add to Adobe Media Encoder Queue” option from the Composition menu. Then select H.264 format in Media Encoder.
After Effects projects generally contain motion graphics. For this type of content, you need to keep the bitrate slightly higher. Sharp edges and flat color areas are sensitive to compression artifacts. Target 20-25 Mbps for 1080p. Also, activate the “Render at Maximum Depth” option.
For projects with an alpha channel, MP4 is not directly suitable. In this case, you should use ProRes 4444 or DNxHR. Then you can convert this intermediate file to MP4. This two-step method gives the best result in the After Effects workflow.
- Click “Add to Adobe Media Encoder Queue” from the Composition menu.
- In Media Encoder, set the format to “H.264” and the preset to “High Quality 1080p”.
- In the Video tab, set the bitrate to 25 Mbps, check “Render at Maximum Depth”.
- In the Audio tab, select AAC 320 Kbps and start the queue.
- If alpha channel is needed, first export ProRes 4444, then convert to MP4.
MP4 Is Not a Professional Editing Format — Why and What to Use
MP4 format uses lossy compression. Moreover, developers did not optimize this structure for editing. Not every frame remains independent in the system. On the contrary, software applies interframe compression to the video. This causes the editing software not to decode each frame fully. As a result, performance drops and you lose color accuracy.
For professional editing, use mezzanine formats such as ProRes, DNxHD, or CineForm. These formats do intra-frame compression, and each frame is independent. Also, color depth is 10-bit or higher, and no color subsampling issue occurs. When you finish editing, you take the final output as MP4.
There is also editing software that supports the smart render feature. This feature re-encodes only the changed frames. Still, you should prefer a mezzanine codec as the source format. Remember, MP4 is a distribution format, not a production format.
MP4 and Subtitles — SRT, TTML, Hard and Soft Subtitles
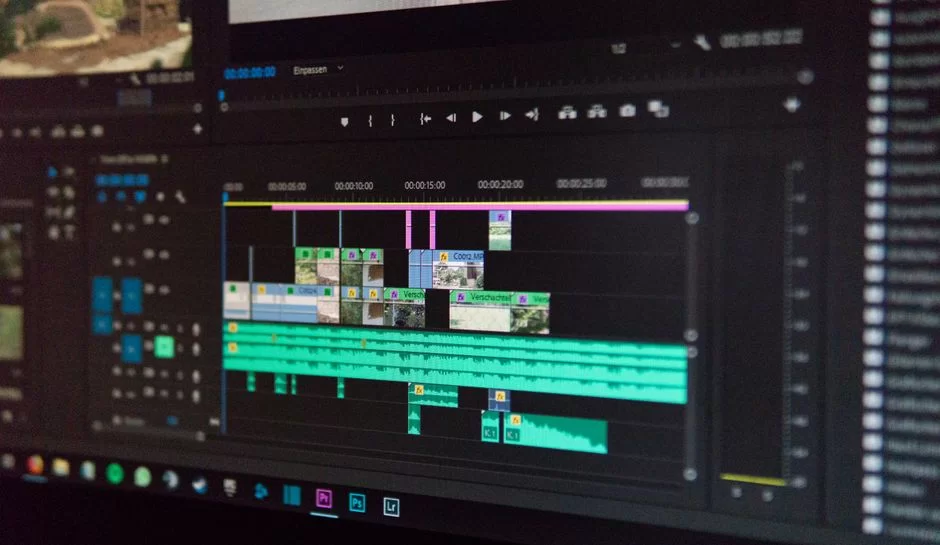
Subtitle support is one of the strengths of the MP4 format. You can carry multiple subtitle tracks in the same file. Also, the user has the freedom to turn subtitles on and off. This is great for accessibility and multilingual content.
There are two types of subtitle insertion methods. You add a soft subtitle as a separate track. Moreover, you can turn off this subtitle anytime you want. You can burn hard subtitles directly onto the image. Therefore, you cannot remove this text from the video. Each has its own unique advantages.
Adding Soft Subtitles to MP4
You can use FFmpeg to add soft subtitles. First, prepare a subtitle file in SRT format. Then run the command ffmpeg -i video.mp4 -i subtitle.srt -c copy -c:s mov_text -map 0 -map 1 output.mp4. This command adds the subtitle without re-encoding the video.
If you want to add multiple languages, use separate -i and -map parameters for each SRT file. Also, add language tags so the player shows the correct name. Modern players such as VLC display these subtitles without issues. The user can choose and watch in any language they want.
The biggest advantage of soft subtitles is flexibility. You can later edit or completely remove the subtitle. Also, its effect on file size is almost negligible. It also finds broad support on web and mobile platforms.
- Prepare your SRT file: Timestamps and text must be correct.
- Run the FFmpeg command:
ffmpeg -i video.mp4 -i subtitle.srt -c copy -c:s mov_text -map 0 -map 1 output.mp4 - For multiple languages, add each SRT with separate
-iand-map. - Add a language tag: e.g.,
-metadata:s:s:0 language=eng. - Test with VLC; select the correct language from the subtitle menu.
Burning Hard Subtitles into MP4
For hard subtitles, you need to re-encode the video. In FFmpeg, use the command ffmpeg -i video.mp4 -vf "subtitles=subtitle.srt" output.mp4. This process directly burns the subtitle onto the image. As a result, you can no longer remove this text from the video. Encoding time varies depending on the video length.
You can also customize the subtitle font, size, and position. With parameters such as subtitles=subtitle.srt:force_style='FontName=Arial,FontSize=24,PrimaryColour=&HFFFFFF', control is in your hands. You can also add a background shadow and outline.
Hard subtitles are ideal for social media videos. Instagram, TikTok, and Twitter don’t have soft subtitle support. On these platforms, hard subtitles are a must for viewers to understand your video. Also, subtitles seriously increase engagement in silently watched videos.
- Put your SRT file in the same folder as the video.
- Run the FFmpeg command:
ffmpeg -i video.mp4 -vf "subtitles=subtitle.srt" output.mp4 - To style:
subtitles=subtitle.srt:force_style='FontSize=20,PrimaryColour=&H00FFFF' - If using HandBrake, import the SRT from the “Subtitle” tab and check “Burn In”.
- Upload the output on the social media platform and check the subtitles.
Difference Between SRT and TTML Subtitle Formats
SRT is the simplest and most common subtitle format. It consists of a sequence number, time range, and text. You can create it with any text editor. However, it lacks style and positioning support.
TTML, on the other hand, is a more advanced XML-based format. It carries style properties like color, font, position, and animation. Professionals prefer it in professional broadcasting and streaming platforms. Also, it is in perfect harmony with MPEG-DASH and HLS.
For simple tasks, SRT is enough and works everywhere. For professional work and branded content, TTML is more suitable. The MP4 format supports both formats. The choice depends entirely on your needs.
| Feature | SRT | TTML |
|---|---|---|
| Style Support | None | Comprehensive |
| File Size | Very Small | Small-Medium |
| Compatibility | Universal | Modern Platforms |
| Ease of Creation | Very Easy | Medium |
MP4 and Patent/Licensing Status — Journey from H.264 to AV1
In the video world, patents and license fees are a significant issue. Especially in commercial projects, these costs can reach serious amounts. H.264 and H.265 codecs are under patent protection. Luckily, a royalty-free future became possible with AV1.
There is no direct license fee for the MP4 format itself. However, the codecs you use inside may require licensing. This situation gains importance, especially in broadcasting and content distribution. Now let’s clarify this complex topic.
H.264 and the MPEG LA Patent Pool
H.264 codec has a patent pool that MPEG LA manages. This pool gathers patents from many companies under one roof. Content creators and broadcasters must pay license fees. However, personal use and free internet broadcasts are generally exempt.
By 2026, MPEG LA is nearing the end of the H.264 licensing program. Some patents have already expired. This makes H.264 even more accessible. Still, it is wise to be careful in commercial use.
For small-scale projects, H.264 license fees are generally not an issue. If you do large-scale distribution, you should evaluate the situation. As an alternative, you can switch to the royalty-free AV1 codec. This switch provides serious savings in the long term.
- Using H.264 in personal projects does not require a license fee.
- In commercial broadcasts, no license fee applies up to 10 million views per year.
- For large-scale distribution, contact MPEG LA.
- Use H.264 features whose patents have expired with up-to-date FFmpeg.
- Plan the switch to AV1 as a long-term strategy.
HEVC (H.265) Patent Status and Complexity
HEVC’s patent status is much more complex than H.264’s. Three separate patent pools demand license fees. MPEG LA, HEVC Advance, and Velos Media do separate licensing. This situation seriously increases costs and creates uncertainty.
This mess is the biggest factor slowing HEVC adoption. Especially browser vendors and small platforms stay away from HEVC. Large players such as Apple and Microsoft offer hardware support, but problems persist on the software side. HEVC’s patent chaos accelerated the birth of AV1.
If you plan to use HEVC in your commercial projects, first research the licensing status. Small-scale uses generally don’t face issues. However, for large distribution and broadcasting, definitely get legal advice. A wrong step can be costly.
AV1 — Royalty-Free Future
AV1 is a royalty-free codec that the Alliance for Open Media developed. Giants such as Google, Netflix, Amazon, Apple, and Microsoft are members of this alliance. The aim was to create a codec free from patent chaos that everyone can use freely. They have largely realized this aim.
You pay no license fees to use AV1, whether as a content creator or a platform operator. This is a significant advantage, especially for startups and independent content creators. Also, its open source nature encourages community contribution and fast development.
By 2026, AV1 hardware support is rapidly becoming widespread. New-generation processors, graphics cards, and mobile chips can decode AV1. AV1 works in perfect harmony with MP4. AV1 is the undisputed leader as the codec of the future.
- AV1 codec is completely free; it is not tied to any patent pool.
- To encode with AV1 in FFmpeg:
ffmpeg -i source.mp4 -c:v libaom-av1 target.mp4 - New-generation GPUs (NVIDIA RTX 40 series, Intel Arc) offer hardware AV1 encoding.
- YouTube and Netflix have started serving AV1 content as a priority.
- I expect AV1 to reach a 70% share in web videos by 2028.
MP4 and HDR — Dolby Vision, HLG, PQ Support
High Dynamic Range (HDR) is a technology that revolutionizes video quality. It offers brighter whites, deeper blacks, and richer colors. MP4 format fully supports HDR technology. It is compatible with standards such as Dolby Vision, HLG, and PQ.
To produce and play HDR content, you need to know the right settings. Color depth, tone mapping, and metadata management are critically important. Also, a compatible display and player are essential. Now let’s open the doors to the HDR world.
What Is HDR in MP4 and How Does It Work?

HDR offers a much wider brightness range than standard video. Normal SDR content stays at 100 nits brightness. HDR, on the other hand, can reach 1000 nits and above. This provides incredible realism, especially in scenes such as sunlight, fire, and explosions.
You need three components for HDR to work. First, an HDR-compatible display is a must. Second, you need a file that carries HDR metadata. Third, you need a player that can read this metadata. MP4 brings these three components together smoothly.
HDR technology uses 10-bit or 12-bit color depth. This feature completely eliminates banding issues by offering billions of colors. Moreover, thanks to the BT.2020 color space, you get much more vibrant tones. As a result, this technology takes your viewing experience to a whole new level.
Dolby Vision and MP4 Compatibility
Dolby Vision is a premium HDR standard that Dolby developed. It uses dynamic metadata to make separate brightness adjustments for each scene. This means scene-based optimization and a more accurate image. Also, it offers the highest quality with 12-bit color depth.
MP4 format is fully compatible with Dolby Vision. It carries the metadata embedded in the video stream. The player reads this data and optimizes the image according to the display’s capabilities. Especially platforms such as Netflix and Apple TV+ use Dolby Vision.
Dolby Vision is a licensed technology and requires a fee. Content creators and device manufacturers pay a license fee to Dolby. However, there is no extra cost for the end user. If you target a premium HDR experience, Dolby Vision is the best choice.
HLG and PQ — Difference Between HDR Standards
HLG (Hybrid Log-Gamma) is an HDR standard that was developed for broadcasting. Its biggest advantage is backward compatibility. The same signal works on both HDR and SDR televisions. This is ideal for live broadcasts and TV channels.
Developers, on the other hand, optimize PQ (Perceptual Quantizer) for cinema and streaming. They designed it according to the human eye’s perception curve. Dolby Vision and HDR10 rely on this curve. It offers higher brightness and more accurate color compared to HLG.
MP4 format supports both standards. HLG is suitable for broadcast and live events; PQ is suitable for cinema and streaming. You need to choose the right standard according to your project’s needs. Also, consider the devices of your target audience.
- Choose HLG standard for live TV broadcasting; it ensures SDR compatibility.
- Prefer PQ (HDR10 or Dolby Vision) for streaming and cinema.
- For HDR encoding in FFmpeg:
-color_primaries bt2020 -color_trc smpte2084 -colorspace bt2020nc - A licensed encoder and compatible player are required for Dolby Vision.
- HLG content automatically displays correctly on SDR screens.
Advanced Reading Resources for MP4
What I explained in this guide is a combination of practical experience and up-to-date information. However, the technical depth of the subject doesn’t end here. For more advanced knowledge, I suggest you examine the authoritative resources below. Each is the most reliable reference in its field.
- ISO/IEC 14496-14:2020 is the official specification of MP4. This document defines all the technical details of the container structure. It is the primary source for professional developers and advanced users.
- The Alliance for Open Media — AV1 page contains all the features of the AV1 codec. It is a great starting point to understand the future of royalty-free video codec. You can also access technical whitepapers from here.
- The ITU-T H.264 Recommendation is the international standard document of the H.264 codec. You can reach all profiles, levels, and technical details of the codec from here. It is an indispensable reference, especially for those interested in video engineering.
The 10 Most Puzzling Questions About MP4 Technology
What is MP4 and what does it do?
What is the difference between MP4 and MP3?
How do you open an MP4 file?
How do I shrink a file without losing quality?
What’s the difference between MP4 and MKV?
Can this file type carry a virus?
What are the best MP4 settings for YouTube?
Which is better when encoding video: H.264 or H.265?
How do you repair a corrupted MP4 file?
What are the advantages and disadvantages of MP4?
Conclusion — Why MP4 Is Still the Best Video Format
You now clearly see why MP4 still holds its throne. Its flexible structure, universal compatibility, and continuous development make it unrivaled. New codecs and technologies strengthen the MP4 format even more.
Behind it still being the best option in 2026 lies solid engineering. Engineers meticulously designed every detail, from the atom structure to codec independence. Also, the massive ecosystem support makes this format indispensable. We, as users and developers, will continue to trust this standard.
In your projects, you can get the best results by using the information in this guide. The right codec choice, bitrate optimization, and platform compatibility are no longer secrets to you. Also, you can make conscious decisions on security and privacy. Now it’s your turn; put what you have learned into practice and produce great videos.
- Pick a codec based on your project’s need: H.264 for compatibility, AV1 for efficiency.
- Target the right bitrate and resolution; check platform requirements.
- Always move the moov atom to the front and use the fast start feature.
- Clean metadata and run a security scan before sharing.
- Follow new technologies; AI and AV1 are shaping the future.

Be the first to share your comment