

You press your computer’s power button. Your desktop appears in seconds. During that brief moment, you witness a grand software symphony.
The operating system kernel conducts this orchestra. It manages billions of transistors without you noticing. It builds a flawless bridge between hardware and software.
As of 2026, the Linux version has crossed 30 million lines. Meanwhile, the Windows NT core evolves as closed source. On mobile devices, Android’s engine serves billions of users.
So how does this critical piece of software actually work? What types exist? I will share my years of experience as a system admin.
In this guide, you will learn the difference between ring 0 and ring 3. Plus, you will see panic scenarios. Let’s explore the deepest layer of an operating system together. Ready? Let’s dive deep!
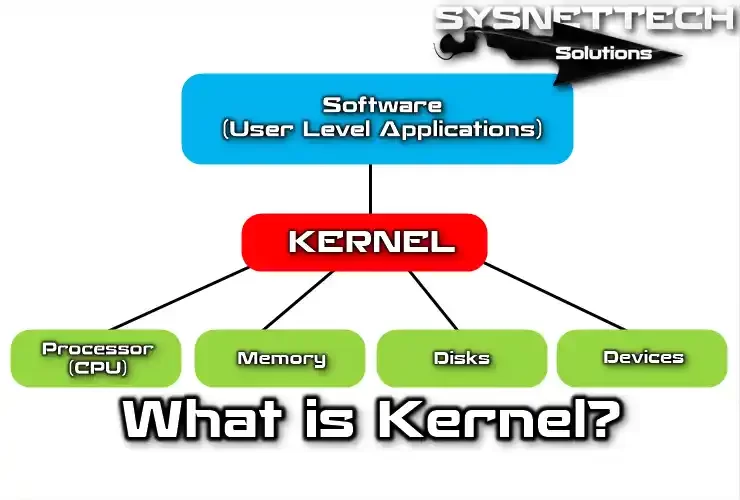
What Is a Kernel? – The Software at the Heart of the OS
Let me give you the simplest answer. It is the most basic piece of an operating system. It is the only software layer that manages hardware resources directly.
The system loads this core into memory the moment the computer starts. It stays there until the system shuts down. In short, all apps run on top of it.
Its job is extremely critical. It shares processor time among processes. After that, it isolates memory regions from each other.
It talks to hardware through device drivers. It manages file systems. Plus, it processes network packets.
Simply put, no app runs without this core. Even your mouse movement depends on it. Every keystroke on your keyboard passes through it.
Why Is a Kernel Needed? The App-Hardware Bridge
Apps cannot reach hardware directly. This is a core security rule. Otherwise, one program could crash the whole system.
That is exactly where this software steps in. It provides controlled access through the system call (syscall) method. An app sends a “file open” request to it.
The engine processes this request with kernel mode privileges. After that, it accesses the disk and returns the result to the app.
This layered design keeps the system stable. An app may crash, but the OS stays up. It works just like a ship’s watertight compartments.
The Hardware Abstraction Layer (HAL) also plays a role here. It offers a single interface for different disk models. Apps never need to know the disk’s brand.
On top of that, it fully handles memory addressing. It assigns a private virtual memory space to each process. So processes never leak into each other’s memory.
How Does a Kernel Work? From Ring 0 to System Calls
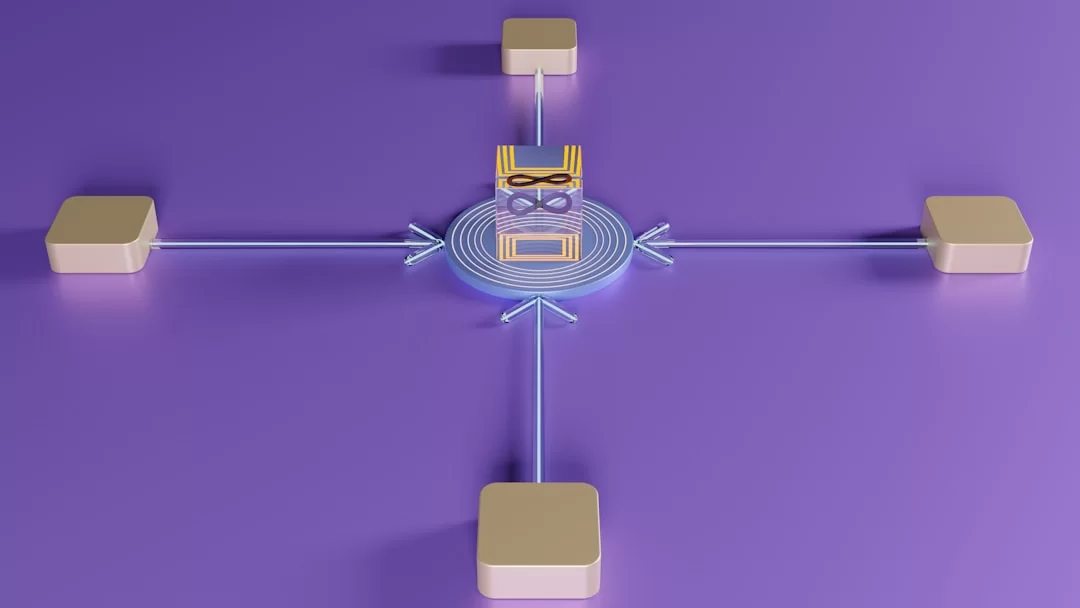
Modern processors work under protected mode. This mode defines privilege rings. Ring 0 holds the highest privilege level.
Only kernel code runs at the ring 0 layer. It can reach all hardware commands. It can touch every processor register.
Ring 3, on the other hand, is the space for user mode apps. Code here has limited privileges. Above all, direct hardware access is impossible.
Without this split, system security would vanish. Any app could format your disk. Luckily, x86 architecture offers this four-ring protection model.
The system uses real mode only during startup. The bootloader begins in this mode. Next, it switches to protected mode.
Ring 0 and Ring 3: The Wall Between Kernel and User Space
A thick wall stands between ring 0 and ring 3. Only system calls can cross this wall. In fact, no other path exists.
User space apps live outside this wall. They roam freely within their own virtual memory zones. However, the kernel space stays closed to them.
You see, this guarded zone holds critical data structures. The process table sits here. Also, paging structures reside in this area.
What happens if an app tries to reach this guarded space? The processor instantly raises a protection fault. It then kills the app right away.
Segmentation and paging methods provide this guard. The MMU checks every access. Meanwhile, the TLB speeds up address translation.
This wall becomes even more visible during a context switch. The processor saves all its registers when moving to ring 0. On return, it restores them.
System Calls (Syscall): Safe Access to the Architecture for Apps
The system call (syscall) method works in these steps:
- Step 1: An app calls a library function. For example, the
open()function fires through glibc. - Step 2: The library writes the syscall number to a specific register. On x86-64, this is usually the
RAXregister. - Step 3: The
syscall(orint 0x80on older systems) command runs. The processor switches to ring 0. - Step 4: The core looks up the syscall table. It finds and runs the matching handler.
- Step 5: When done, the result returns to user space. The processor drops back to ring 3.
This process is incredibly fast. You can make millions of system calls per second. But each one has a cost.
A context switch pollutes the processor cache every time. That is why newer tech like io_uring came to life. Developers designed these systems to cut syscall overhead.
Interrupt Handlers (ISR) and the Scheduler
How do you make hardware talk to the engine? The answer is the interrupt method. Pressing a key sends an interrupt signal from the hardware.
The processor drops whatever it is doing. The Interrupt Service Routine (ISR) takes over. It reads the key code and passes it to the right app.
An ISR must run extremely fast. It cannot do long tasks. Otherwise, other interrupts get delayed.
The process scheduler decides who gets the processor. It creates a fair and efficient order. Priority processes get more time.
Modern cores use a fully preemptive scheduler. Processes run in fixed time slices. When their time ends, the scheduler switches to another process.
So the system always stays responsive. A single process cannot hog the processor forever. The process scheduler maintains this order.
Kernel Types: Monolithic, Micro, Hybrid, and Exokernel
Developers do not build all cores with the same architecture. Their design philosophies differ at the root. Monolithic architecture is the oldest and most common approach.
Microkernel architecture offers the exact opposite philosophy. Hybrid sits right in the middle. Exokernel gives apps nearly bare hardware.
Each design has its own strengths. The balance of speed, safety, and flexibility shifts. Your choice depends on the use case.
The nanokernel concept pushes theoretical limits. It offers almost no services. For this reason, it is ideal for virtualizing hardware.
Monolithic Kernel (Linux, BSD): The Price of Speed
In a monolithic design, everything runs in one big address space. Device drivers, the file system, and the network stack all live there.
| Advantage | Disadvantage |
|---|---|
| Call transition costs are almost zero | A bug in one driver can crash the whole system |
| Offers high performance | Maintenance and debugging are hard |
| Gains flexibility through loadable modules | Security flaws affect the entire core |
The Linux version is the most successful example of a monolithic design. Still, module support makes it incredibly flexible. You do not need to reboot to load a new device driver.
You feel this speed gap most in server settings. Monolithic engines shine in high-frequency tasks where every microsecond counts.
Microkernel (QNX, MINIX, Mach): The Architecture of Safety

Microkernel architecture builds on minimalism. The core provides only basic services. These include memory management, IPC, and the scheduler.
Device drivers and the file system run in user space. Each one is a separate process. A crash in one never touches the others.
IPC (inter-process communication) is the backbone of this design. All parts talk through message passing. This, of course, adds overhead.
The QNX operating system is the most mature example of this design. Engineers use it in nuclear plants and medical devices. Here, reliability comes before speed.
Developers built the MINIX system for teaching. It is Andrew Tanenbaum’s work. In fact, MINIX was found running inside Intel’s Management Engine.
Hybrid Kernel (Windows NT, XNU): The Best of Both Worlds
A hybrid tries to take the best from both worlds. In theory, it blends monolithic speed with microkernel safety. In practice, things get a bit messy.
The Windows NT version is the best-known member of this family. Developers keep the core small. Yet many services run in kernel mode.
Apple’s XNU also uses a hybrid design. It merges the Mach microkernel with the FreeBSD monolithic engine. The result is quite an interesting mix.
However, the hybrid approach faces criticism too. Some experts say it is just a marketing term. The debate still goes on.
Still, Windows and macOS running smoothly on billions of devices proves this design works.
Linux, Windows, Android, and macOS Kernel Comparison

A different heart beats at the center of each operating system. Linux stands for freedom, Windows for stability, and Android for flexibility. macOS offers an elegant balance.
Looking at usage rates, Linux leads on servers. Windows keeps its throne on the desktop. Meanwhile, Android is the undisputed king of mobile.
As of 2026, the Linux version marches on in the 6.x release series. The Windows NT core matured with Windows 11. The Android engine draws closer to the main Linux version every day.
Linux Kernel: The Power of Open Source and Version Madness
The Linux version is the open-source world’s greatest success story. Linus Torvalds started this project in 1991. Today, it is a massive ecosystem.
Developers release a new version every 9 to 10 weeks. As of 2026, the 6.x stable series is active. Rust support stands out among current features.
Notable new features include:
- Rust Support: From 6.1 onward, you can write kernel modules in Rust.
- eBPF: Dynamic tracing and network programming without recompiling.
- io_uring: A high-performance async I/O framework.
- KVM: Kernel-based virtual machine support keeps improving.
This engine also excels at memory management. Paging algorithms have been perfected over the years. Its virtual memory management runs more efficiently than rivals.
Windows Kernel (NT): A Hybrid Behind Closed Doors

The Windows NT core is Microsoft’s most valuable software asset. Its source code is closed. In short, the company has opened it only to select academic groups.
The NT architecture offers a layered structure. The Hardware Abstraction Layer sits at the bottom. Above it, you find the executive and subsystems.
Windows draws a sharp line between kernel mode and user mode. Even graphics drivers run in kernel mode. This raises the risk of the dreaded BSOD.
Despite this, Microsoft has taken security seriously in recent years. It made driver signing mandatory. Frankly, it added defense layers against kernel-level exploit attacks.
Parameter tuning is limited in Windows. Users handle these tasks through the registry and group policies. Yet it is not as flexible as in Linux.
Android Kernel: The Linux-Based Heart of Mobile

For many years, the Android version was separate from the main Linux branch. Google maintained its own development. Luckily, this changed in the early 2020s.
Now it is much closer to the main Linux tree. The Generic Kernel Image (GKI) project sped up updates. As a result, manufacturers can now push updates more easily.
The custom core world is very active on Android. Developers compile special versions to extend battery life. They fine-tune processor frequencies.
Thanks to module support, you can load extra features. Modern tech like WireGuard VPN arrives as a module. So the software ecosystem keeps growing.
The answer to “how to check your Android version” is simple. Just head to Settings and tap “About Phone.” There you will clearly see the core version.
Kernel Panic and Blue Screen of Death (BSOD): When and Why?
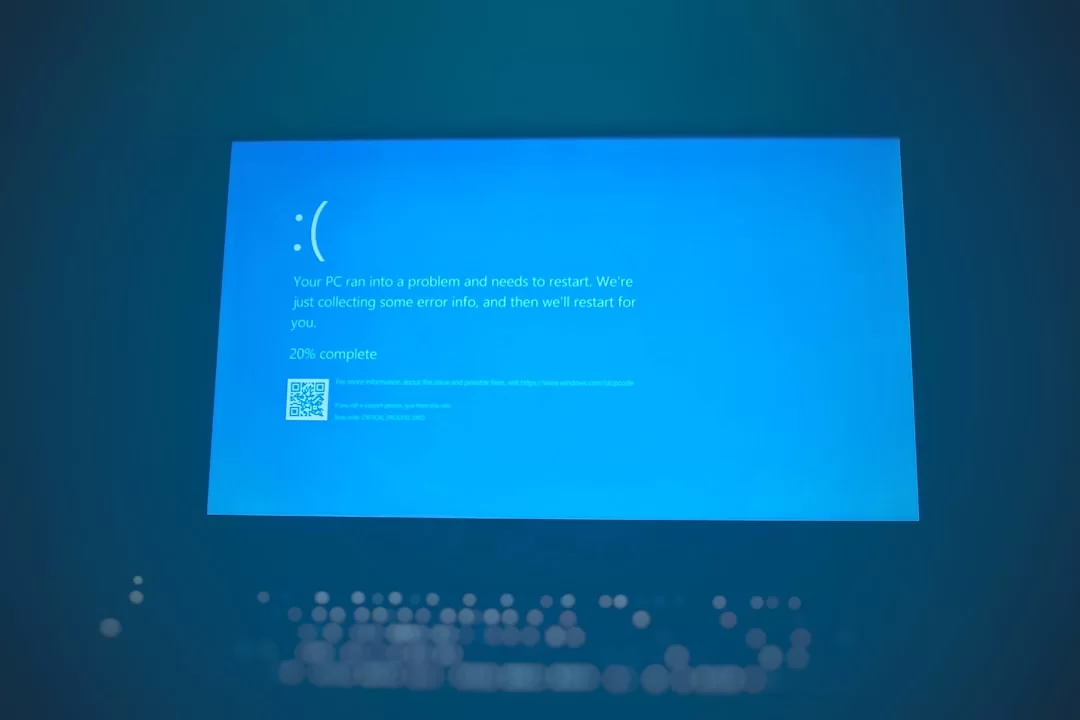
Kernel panic is a system admin’s most hated screen. It appears when the system hits an unrecoverable error. Because of this, going on is not safe.
On Linux and macOS systems, this is called a kernel panic. On Windows, it takes the name Blue Screen of Death (BSOD). Both are different faces of the same thing.
Triggers vary. Bad memory modules are the most common cause. Likewise, faulty device drivers often lead to panic.
File system corruption can also cause this error. Even a mismatch in ACPI tables can trigger it. Spinlock deadlocks are another cause.
In my IT career, I have faced memory issues the most. Non-ECC RAM on servers quietly corrupts data. This is why it erupts as a panic days later.
How to Read a Kernel Panic Log
Follow these steps to read the log dumped on screen during a panic:
- Step 1: Find the error message at the top of the screen. For example: “Kernel panic – not syncing: Attempted to kill init!”
- Step 2: Examine the call trace section. It shows which function triggered the error.
- Step 3: Look at the register dump. The RIP (Instruction Pointer) value here gives the exact address of the error.
- Step 4: Map this address to source code using
objdumporaddr2line. - Step 5: Analyze the memory dump file with the
crashtool.
After applying these steps, you will find the source of most problems. This skill saves lives, especially on production servers.
If you ask what a log file is, it is /var/log/kern.log or the dmesg output. In short, you see all pre-panic events there.
BSOD Error Codes: STOP 0x0000001A, IRQL_NOT_LESS_OR_EQUAL
Windows’ famous blue screen produces specific error codes. Knowing them speeds up troubleshooting:
- MEMORY_MANAGEMENT (0x0000001A): A serious memory management error. Usually stems from bad RAM or a faulty paging operation.
- IRQL_NOT_LESS_OR_EQUAL (0x0000000A): A driver tried to reach a wrong memory zone. This is a kernel mode protection breach.
- KERNEL_SECURITY_CHECK_FAILURE (0x00000139): A safety check found a breach. Often points to a rootkit or corrupt driver.
- CRITICAL_PROCESS_DIED (0x000000EF): The system sees a critical process ending without warning.
When you see these codes, update your drivers first. Next, run a memory test. Analyzing the memory dump file also gives a sure diagnosis.
Kernel Security: Rootkits, Exploits, and Defense Mechanisms
This core security is the most critical area of cybersecurity. A kernel-level attack seizes the whole system. Even antivirus software becomes helpless.
Attackers target the engine to gain system privilege. Once they reach ring 0, the game ends. No defense in user space can stop them.
In 2026, the number of kernel-level exploits keeps growing. The CVE database logs new flaws each month. Luckily, the defense side does not sit idle.
Among malware types, the rootkit is the most dangerous. It plants itself directly under the OS core. In fact, detecting it is extremely hard.
What Is a Rootkit and How Does It Infect a Kernel?
A rootkit is malware that changes the engine to hide itself. It intercepts system calls to mislead you. You cannot see rootkit files even with a disk scan.
Infection methods vary. It can load as a loadable kernel module. Exploits allow writing to kernel memory. It can even infect at the bootloader level.
Once inside, a rootkit alters the system call table. For instance, it swaps the read() call with its own code. This way, it hides malicious content during file reads.
Cleaning a rootkit loaded via a kernel-level exploit is nearly impossible. A format and clean install is the safest route. So prevention is everything.
SELinux and AppArmor: Mandatory Access Control in Linux
SELinux and AppArmor provide mandatory access control in Linux. Both work at the kernel level. But their approaches differ.
| SELinux | AppArmor |
|---|---|
| Based on file labels | Based on file paths |
| Complex but extremely powerful | Simple and easy to learn |
| Default on Red Hat and Fedora | Default on Ubuntu and SUSE |
| Denies everything by default | Allows known apps by default |
SELinux needs fine-tuning but offers military-grade security. AppArmor, on the other hand, is more user-friendly. Developers configure both systems through kernel parameter settings.
In my personal experience, SELinux is annoying at first. You may spend a week full of “Permission denied” errors. Yet once configured right, your system becomes a fortress.
How Do Kernel Security Flaws Form? (With CVE Examples)
Security flaws in the core form for various reasons:
- Memory Access Errors: Classic C bugs like use-after-free and buffer overflow remain the most common cause. CVE-2022-0847 (Dirty Pipe) was exactly this kind of flaw.
- Race Conditions: Sync and semaphore bugs lead to odd behavior. CVE-2023-3269 is a typical example.
- Privilege Escalation: Flaws that let user space code leak into kernel space. A regular user becomes root.
- Information Leakage: Data seeps from kernel memory to user space. Because of this, passwords and keys can be exposed.
The Linux team responds quickly to security holes. Developers usually release patches within hours. Still, you must know how to update a kernel.
Kernel Compilation and Customization: How to Build Your Own Kernel

Compiling your own is a thrilling experience. You optimize your system exactly for your hardware. As a result, you shed unnecessary drivers.
This process demands patience and focus. One wrong config makes the system unbootable. But do not fear—recovery methods always exist.
I compiled my first version in 2005 on a Pentium III machine. It took a full 8 hours. Now the same job takes 10 minutes on a modern processor.
I will explain how to compile it step by step. Now open a terminal and follow along.
Step 1: Download Kernel Source Code and Install Dependencies
The first step is to get the source code. The most trusted source is kernel.org. Follow these steps in order:
1. Install dependencies (Debian/Ubuntu example):
sudo apt update
sudo apt install build-essential libncurses-dev bison flex libssl-dev libelf-dev
2. Download the source code:
wget https://cdn.kernel.org/pub/linux/kernel/v6.x/linux-6.8.tar.xz
tar -xf linux-6.8.tar.xz
cd linux-6.8
If you ask how to check the current kernel version, run the uname -r command. You will see the version you are using right away.
Step 2: Kernel Configuration (menuconfig)
Now we reach the most critical stage. Config errors start here. Follow these steps with care:
1. Use the current config as a base:
cp /boot/config-$(uname -r) .config2. Launch the config tool:
make menuconfigYou will see thousands of options here. Do not panic. Keep the defaults on your first try.
Start only by removing unneeded drivers. For example, if you have an AMD processor, turn off Intel-related options. Enable device tree support only on ARM systems.
Step 3: Compilation and Installation
You are now ready to compile. This stage takes 10 to 45 minutes based on your processor. Run these commands in order:
1. Start the compilation:
make -j$(nproc)2. Compile the modules:
sudo make modules_install3. Install the kernel:
sudo make install4. Create the initramfs:
sudo update-initramfs -c -k 6.8.0-custom5. Update the bootloader:
sudo update-grubAfter finishing these steps, reboot the system. Your system will then start with the new core.
Warning: Kernel Compilation Risks and Recovery Methods
Things can go wrong during compilation. The system may not boot. Do not panic in this case.
For recovery, pick the old version from the GRUB menu. Past versions sit under Advanced options. Pick one and boot the system.
If the GRUB menu itself does not appear, boot with a live USB. Mount your disk and chroot into it. Then restore the old kernel.
Knowing how the boot process works helps here. The bootloader loads the core. Next, it opens a temporary root file system with initrd or initramfs.
This temporary system holds basic drivers. The system switches to the real root file system from there. The init process starts and the system comes to life.
/boot folder. Never delete this file by hand.Kernel Programming and Debug: An Intro for Developers
Kernel programming differs greatly from desktop programming. A mistake crashes the whole system, not just an app. This is exciting but also nerve-wracking.
The answer to “what language is a kernel written in” is clear. 95% of it is C. Assembly appears in critical sections. Developers have officially supported Rust since 2022.
If you ask how to learn kernel programming, the path is long. First, you must know C very well. Next, you need to absorb operating system concepts.
Start with the book Linux Kernel Development by Robert Love. Then read the source code. Also study the docs.
Write Your First Kernel Module: Hello World
Ready to write your first module? Save the code below as hello.c:
#include <linux/module.h>
#include <linux/kernel.h>
#include <linux/init.h>

static int __init hello_init(void) {
    printk(KERN_INFO "Hello, Kernel!\n");
    return 0;
}

static void __exit hello_exit(void) {
    printk(KERN_INFO "Goodbye, Kernel!\n");
}

module_init(hello_init);
module_exit(hello_exit);

MODULE_LICENSE("GPL");
MODULE_AUTHOR("You");
MODULE_DESCRIPTION("My first kernel module");
Create a Makefile to compile it:
obj-m += hello.o

all:
	make -C /lib/modules/$(shell uname -r)/build M=$(PWD) modules

clean:
	make -C /lib/modules/$(shell uname -r)/build M=$(PWD) clean
Now run the make command. Then load the module:
sudo insmod hello.koYou will see “Hello, Kernel!” through dmesg. Congrats—you just wrote your first kernel module!
Kernel Debug Methods: printk, ftrace, kgdb
We use these methods for debugging:
- printk: The simplest yet most effective method. It prints messages to the console. Kernel logs then filter by level.
- ftrace: A function tracer. This tool clearly shows which function you called and when. It is ideal for finding performance bottlenecks.
- kgdb: A full-fledged debugger. You connect remotely through GDB and step through code.
- memory dump: Takes a full copy of memory when the system crashes. You analyze it with the
crashtool.
Learning how to do debugging takes time. But every system developer needs these skills.
Performance Monitoring: eBPF and perf
eBPF is the most exciting tech of recent years. It lets you do dynamic tracing without recompiling. It runs inside a safe virtual machine.
You can also use it for network packet filtering, security auditing, and performance profiling. Combined with io_uring, you get amazing I/O speeds.
The perf tool reads hardware counters. It counts processor cache misses. It also tracks branch predictions.
These tools act as a task manager. They let you account for every nanosecond of your system. For tuning fans, they are a true gift.
Further Reading and Authoritative Sources
What I have shared in this guide is just the tip of the iceberg. If you want to learn the topic in depth, check the authoritative sources below.
- The official Linux Kernel documentation offers the most current data: Linux Kernel Documentation gives detailed explanations of all subsystems.
- LWN.net tracks the development process weekly: LWN.net Kernel Index lets you read the latest patches and talks.
- For an academic view, I suggest MIT’s open course sources: MIT 6.828 Operating System Engineering teaches kernel architecture from the ground up.
Behind the Scenes of the System Kernel: FAQ
What is the difference between a kernel and an operating system?
What language is a kernel written in?
How do I check my version?
How do I update a kernel?
How do I recover a computer that has a kernel panic?
Is there a difference between a panic and a BSOD?
What is the difference between a kernel and BIOS?
What is a custom kernel and why use one?
Where is the log file located?
What is a rootkit and how do you clean it from the kernel?
Conclusion: Understanding the Kernel Is Understanding Your Computer
We have reached the end of this journey. We examined in depth what an OS kernel is. Plus, we explored every layer from ring 0 to system calls.
We compared monolithic, micro, and hybrid architectures. In addition, we saw the open-source power of Linux. After that, we unraveled the layered structure of Windows NT.
We learned to deal with kernel panic and BSOD. We also grasped the rootkit threat. Finally, we compiled our own engine.
Now you know that every second of your computer is under this core’s control. Without it, the system is just a pile of silicon. On top of that, even virtualization technology is built upon it.
I hope this guide has opened new doors for you. I am sure you will stay calm during the next panic. Because now you know what happens behind the scenes.

Be the first to share your comment