

The cost of existing online keeps climbing. Starting a site with zero funds sounds like a dream. Hosting fees and license costs burn a hole in your pocket. So, skilled content makers often give up. Yet Google provides a huge ecosystem.
Its most humble tool sits right under our noses. Millions of people don’t want to fight with tech details. They just want to focus on writing. Plus, they seek a simple use and a safe, trusted platform.
This is where Google’s most graceful answer comes in. Zero coding skill is enough. It gives you a blog service that is totally free. In 2026, this structure still stands rock solid. What’s more, it keeps getting updates. In this guide, we will tear apart the Blogspot, now called ‘Blogger,’ ecosystem.
Of course, we will go beyond dry tech terms. I will share years of sweet and bitter tales. We will stack it up against WordPress. We will dive deep into SEO tricks. So, we will talk about linking a custom domain. AdSense setup is a make-or-break topic too.
What Are Blogspot and Blogger? The Basics of Google’s Blog Platform

Most people mix up the terms Blogspot and Blogger. Or they think these two are the same thing. In truth, a fine tech line sits between them.
Blogger is the actual blog platform service from Google. Meanwhile, Blogspot is the free subdomain you get for sites built with this tool. So, think of the Blogspot name as an output of the Blogger system.
This Google blog tool is a key part of the early web diary trend. Nowadays, it works like a modern content system. However, at its core, it is a hosting service and a way to publish.
It lets you go global using just a Google account. There is no hosting fee at all. Because of this, many see it as the smoothest way to step into the digital world.
But why is it still so hot right now? Many rivals promise easy setup. Yet here, you can truly forget the tech side.
Thanks to Google’s cloud setup, your site won’t crash during a traffic spike. Still, let me warn you now: this comfort comes with a price. In later parts, I will dig deep into the pros and cons of Blogger.
From Web Log to Digital Diary: The Birth of the Blog Concept
To grasp today’s modern Blogger base, we must step back to the dusty shelves of the internet. The weblog idea popped up in the late 1990s. Back then, tech-savvy folks used it as a sort of private note pad.
In those days, building a web log was a tough job. It required HTML know-how and control over a server. People longed to share their thoughts but got stuck on these tech walls.
Then the blog concept entered our lives. These tools gave a voice to the average internet user. This new-age digital diary made it possible to leave a mark online with no coding skill.
Time-stamped posts and a timeline order were the building blocks of these platforms. Readers could drop a comment and engage with the writer. So, passive reading gave way to active talks.
That is how the blog world was born. At first, it was just a hobby for pure joy. Later, it grew into a pro field. Now, terms like making cash from blogs and being a blogger are real career goals.
Standing right in the middle of this shift was a tool built by a company called Pyra Labs. It led the way for millions.
From Pyra Labs to Google: The Historic Trip of Blogger
The Blogger story starts in 1999 in San Francisco. A small firm named Pyra Labs built a tool to make web journaling easy.
This tool smashed the old idea of a blog service. Then, it rebuilt the whole thing. People no longer had to rent a server. That was a true turning point for the web. Still, when the dot-com bubble burst, the firm hit a wall with cash.
Right in those dark days, a huge name stepped in. In February 2003, Google made the buy.
At the time, this free blog giant was still in its early steps. Google took it in to boost its own content world.
This buy was a fresh start for Blogger. Thanks to Google’s skill and base, the platform first made premium tools free. Next, it rose to a spot with no rivals across the globe.
Over time, it meshed well with other Google goods. Mainly because of the AdSense link, this place was no longer just a hobby zone.
People started to pull in real cash here. The fact that the tool is still alive and fresh after 23 years shows that Google made a sharp choice.
Indeed, each year the question ‘Did Blogger shut down?’ pops up. Yet the platform stays on its feet.
How Does the Blogspot Subdomain and Address System Work?
When you start a new blog, one of the most key choices is the address. The system assigns a default subdomain right away.
Your site’s address will follow this form: yourblog.blogspot.com. The ‘.blogspot.com’ part stays fixed. It is a sub-domain that the system gives you. So, you can go live in seconds with no extra hosting or DNS work.
This setup has both good sides and bad sides. First, Google’s servers host this sub-structure. So you can rest easy on speed and safety.
You don’t need to ask ‘Is Blogspot safe?’. You sit right behind Google’s giant firewalls. But if you want a pro look, the ‘.blogspot.com’ tag does give off an amateur vibe.
For this reason, buying a custom domain to link here is almost a must later on.
From a tech view, the blogspot.com subdomain setup means Google handles the DNS.
You just pick the prefix. When you choose this sub-name, the most vital point is to make it keyword-rich and easy to recall. Don’t forget, if you skip a custom domain later, your online ID stays tied to this address.
Making a Blog with Blogger: A Step-by-Step Free Blog Setup Guide

It is time to leave the dry facts and roll up our sleeves. Now, we will start a blog from scratch.
There are zero cash blocks on your path to join the Blogspot world. All you need is a working Google account. That is just your Gmail address. With such a simple need, you can own your own media hub in just minutes.
The steps I’ll lay out here come from years of work on dozens of tasks. These are the most streamlined paths I have used.
Sure, the Blogger look might shift in small ways from time to time. But the core logic never changes. Don’t be afraid. I will hold your hand on this trip and warn you at each key turn.
As you move through this guide, I urge you not to rush. A small setting mistake you make during setup can cause huge headaches down the road.
Above all, you must set up your privacy and search view options the right way from day one. Now, get ready to meet the Blogger control panel.
Signing In with a Google Account and Starting a New Blog

Step 1: Go to Blogger.com
Type blogger.com into your browser’s bar and press Enter. If you haven’t signed in with your Google account, the system sends you right to the Gmail login page. Here, you can use your own private or work account.
Step 2: Hit the New Blog Button
After you log in, a blank panel will greet you. Right in the middle or on the top left, you will spot an orange ‘New Blog’ button. We start the blog wizard by tapping this.
Step 3: Pick a Title and Address
Two key fields show up in the pop-up box. First is the Title. Type your blog’s name here. Don’t worry, you can change this name later as much as you like. Second is the Address. This spot is the point of no return I told you about.
Step 4: Check the Subdomain
The system checks on the spot if your address is free. If someone else owns the name you picked, you will see a red flag next to it.
In this case, I suggest you find a totally fresh and creative name. Don’t just toss in a number or a dash.
Step 5: Confirm the Theme
Once you confirm your address, the system shows you a few default skins. For now, just pick any theme that pleases your eye and move on.
We will talk later about free Blogger themes and pro skin setups. End the task by tapping the ‘Create Blog’ button.
Well done! You just took your first real step into the Blogger world. Now you own a live website on the net. But this is just the start. Next, you need to know the cockpit—the control panel.
A Deep Look at the Blogger Dashboard (Control Panel)
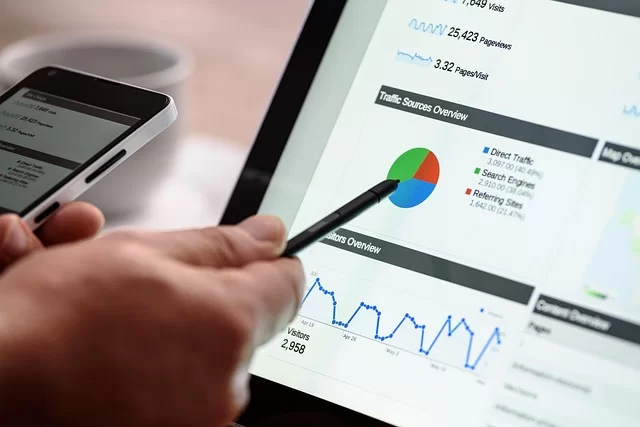
The Blogger panel, also known as the dashboard, is your command hub with full control.
Don’t let its plain look fool you. Behind the scenes, it holds quite strong tools. To grasp how it works, we should break the panel into its main parts. Here are the menus you will use most on the Blogger dashboard and what they do:
- Overview: Shows your site’s core stats, post count, and comment state in real time. Plus, key news from Google pops up on this screen.
- Posts: Lists all your blog posts. From here, you can add a new entry, edit current ones, or save drafts. You also handle bulk label work in this part.
- Stats: Shows where your traffic comes from, which states read you, and your top hits. It lacks the depth of Google Analytics but gives you a quick pulse check.
- Comments: The spot for handling reader notes. You can tackle spam comment cleanup in bulk here. Or, you can set the blog so that each remark waits for your yes before it goes live.
- Pages: Blogs often have flat items like ‘About Me’ or ‘Contact.’ You run these bits apart from posts under this menu.
- Layout: The zone where you shape your site’s look. You can add gadgets, sort menus, and run the footer. It is a top spot among the places to drop code in Blogger.
- Theme: You steer the full outer look of the site here. From here, you can load a fresh theme or tweak the current one’s HTML/CSS codes. As a plus, you can do Blogger speed work.
- Settings: All the tech setup for the site lives here. Meta tags, SSL, search engine picks, and backups—these vital points are all found in this spot.
Don’t let your eyes glaze over as you move through this panel. You’ll soon know each menu by heart. The Settings part, in detail, is the hub for the Blogger SEO tweaks I’ll tell you about. Now, let’s use this panel to make our first piece and finish the base build.
Pushing Publish on Your First Post and Setting Up the Basics

Step 1: Make a New Post
Click the orange pen icon on the top left of the dashboard. Or, hit the ‘New Post’ button. A classic text editor pops up in front of you. This editor works just like the Word app. Put a catchy title in the header field. Then, start typing your first piece into the content box.
Step 2: Set the Labels
On the right side, find the Labels part inside the Post Settings menu. Type in key words linked to your topic, split by commas. Labels help guests find alike topics on your site. They also give a slight boost for internal links.
Step 3: Build a Permalink
In that same menu, tap the Permalink choice. Then, pick the Custom Permalink option. Enter a URL with no local chars. Use small letters and dashes between words. This step is a must for a good bond between Blogger and SEO. Never leave it on auto.
Step 4: Type the Search Description
Tap the Search Description field. Write a 150-160 char text that sums up your post best. This spot is where you add the Blogger meta description. It is that black text right under the title in Google’s search results.
Step 5: Publish
After you check all things, press the orange Publish button up top. Your first entry is now live for all to view. Now, it is time for the basic settings that run the site’s wider flow.
Key Tweaks for Basic Settings
Go into the Settings menu. In the Privacy tab, be sure the ‘Visible to search engines’ box is checked. In the Publishing tab, check the Blog Address. Set your time zone to Eastern in the Formatting tab. Last, in the Comments tab, set Comment Check to ‘Always.’ This will save your life when spam attacks hit later.
Blogger Pros and Cons: Who Is This Platform Ideal For?
Millions of users choose Blogspot. But is this tool the right coat for every person? That is a hot debate.
Through the years, I told many clients to stick with Blogger. Yet I also told just as many to jump to WordPress right away. To make this call, you must cruelly lay out the strong points and the weak spots of the tool.
I will not paint a rosy scene in this part. I will just share the real truths I hit in the field. If you run a personal diary for fun, the case is not the same.
But if you aim to make cash from blogs and build a pro income stream, you must read these pros and cons with great care. The choice is yours. Still, I will lay out all the facts to help you pick right.
You can’t judge a tool just because it is free. Long-term room to grow, SEO skill, and the level of control are just as vital as the price tag. So, let’s dig deep under two clear heads.
7 Big Perks That Blogger Offers
Let’s kick things off with the good news. To see why the Blogspot tool has stood tall for over 20 years, just scan these perks.
For users with thin tech skill, these points are a true gift. Here are the top 7 plus points I have seen myself out in the field:
- Zero Cost: You pay not a dime for hosting, a domain, or a theme. It is a fully free blog space. For new folks, this means you can test things out with no risk.
- No Bandwidth Cap: Even if your site gets as hot as TechCrunch, Google’s servers won’t let you down. You never face a traffic limit or a shock bill. This is a perk with no peer in the hosting trade.
- Top-Tier Safety: I can say ‘yes’ with full ease when asked if Blogspot is safe. You get an SSL cert on its own. Google’s huge firewalls shield you from DDoS hits and hack tries.
- Flawless Google Link: You can tie in AdSense, Search Console, and Analytics in mere seconds. Mainly, the link to Search Console works on its own with no code checks.
- Ease of Use: The look is super plain. You don’t fight with deep menus or geek terms. This way of keeping things simple lets you pour all your focus into content.
- Speed and Pep: Thanks to Google’s global CDN base, a good skin can load pages at wild speeds. When done right, Blogger speed work can beat many paid hosts.
- Zero Upkeep: You never stress about updates, patching plugins, or scrubbing a database. All tech duties fall on Google’s crew. Your site stays fresh even while you sleep.
6 Key Flaws and Limits of Blogger
Now let’s move to the part that may sting a bit. I will list the biggest walls and limits you will hit while using Blogspot.
If you obsess over control and flex, your chest might feel tight as you read these items. Still, knowing them will stop big letdowns later.
- Tight Custom Range: Unlike rivals with an open-source CMS base, your chance to touch the code pool here is slim. There is no plugin concept. That means no complex member setups or check-out screens.
- SEO Curbs: Yes, you can tweak Blogger SEO. But you cannot fully steer the URL form. For instance, you can’t make clean links based on type. This is a real hit for large-scale sites.
- Cloud Over the Tool’s Path: We have all seen Google kill off much-loved hits. So, the ‘Will Blogger shut down?’ thought bugs us all. Big updates for the platform now come at a much slower pace.
- Hard Data Shift: If you later think ‘What to use instead of Blogspot?’ and want to move to WordPress, shifting your data is pure pain. There is a basic export tool, yet pics and custom builds often cause a mess.
- Amateur Smell: In the work world, a site with the ‘.blogspot.com’ tag is sadly not seen as pro. Even if you link a custom name, the theme’s code makes it easy to spot as a Blogger site.
- Thin Multi-Writer Aid: Sure, you can add more than one writer. But the rank of powers is quite crude. You can’t let a writer post in just a set group. This makes team tasks tough.
Blogger vs WordPress: Which Blog Tool Fits You Best?
We have now hit one of the web’s great split paths. Blogger up against WordPress.
Choosing between these two huge tools is a true riddle, above all for those just starting. On one flank, you have a stress-free blog space under Google’s roof.
On the other flank, an open-source content tool that fuels more than 40% of the web and vows full command.
I will keep my heart out of this face-off. No WordPress love or Google hate. I’ll stick just to tech truths and what users need.
Because each tool has its own bright wins and sad tales. What counts is which tool meets your needs. Let’s weigh these two giants on tech base, room to tweak, and shift plans.
Note this well: the ‘WordPress’ term here points to the open-source CMS code you grab from WordPress.org and set up on your own host. Don’t mix it up with WordPress.com. Now, take a deep breath as we plunge into the details of this clash.
Tech Base and Hosting Service Face-Off
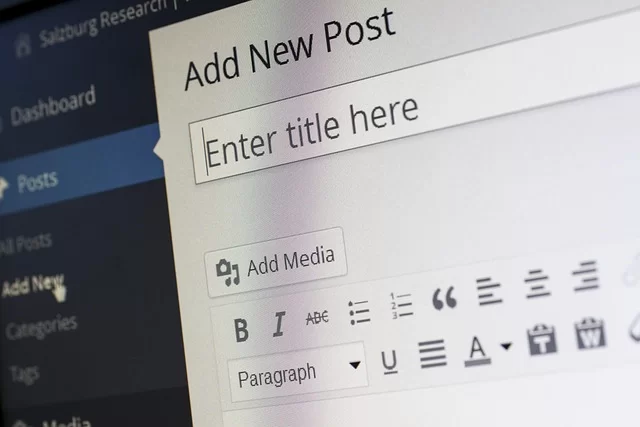
The most core split between these two tools lies in their view on hosting. Blogger works like a resort that covers all. Your meals, drinks, safety, and fun are in the plan.
However, you can’t step past the resort grounds or dig your own pool. WordPress, on the other hand, is a plot of bare land you buy. You set up the power, the water, and the gates. But you can choose to build a tower that scrapes the sky on that land.
| Feature | Blogspot, Blogger | WordPress (Open Source CMS) |
|---|---|---|
| Hosting Service | Free, Google Servers | Paid (You Buy Hosting) |
| Safety Duty | All on Google | All on the Site Owner |
| Backup | By Hand (Settings > Backup) | Self-Run (Via Plugins) |
| SSL Cert | Self-Serve and Free | Tied to Host (Often Free Let’s Encrypt) |
| Traffic Cap | No Limit | Tied to Host Plan (Capped) |
As the chart up top shows in clear terms, Blogger frees its user from a huge load when it comes to the tech base.
This tool is a gift for those who want no part of server stress, DDoS shields, or SSL renew work.
But on the WordPress side, you hold the right to pick your own host. So, you can speed things up by placing your server near your main crowd. Or, you can put up your own firewalls.
To wrap this up, if you have flat zero tech skill and a tight purse, this care-free space from Blogger is worth its weight in gold. But as your site swells and fresh needs crop up, that itch to move to the bare plot that WordPress sells will start to gnaw at you.
Custom Range and Control: Open Source CMS Flex vs Blogger
This is the spot where the real split happens. When we talk about custom work and control, the gap is as wide as night and day.
You can build a pro site with Blogger. But that pro sheen tends to stop at the look. WordPress, though, knows no bounds in terms of what it can do. To get this split more, glance at this face-off:
| Benchmark | Blogspot, Blogger | WordPress (Open Source CMS) |
|---|---|---|
| Theme/Skin Range | Thin set of stock themes + third-party XML skins | Tens of thousands of free and paid themes |
| Plugin Aid | NONE (Gadgets are too tight) | More than 60,000 plugins on hand |
| Code Tweaks | Just HTML/CSS (Tight widget zones) | HTML, CSS, PHP, JS & Database (Full Reach) |
| SEO Skill | Base level (Blogger SEO tweaks are tight) | High level (With tools like Yoast, Rank Math) |
| E-Shop Link | NOT DOABLE, barring links to outside sites | Full Store Link via WooCommerce |
As you can see, the scale of control and flex flips all the way. Blogspot users slam a wall when they wish to add a board, a sign-up scheme, or a rich set of work samples.
Why? Because this tool is, at heart, a post space built on a content system. Yet WordPress has gone way past just being a content system.
That said, this fresh breath has a price. On WordPress, a bad plugin choice or a theme with a hole in its guard can cause a full hack or crash.
Blogspot, in contrast, lacks this risk. What Google says, goes. At times, this feels like a curse. At other times, a true gift. The choice hangs just on what you hope to get.
In addition, you link AdSense, Search Console, and Analytics in just ticks. This fast link is made doable through Google’s own API setups. Since this tech works back stage, the user’s path feels this smooth.
When Should You Shift to WordPress? Exit Plans from Blogger
Those who ask me this most often are the ones who spent some time on Blogger and then hit a dead end. At first, all was bright and sweet. Then out of the blue, they start to ask, ‘How can I add a sign-up scheme here?’ or ‘How do I list goods?’
At that exact point, the time to move has come. But what is the right time for this shift?
If your month’s guests have topped 10,000 and you’ve built a brand that starts to mean something, you should think of a shift. Mainly, if you need high-level SEO moves to score a higher rank in search, the built-in tweaks will start to fail you past a point.
WordPress holds much more skill when it comes to schema tags and custom fonts. Beyond this, when you must add a custom code job to your site, a coder can craft a fix for WordPress. But finding one for Blogger is next to a lost cause.
However, let me state this in plain words. If your site is a classic fun blog with just text and pics, stay put right where you are.
Blogspot is still the most safe space for you. A move can cause hits to your SEO rank and brief reach snags.
If your thought is ‘I’m not losing a thing, so why risk it?’, then just keep your spot and keep making content. Make the call to shift only when the tool’s walls truly block your path.
Linking a Custom Domain to Blogger and Getting a Pro Look
Time to get a bit more stern with the site now. No matter how rich your posts are, the ‘.blogspot.com’ tag casts a thin, home-made glow.
Above all, if you plan to do brand work or test cash paths past AdSense, you must buy a custom domain. The good news is that Blogspot, Blogger, is quite free on this point. It lets you do the domain link job in a very clean way.
In this part, I’ll show you how to buy a domain from scratch and tie it to Blogger. Plus, we will set up the SSL cert, a key part of today’s web norms.
So, you will not see that stark ‘Not Safe’ flag in the site’s address bar. You will earn your guests’ trust. If you feel set, let’s give your site a fresh badge.
This leg of the job might have a dash of tech depth. But don’t let that scare you. As long as you trail each step in line, you can wrap up the task in just ten ticks.
Note this too: a custom domain link sends a plus sign for Blogger SEO. Google tends to see sites that own their own name as more firm and true.
Steps to Buy a Custom Domain and Map It to Blogger
Step 1: Buy a Domain
Grab the name you want, like a .com or .net, from a safe shop like Namecheap, GoDaddy, or Google Domains.
The sole thing to check at this point is that the firm gives a plain path to its DNS zone page. I pick Namecheap on my own, as its look is quite clean.
Step 2: Go to Blogger Settings
On your Blogger dashboard, click the left-side Settings menu. Then, flip to the Publishing tab. You will spot the Blog Address zone here.
Right next to it, click the link to set up a third-party domain. In the pop-up box, type your bought name with a ‘www’ at the start (like: www.yoursite.com).
To see the core of the new Blogger base, we must look back a bit. This is where the roots of the WWW (World Wide Web) step in. The web’s face took shape with this rule set. Web logs rose on this same base. To be blunt, blog life as we know it could not be if not for WWW.
Step 3: Grab the CNAME Notes
Once you hit Save, the system will flash two CNAME notes. One is for the ‘www’ part, and one is a proof code.
Jot these down or keep the page in view. These codes prove you own the name and steer the traffic.
Step 4: Go to the DNS Zone
Head to the site of the shop where you bought the name. Then, pop open the domain control page.
Find a tab called DNS Zone or Zone Editor. Move to the spot to add a new note there. Pick CNAME as the note type.
Step 5: Match the CNAME Notes
In the Host field, paste the first key from Blogger (it often looks like ‘www’ or a blog code). In the Value or Points To field, type ghs.google.com.
Next, add the second CNAME note the same way, with the one-of-a-kind code that came with it. This step sits at the heart of the domain point job for Blogger.
Step 6: Wait and Then Save
The spread of DNS notes across the globe can take from 1 to 48 hours. But most times, the task wraps in 10 to 15 ticks.
When the time is up, press the Save key on Blogger once more. If each step was right, your blog will now serve from its fresh address.
Step 7: Set the Point
On that same Settings > Publishing screen, check the box to point Blogspot there.
This means guests to the old ‘.blogspot.com’ site zip straight to your fresh ‘.com’ home. It is a key move to keep your SEO score from splitting.
Blogger SSL Cert Settings and HTTPS Point
Step 1: Turn SSL On
Once your custom name links well, you will spot a zone with the ‘HTTPS’ head in the Settings. Click there and turn the ‘HTTPS Availability’ switch to Yes.
Google will now start to build a free Blogger SSL cert for your domain on its own.
Step 2: Force the HTTPS Point
When the SSL cert goes live, a fresh ‘HTTPS Redirect’ choice pops up on the same page. Turn this to Yes as well. By doing so, all streams that come to your site are pushed straight to the safe https:// rule set.
If you skip this, your site will live in two shades—both safe and not. This is a true act of madness for SEO.
Step 3: Check for Mixed Stuff Flags
After the switch to HTTPS, old shots in your posts that still point to http:// might spark a ‘Mixed Stuff’ snag. When this hits, the green lock in the address bar drops out of sight.
To patch this, you might need to freshen up the image links in your theme or posts. The good part is that fresh themes tend to lack this whole mess.
With these two key moves done, your Blogspot, Blogger site now owns a pro look and a safe link.
When your guests see your own site name and a small padlock in the bar, your heart can rest at ease as you keep making content.
Blogger SEO Tweaks and Tricks to Rise in Google’s Ranks
Lots of folks think Blogspot can’t do SEO. That is a big, fat lie. True, it lacks the sweet tools that WordPress has, like Yoast.
But with the right fine points, you can squeeze wild wins from Blogger too. Through the years, I have seen plans rake in six-figure clicks just on this stage. The point is not what the tool is, but how you use it.
In this part, I will lay out some Blogger SEO tricks you may have not caught elsewhere. From meta tags to robots.txt files, and from site maps to speed tweaks for phones, we will pick apart each speck.
If you trail these steps to the word, your site’s worth in Google’s eyes will spike at once. Strap in tight, as we step down into the real nuts and bolts.
Truth is, the bond between Blogger and SEO runs much deeper than you might guess. Why? Because Google itself owns the tool.
This means Googlebot crawls and adds your pages at a wild pace. Our job is to make the tech tweaks that max out this edge.
Adding a Blogger Meta Description and Fine-Tuning the Title Tag
Step 1: The Home Page Meta
From the dashboard, take the path Settings > Search Preferences. On the page that pops up, spot the Meta Tags part. Under it, you will see a ‘Description’ field.
Tap it, choose ‘Yes,’ and type a text that caps out at 150 chars to sum up your whole site. This is the spot to add the Blogger meta description for your home page. It is a huge misstep to leave this space bare.
Step 2: Post-Level Search Blurb
Each time you draft a fresh post, you must type a custom text in the ‘Search Description’ box on the right Post Settings menu.
While you type this text, be sure to weave in your core key word in a smooth way at the start or the heart of the line. If you don’t, Google will just pull the first chunk of your post as the meta. Most times, that cuts your click rate.
Step 3: Fine-Tune the Title Tag
In Blogger, the title tag defaults to ‘Blog Name: Post Title.’ That form is not the best for SEO.
To switch this, go to Theme > Edit HTML. Find this code: <title><data:blog.pageTitle/></title>. Wipe it clean. Then, stick this form in its place:
<b:if cond='data:blog.pageType == "index"'>
<title><data:blog.title/></title>
<b:else/>
<title><data:blog.pageName/> - <data:blog.title/></title>
</b:if>
This shift in code shows just your blog name on the home page. But on post pages, it gives the ‘Post Title – Blog Name’ look.
In this way, your post name pops out first in search lists. Among the spots to drop code in Blogger, this is the most key one for SEO.
Blogger Robots.txt Tweaks and Custom Robot Header Tags
Head back to Settings > Search Preferences. This time, turn on the ‘Custom robots.txt’ choice that sits under the Crawlers and Indexing head. A text box will pop up for you.
This is the exact spot where you shape the Blogger robots.txt file. This file works as a map that tells search bots where they can step on your site.
Paste this block of code into the box. It stops search bots from crawling dead-end label pages and search result screens. So, you save up your crawl cash and stop your site’s clout from spreading thin.
User-agent: Mediapartners-Google
Disallow:
User-agent: *
Disallow: /search
Allow: /
Sitemap: https://www.yoursite.com/sitemap.xml
Note: Do not skip the swap of the last line https://www.yoursite.com/sitemap.xml for your own domain. This code base is the norm for a tight bond between Blogger and SEO.
On Blogger, the range of themes is a bit thin. But you can fill this gap with third-party XML skins. These files switch up your whole site look. So, be sure your skin came from a safe spot. If not, a theme with weak code might give you a lot of stress.
Right above this, on the same page, you will see Custom Robots Header Tags. From here, tweak the base rules for Home Page, Archive and Search Pages, plus Posts and Pages.
My own tip is to mark the ‘noindex, follow’ choice for Archive and Search Pages. This way, your tag cloud screens stay out of Google’s main list. You just push your posts and flat pages to the index.
Making a Blogger Sitemap and Hooking It to Google Search Console
Step 1: Learn Your Sitemap Link
There is no stress of crafting a sitemap by hand on Blogger. The tool does this task for you on its own.
Your link is: https://www.yoursite.com/sitemap.xml. This file holds up to your last 500 posts. If you have more, you must add bits like sitemap.xml?page=2.
Step 2: Step Into Google Search Console
Go to search.google.com/search-console and add your site. The link job for Blogger and Google Search Console most times needs the URL prefix way. Type your domain with the https:// at the front.
Step 3: Send In Your Sitemap
From the left menu, click Sitemaps. On the page you see, type sitemap.xml into the ‘Add a new sitemap’ box. Then, hit the Send key.
Once this is through, Google will spot all your fresh stuff at a much faster clip. The task to make and send a Blogger sitemap is that clean.
Step 4: Hook in Analytics
Grab your Google Analytics 4 (GA4) tracking tag. On your Blogger dashboard, take the path Settings > Other. At the base, you’ll see a ‘Google Analytics’ spot. Paste your GA4 check ID (G-XXXXXXXX) here.
This seals the link for Blogger Analytics. You can now track in depth which posts pull in the most eyes.
Blogger Speed Tuning and Phone-Friendly Fixes
Speed is one of the top rank levers for SEO in 2026. But bad add-ons we throw in can still chop this speed down. Here is my gold-list of moves to get a blog that loads in a flash:
- Cut Out Dead Gadgets: From the Layout tab, strip out weighty widgets like ‘Top Posts,’ ‘Blog Archive,’ or ‘Tag Cloud’ that drag your site. The Blog Archive, in its branch-like form, works the database way too hard.
- Squash Your Pics: Before you stick an image into a post, be sure to squeeze it with a tool like TinyPNG. Blogger does clean up pics on its own when you load them. Still, if you drop a 100 KB shot instead of 1 MB, the page pops up whole ticks more fast.
- Use a Skin That Fits Phones: By now, the bulk of the base skins give phone-fit blog aid. Check your theme picks to be sure the phone view is switched on. In fact, if you can, set up a Blogger AMP skin to hit light speed on phones. AMP is a true boost, above all for news sites.
- Shrink Your JS Use: Don’t toss loads of JS code into your theme from far-off spots (like outside fonts or share keys). Each call to a far source adds more hang time to your page. For share icons, using flat shots is more swift than pulling a whole JS pack.
- Slap On a Lazy Load: This trick makes shots on the page load just as they scroll into view. Sad to say, Blogger lacks this as a stock piece. Still, you can spark this by sticking a small bit of JavaScript code into the HTML of your theme.
When you take these steps, you will spot a sharp jump in your PageSpeed Insights score. To put it in plain words, a high speed score is the slickest path to catch Google’s eye.
Making Cash with Blogger: AdSense Linking & Other Cash Paths
Hobbies are nice. A deep love is great. But the bills are a real thing. It is the most basic urge to want to see cash from the sweat you pour into the Blogger stage.
The good news is that Google has made it shockingly smooth to earn in its own world. The AdSense link feels like it was cut just for this stage.
In this part, I’ll walk you through the steps to score the king of all cash paths on Blogger—AdSense. Yet, we won’t stop there. AdSense should not be your sole cash door.
Stashing all your eggs in just one bin is one of the worst chess moves you can make in the online space. So, we will also lay out ways to earn bucks with Blogger. If you feel set, let’s start to turn your site into a cash mill.
Mark this: you need a crowd first to make money. Do not rush to get the AdSense yes. Pack the site first with 20 or 30 prime posts and pull in some pure search guests. Grit is the core need here.
How to Get Blogger AdSense Approval? The 2026 Fresh Rules

Step 1: Hit the Fit Checks
As we step into 2026, Google AdSense has grown a wild streak of care for post depth.
Your site must be at least 6 months old and stuffed with one-off text. Put your AdSense dreams on ice if you deal in copy-paste fluff. You also must have your ‘About,’ ‘Contact,’ and ‘Privacy Policy’ screens all in full shape.
Step 2: Send In Your Ask
On your Blogger dashboard, tap the ‘Earnings’ tab on the left. You will spot the ‘Sign Up for AdSense’ key here. Launch the ask flow by clicking that key. The setup sends you off to the Google AdSense screen. This is where you type in your blog’s URL.
Step 3: Prove Your Site
Once you send your ask, a check bot from Google scans your site. It peers at your nav paths, the depth of your text, and how well it fits a phone.
This phase can last from 2 days up to a full 4 weeks. If they push back, you get a mail with the cause.
Step 4: Plant the Ads
With the green light in hand, the Earnings tab wakes up. From this spot, you can let the ads self-place. Or, you can drop the code by hand just where you like it.
What I lean toward is the use of ad units that sit right inside the text. The peak tap rates tend to spring from those zones.
The key to ‘how to win Blogger AdSense yes’ is quite blunt: craft rich, long posts. Do not ask with 300-word blurbs. Use deep guides of at least 1,000 words. Google gives a lift to those sites that add real worth to the guest.
Ways to Earn Bucks with Blogger Past AdSense
AdSense is a solid first step. Yet the real fat cash sits in other paths.
I have built you a list to stretch your mind on how to pull cash from Blogger. By testing these one by one, you can swell your take:
- Affiliate Marketing: Push goods tied to your theme from spots like Amazon, or ClickBank. For one case, in a post on top brew tools, you can earn a slice from the buy links you weave in.
- Paid Posts: When your site builds a set heft, firms will reach out to place a shout-out post on your stage. You can ask for a flat fee for these. Just take care to work with brands that mesh with your own zone.
- E-Goods Sales: You can sell your own e-book or PDF guide right through your blog. Just join a shop like Selz or Gumroad and stick the pay links on your Blogger screens. The best part? You don’t split the take with Google on this path.
- Consult Work: If you drop facts on a theme you own at an expert depth, your crowd will want to pick your brain. Pop a ‘Hire Me’ key on your touch page and set up talks for a cost per hour.
- Ad Spot Rentals: On your own, with no AdSense tie, you can lease a set zone of your site (say, a side bar block) for a flat month’s fee straight to an ad buyer. This way pays off huge, mainly in tight theme zones.
All You Want to Know About Google Blogger (2026 Fresh Guide)
Are Blogspot and Blogger the same thing? What sets them apart?
What kind of curbs come with a fully free Blogspot blog?
How do I tie my own bought domain name to Blogger?
How do I set up SEO on Blogger? Can I reach the top of Google?
Where can I grab the top free and pro themes for Blogger? How do I add them?
How do I add Google AdSense ads to my Blogger blog and get the green light?
Can I add more than one writer to Blogger? How do I shape a team blog?
How do I save a spare copy of my Blogger blog and shift to a fresh stage?
How do I solve phone-fit (responsive) snags on Blogger?
What do I do if I want to trash my Blogger blog? Can I pull a dead blog back?
Final Word: Does a Pro Blogger Site Still Make Sense in 2026?
Here we are, at the end of this long trip. We broke down facts on Blogspot & Blogger you might have not caught before.
So, with all this on the board, let’s hit the big ask. Is it a sharp move to build a pro site on this tool in 2026? My take is a huge ‘It Depends.’ Each job has its own needs. Each user holds a fresh tech skill set.
If you launch with flat zero cash and your sole itch is to write, share, and grow a small crowd, Blogger stands as the top pick in the field.
It leaves you free from the pain of host bills, site crashes, and guard holes. You can rest your head with peace. However, if your aim is to blow up fast, shape a giant brand, or run a shop, I tip my hat to WordPress from the very first day.
As I trail the news on Blogger’s 2026 paths, I see the core soul of the tool stays put. Google keeps this spot as a hub to craft content.
We might not spot fresh bells and rings, but what stands here now runs like a rock. Blogspot hangs on as a flag of plain use and trust. The call is yours. But mark this: the stage does not make the king. Your words do. May your pen be strong.

Be the first to share your comment