In this article, we will examine how to create a new virtual machine for installing Windows, Linux or macOS on VMware vSphere ESXi.
How to Create / Install a New Virtual Machine in VMware vSphere ESXi 7.0
Creating a new VM with VMware ESXi server is very easy. If you have used the VMware virtualization program before, you do not have to worry about creating virtual machines.
VMware ESXi is a server virtualization software. Once you have installed VMware ESXi on a physical server, you can use the server more efficiently. As a result, VMware ESXi runs on a physical server and acts as a layer between VMs and hardware.
In this article, we will set up a VM for the operating systems to be used on VMware vSphere.
How to Configure Virtual Machine in vSphere
To create a new VM for Windows 7 on ESXi, follow these steps in order.
Step 1
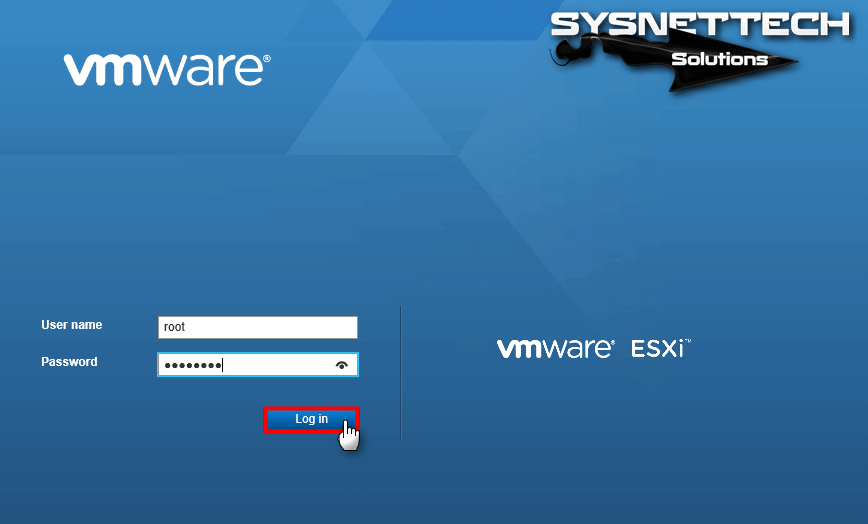
Run the server and connect to the server by typing the IP address in the Internet Explorer address line. On the login screen, type your username and password as shown below and click on the Log in button.
Step 2
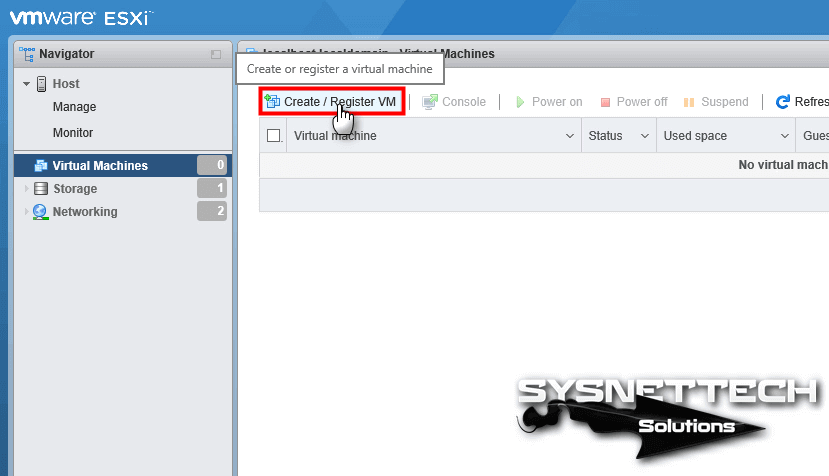
The first boot view of vSphere ESXi is as follows. To create a VM, click VMs from the options in the left pane.

Step 3
In the Virtual Machines window, click the Create / Register VM button.
Step 4
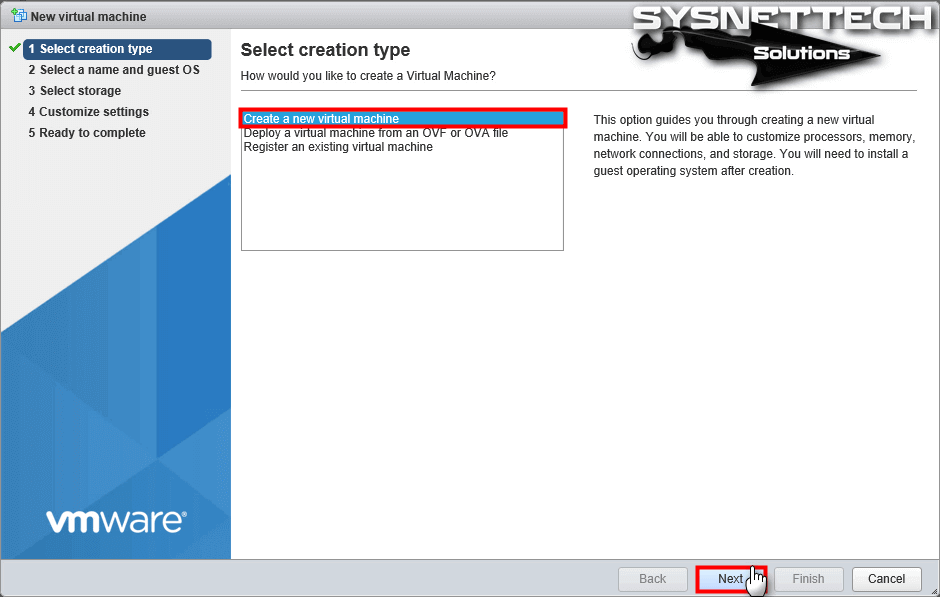
To create a new VM after the New VM window opens, select Create a new VM and click on the Next button.
Step 5
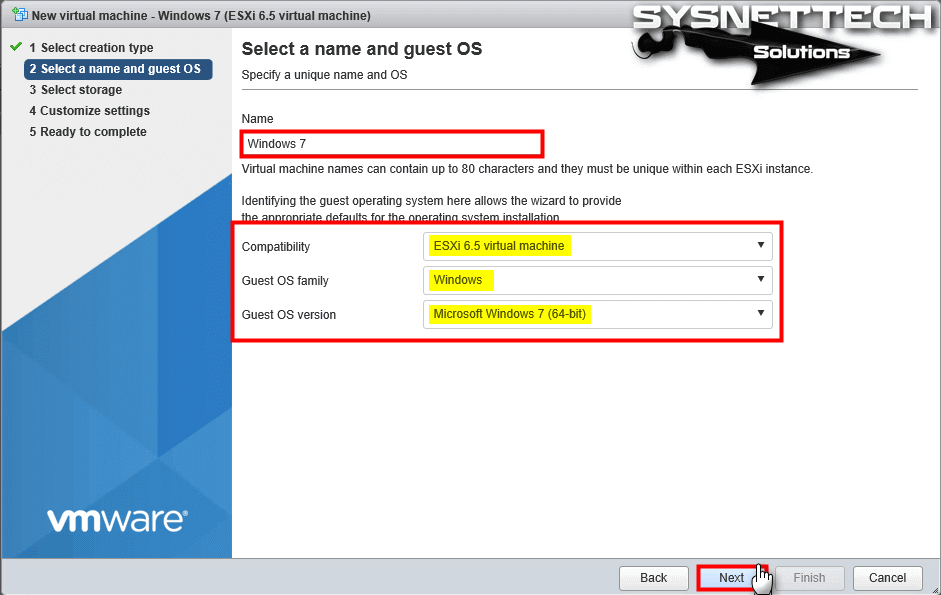
Type the name of the operating system you are going to run, and click Next when you have configured the Guest OS Family and Guest OS Version sections.
Step 6
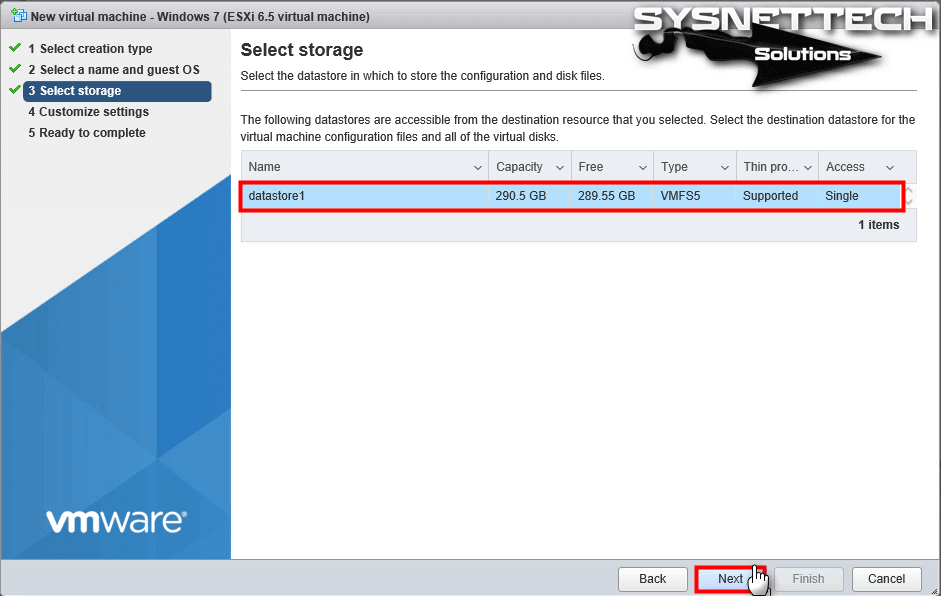
By default, DataStore1 will be selected because a physical disk is installed in the server. Click Next to proceed to the next step.
Step 7
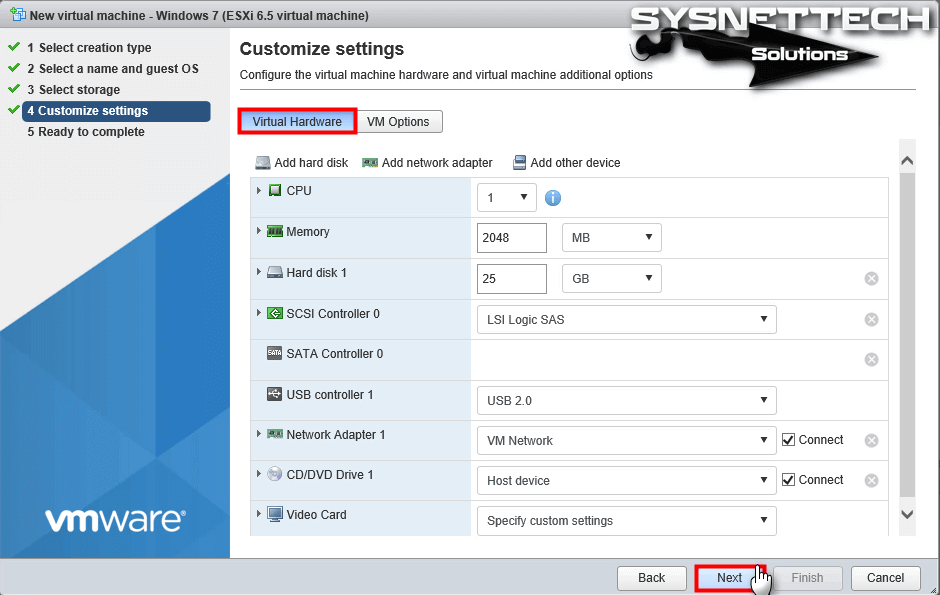
You can configure the VM created on vSphere ESXi in the Customize Settings window. For example, to install the operating system in a VM, you can add the ISO file from CD/DVD Drive 1.
Step 8
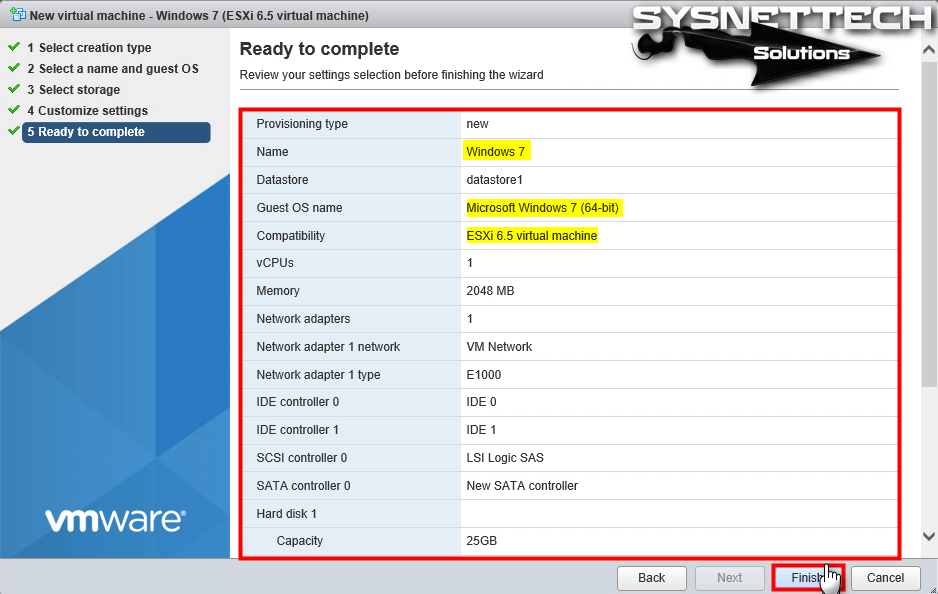
The summary information of the Windows 7 VM is shown below. You can close the window by clicking on the Finish button.
Step 9
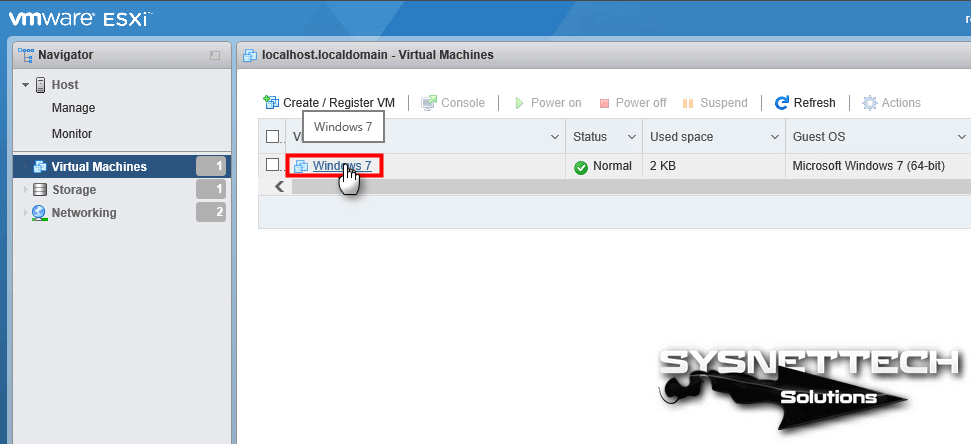
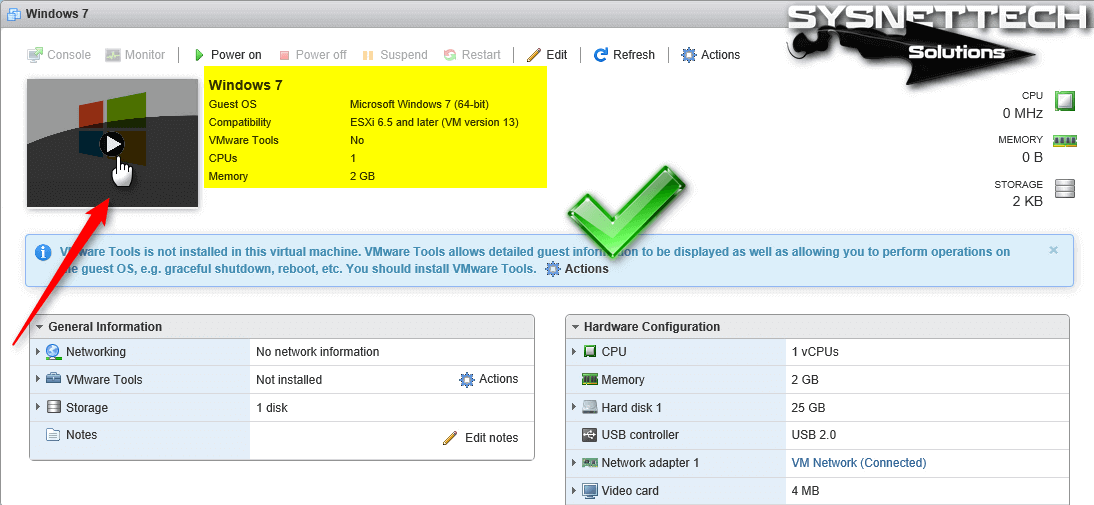
After creating the machine in the server, click on the VM.
Step 10
Start the VM by clicking Power on. You can also open the console screen by clicking on the Windows Logo as below.
Step 11
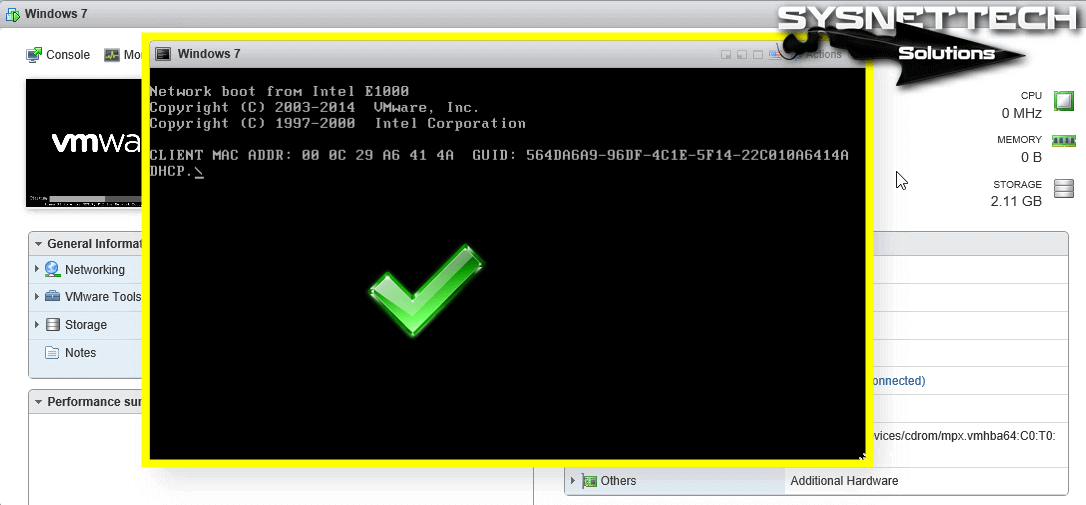
The VM turned on, but an operating system setup did not start. Because we did not add an ISO file to the VM.
Video
For VM setup and configuration on VMware ESXi in VMware Workstation, you can watch the following video and also subscribe to our YouTube channel to support us!
Related Articles
♦ How to Install Windows 10 in vSphere
♦ How to Install Windows 7 in vSphere
♦ How to Copy ISO Files to Datastore
♦ How to Install Ubuntu in vSphere
♦ How to Install Debian in VMware

