
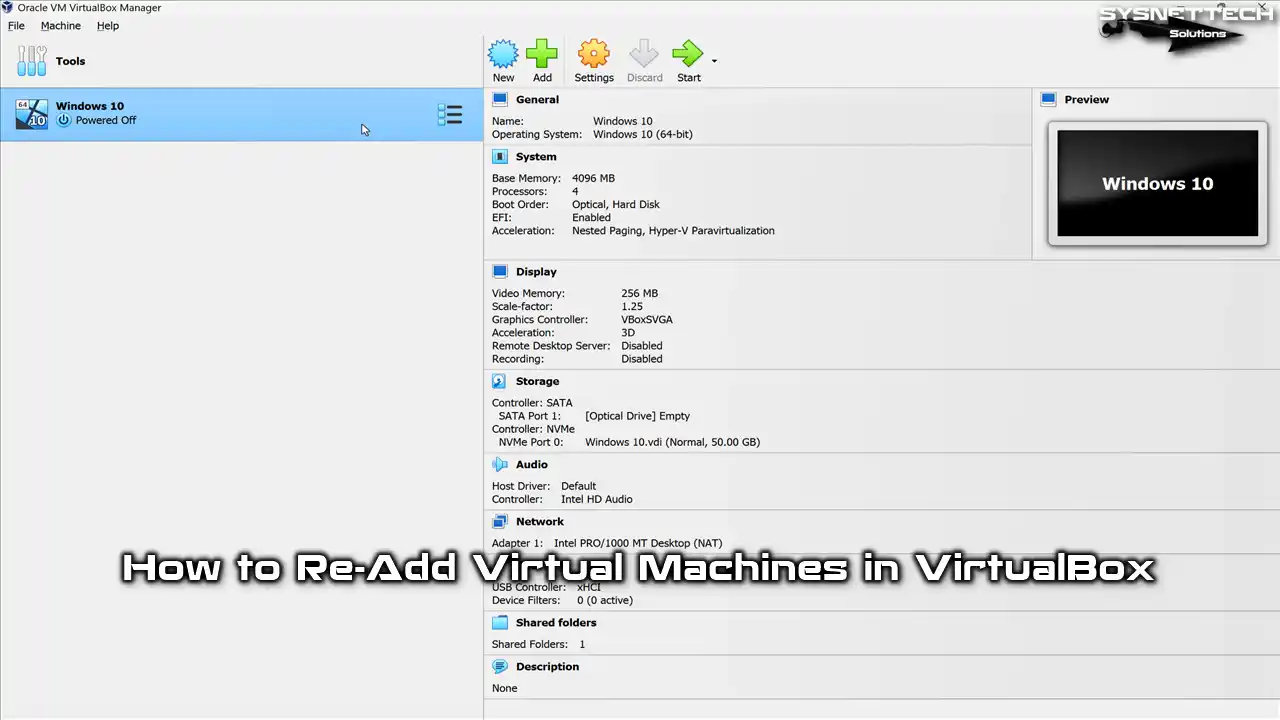
Adding back a virtual machine you have previously used in Oracle VM VirtualBox is simple and easy. In this guide, I will explain simple and effective methods to register existing virtual machines to VirtualBox, whether you are using macOS, Linux, or Windows 10 & 11.
Adding an old virtual machine to VirtualBox is often just a few clicks. However, you might wonder what the VBOX file does during the process. In fact, grasping the basic logic of Oracle virtualization software will give you a big edge in understanding the whole process. You will not need to memorize any of the steps.
VBOX files are critical so that you can re-add your VMs. Therefore, you can reintegrate them using VirtualBox’s user interface and the vboxmanage terminal tool. So, let’s get started to experience and test your old systems again!
How to Register an Existing Virtual Machine into VirtualBox
Suppose you have only deleted all the virtual systems you installed with VirtualBox software from the library. If necessary, you can always decide to include them in the program likewise at a later point. You can even wholly copy and install the virtual system files in Oracle virtualization software on another computer.
Suppose you have backed up your existing virtual machines from the default VM installation location of the Oracle program, and you plan to use them on another PC. In that case, rest assured that you can increase productivity and focus on crucial tasks by scheduling them accordingly.
What Are the Benefits of Re-Adding Virtual Systems?
Let’s say you back up a Windows or other operating system that you run virtually to your external disk so that your host PC doesn’t fill up disk space unnecessarily after using it in your projects.
Or, if you are developing a project with multiple people in a working environment, you can efficiently distribute the VMs to other computers with an external disk by importing them instead of creating a new virtual machine.
Let’s take a look at its other benefits:
- Convenience: Using a preconfigured virtual computer saves you time and provides comfort by skipping installing and configuring an operating system and other software.
- Test and Development: This provides a quick solution for using a pre-installed VM to test software. A preconfigured guest machine can significantly simplify your work and help you visualize how the software will perform on a specific operating system.
- Ease of Deployment: Deploying a VM to another person or system with import is more straightforward and time-saving. Sharing virtual machine setup files is as easy as copying them to another computer.
Adding your previously installed and backed-up virtual systems to VirtualBox allows you to use them quickly if needed. This easy process saves you time, makes it easier to experiment and test, or will enable you to run your applications in isolated environments.
Keeping your host computer’s hard drive clean is a great habit. That is why backing up virtual machines to an external drive makes so much sense. So, if you want to take things to the next level, a regular snapshot routine will boost your workflow. Freezing the system, especially before a key update, can be a life saver.
What is a VBOX File?
The VBOX file of the VirtualBox software contains all the configuration information of a virtual machine. In short, it includes a guest machine’s disk image, memory settings, screen resolution, network settings, and virtual hardware configurations. The Oracle program uses this file to create, configure, and manage a virtual PC.
Suppose you want to copy or move the VBOX file to a different computer. You must also copy the file and all associated disc images.
How to Re-Add a Virtual Machine Again Via VBOX
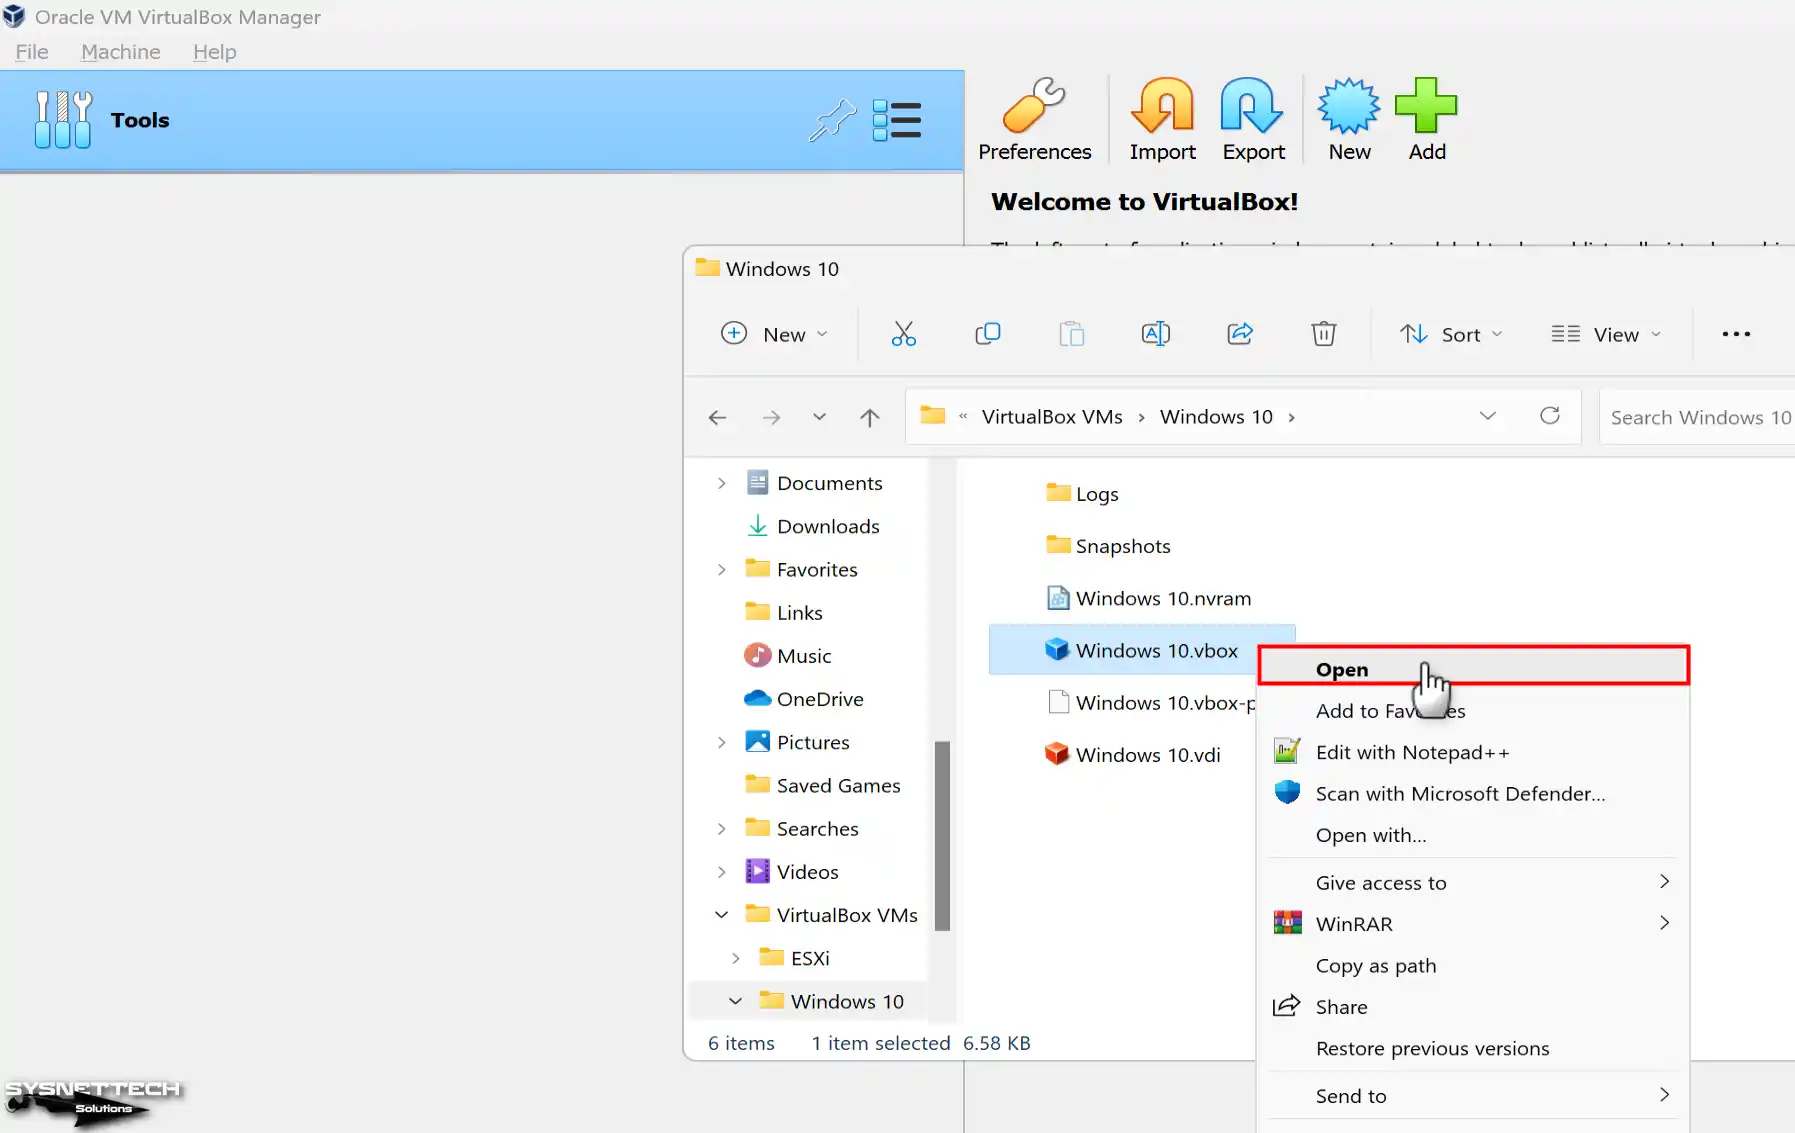
It is straightforward to reintroduce any of your virtual machines into the Oracle virtualization program. To initiate the process, double-click the VBOX file or right-click the ‘Open’ command.
Step 1
To add the virtual machine to the program from your external disk or any location on your system, first go to the installation location or the location you backed up. Check that there are NVRAM, VDI, VBOX-PREV, and VBOX files in the virtual system’s folder and double-click the VBOX file among them and open your VM.
NOTE: Let’s say you only have a disk image and your VBOX file is completely missing. In this case, the best thing you can do is learn how to configure a new VM from scratch. You won’t be able to recover the old settings, but you will have immediate access to your data.
Step 2
Check that you have added a VM to VirtualBox via the VBOX file.

How to Re-Add a Virtual Machine Again Via VirtualBox
Another simple method is to add your guest machine via VirtualBox. To do this, you can use the Machine / Add option from the tool menu, or for faster access, click Add from the big icon buttons on the main screen.
Step 1
When you click the Add button, go to the location of your VM from the Select a virtual machine file window and select and open the Windows 10.vbox file as an example.

Step 2
Likewise, you can check that you have successfully added a Windows virtual machine using the VirtualBox program’s user interface.

How to Register a Virtual Machine Again Via Terminal (Vboxmanage)
You have completed the steps to re-add a virtual machine previously installed on VirtualBox using the two simple methods above. Now, let’s add the existing VMs again in a slightly more professional way.
If you possess proficiency in computer usage, you likely have a certain level of familiarity with terminal commands on Windows or Linux operating systems. If you have Windows 11 or any other operating system, you should know they all have the terminal tool.
There is a tool called “vboxmanage” in the installation location of VirtualBox software. This tool allows you to configure your virtual systems further. It makes it easy to reintroduce your VMs into the program.
Step 1
To go to the location of the Oracle program on Windows 11, right-click on the program’s shortcut in your desktop location or the start menu, and then click Open File Location.
After launching the “C:\Program Files\Oracle\VirtualBox” directory, right-click in it and hit the Open in Terminal option.

Step 2
Please verify your current location, which should be located at “C:\Program Files\Oracle\VirtualBox”. Then you can quickly add your desired virtual system to your program by executing the command ( ./vboxmanage registervm “VM’s Location”).
./vboxmanage registervm "C:\Users\SYSNETTECHSolutions\VirtualBox VMs\Windows 10\Windows 10.vbox"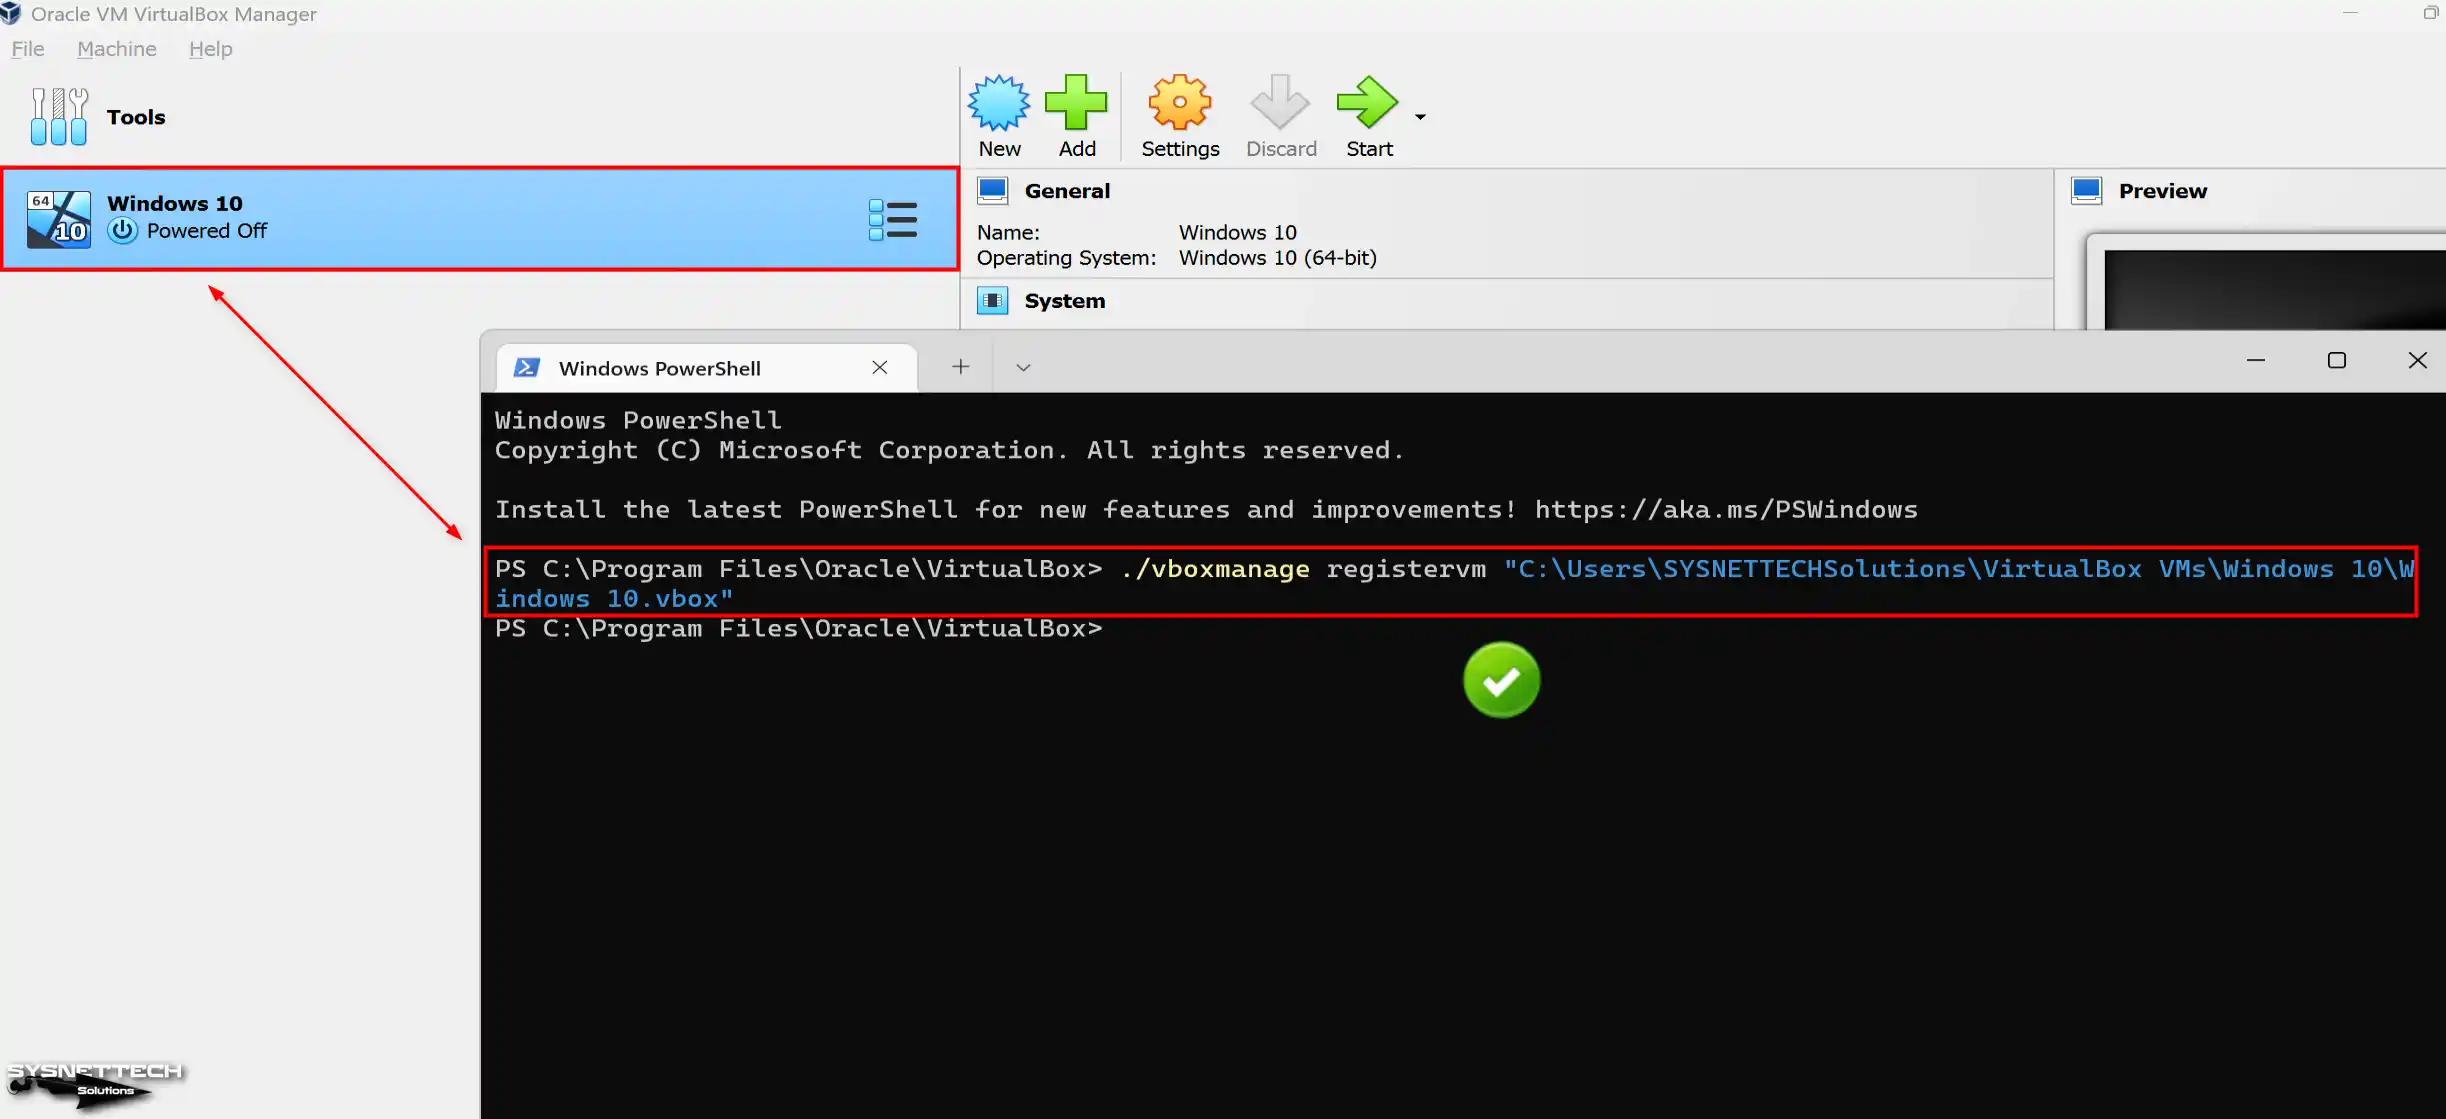
Bringing in a virtual machine is very handy, especially if you need to share the same setup with your team. Making a full copy of the original system before rollout, in my view, gives a much cleaner plan. This lets you share safely without putting your main machine at risk.
Video
FAQ About Reusing Old VMs in VirtualBox
How do I add back a virtual machine that I removed from VirtualBox?
Can I add a virtual machine without a .vbox file?
Can I move my virtual machine files to another computer?
Do I have to add a VM with vboxmanage from the terminal? What is the difference?
I get a ‘file not found’ error when adding the virtual machine. Why?
Do the network card or USB settings get messed up after adding the VM?
Conclusion
As a result, you have the opportunity to re-add virtual guest systems to Oracle VM VirtualBox. Thanks to this feature, you can quickly reintegrate your previously installed VMs.
Additionally, you can do this using both GUI and terminal commands. So you can save your existing virtual machines. This gives you efficient distribution, ease of sharing, and time savings.

Be the first to share your comment