

This guide gives you clear steps for installing Windows Server 2019. You can use VMware Workstation on a Windows 11 or 10 computer. Whether you have versions 15, 14, 12, or 17, this guide helps you. Moreover, it helps you set up your virtual environment.
How to Install Windows Server 2019 in a VM on VMware Workstation
Microsoft recently released the Windows Server 2019 Preview version in the Windows Insider Program.
Although Windows Server 2019 is very similar to version 2016, it has many new features. If you are wondering what’s new in it, visit this webpage.
As you know, IT professionals use high-quality virtualization programs. Examples of these programs are VMware Workstation, Oracle VM VirtualBox, and Hyper-V.
In this article, we will use VMware Workstation 14 Pro to install the Technical Preview.
As you all know, making virtual computers with VMware is easy. You can go ahead with the setup steps by getting a new virtual computer ready. However, I suggest that you first get the Windows Server ISO file from here.
How to Run Windows Server 2019 in Virtual Machine
Follow the steps below in order to set up Windows Server 2019 step by step. But first, download VMware Workstation Pro to your PC.
Step 1
After you open VMware Workstation, click Create a New Virtual Machine. Then install a new virtual machine.
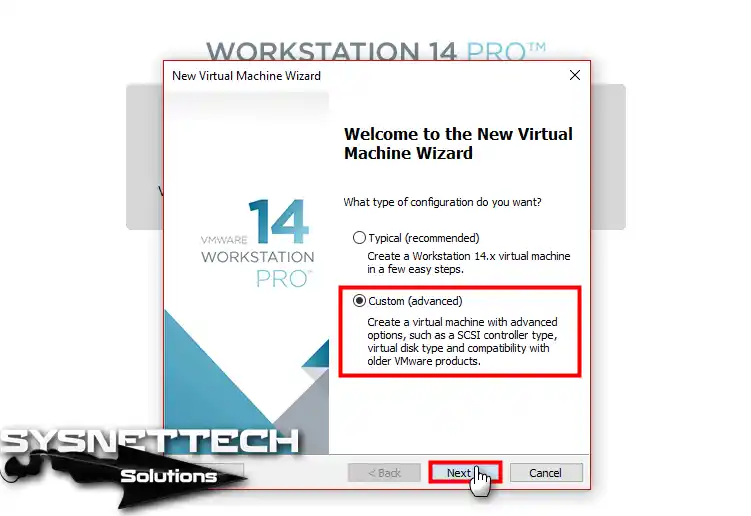
In the virtual machine creation window, select Custom (Advanced) and click on the Next button.
Step 2
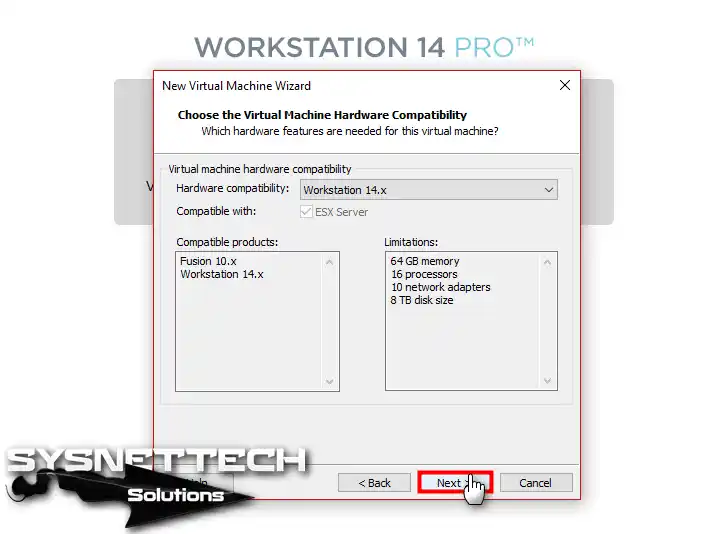
In the Virtual Machine Hardware Compatibility window, make sure Workstation 14.x/15.x is selected. Then click Next.
Step 3
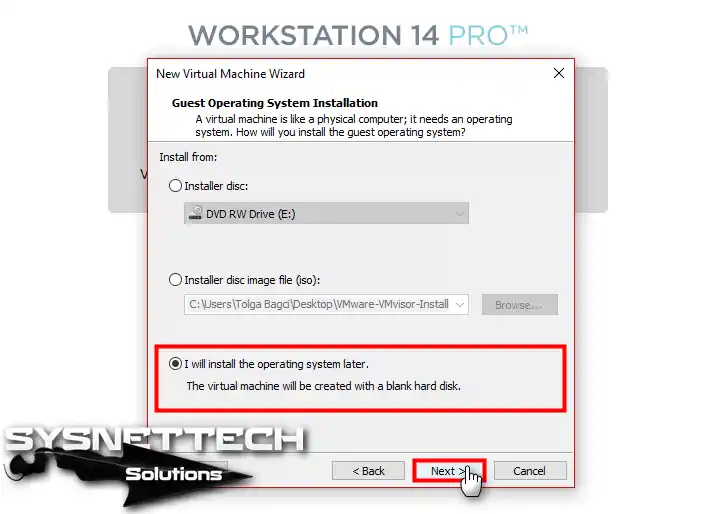
Select I will install the operating system later. This option lets you add the Server ISO file later. Then click Next.
Step 4
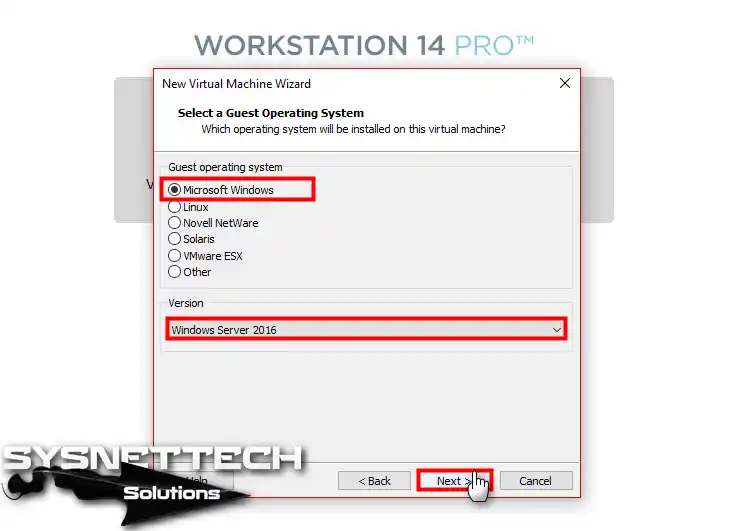
In the operating system selection window, select Microsoft Windows. Then choose the Server 2016 version and click Next.
Step 5
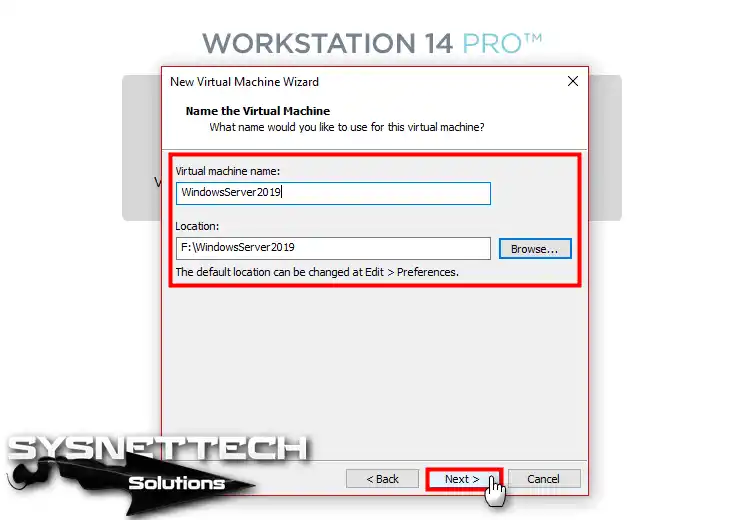
Store the virtual machine on an external disk for better performance. Save the location on a portable HDD. Then click Next.
Step 6
In the Firmware Type window, UEFI is the default option. If you want, you can enable Secure Boot.

Step 7
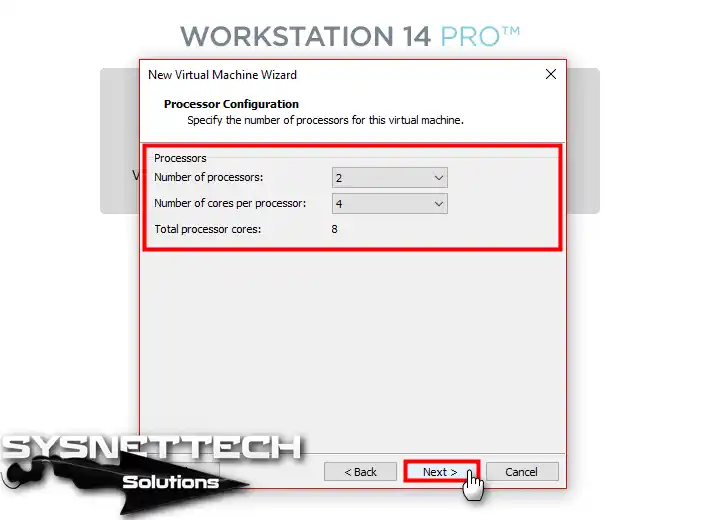
In the Processor Configuration window, configure the processor for your hardware. Then click Next.
Step 8
Likewise, set the virtual machine memory to 4 GB (4096 MB). You can specify a higher RAM value too. Then click Next to continue the configuration.

Step 9
In the VMware network configuration window, you can select the NAT network.

Configuring Virtual Disk and Finalizing Settings
Step 1
Choose LSI Logic SAS (Recommended), the default option, and keep going.

Step 2
Please choose “SCSI” as the disk type and then proceed by clicking the “Next” button.

Step 3
Select Create a new virtual disk. This creates a new device for the virtual machine. Then click Next.

Step 4
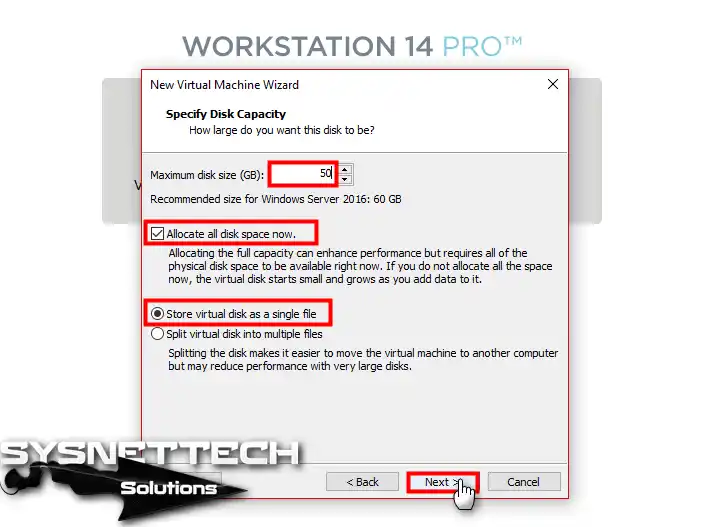
Use all free space on the disk. Then configure the VMware disk as shown below.
Step 5
Continue by clicking the Next button in the disk file specification window.

Step 6
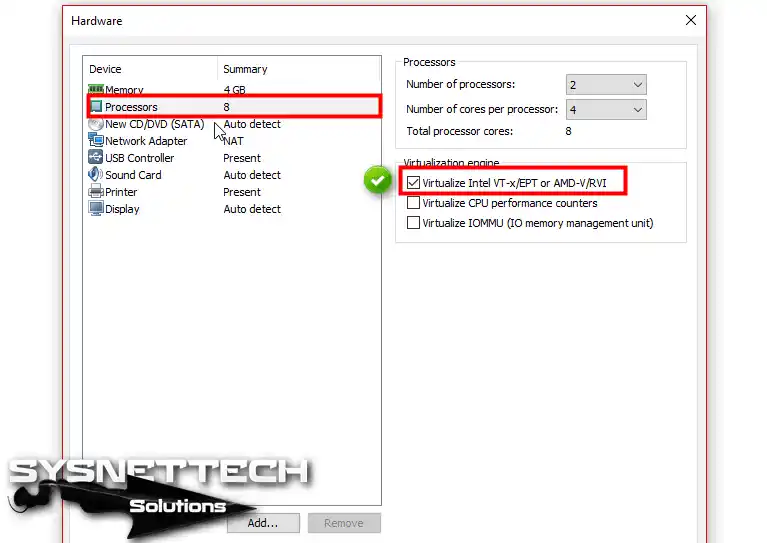
Activate the virtualization feature before completing the virtual computer. Open Hardware settings. Enable the Virtualize Intel VT-x/EPT or AMD-V/RVI option as shown below. Then close the window.
Step 7
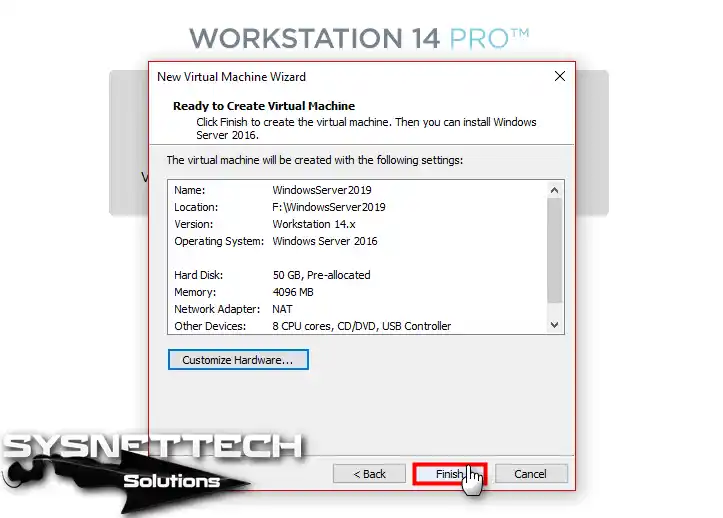
Click the “Finish” button in the window that’s ready to create a virtual PC.
Step 8
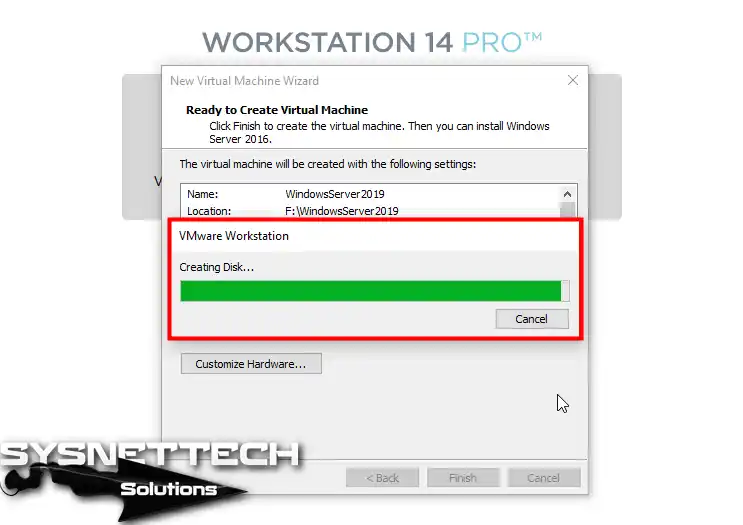
Once you click Finish, the virtual disk creation process begins. Also, note that this process may take some time.
Step 9
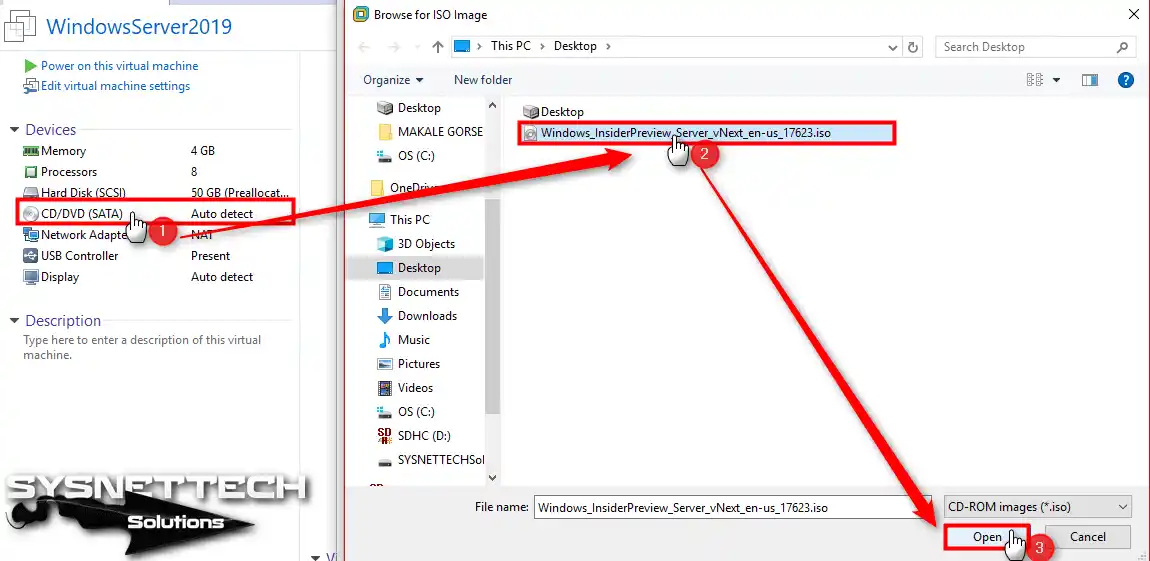
After you create the virtual machine, attach the downloaded ISO file to it.
Step 10
Start the virtual machine and start the WS 2019 installation.

How to Install Windows Server 2019 Step-by-Step
After you run the virtual machine, follow these steps. Then install Windows Server on VMware step by step.
Step 1
Run the virtual machine on VMware 14/15. Then, when you see “Press any key to boot from CD“, press any key.
Once the setup window opens, set your language, time, and keyboard preferences, then click Next.

Step 2
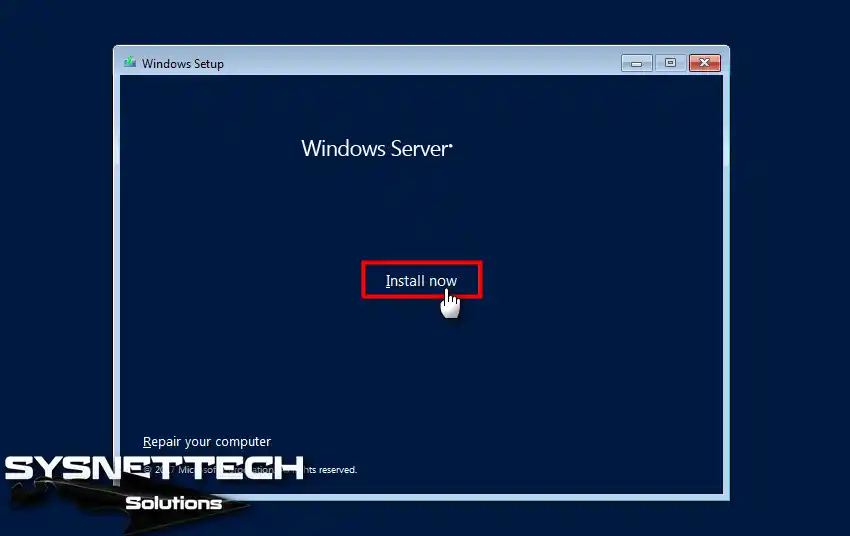
Click the Install Now button to start the VMware Windows Server installation.
Step 3
Go to the “Activate Windows” window. Then click the option that says I do not have a product key.

Step 4
You must select the type of operating system you want to install. If you want a GUI, choose the desktop experience option. Then continue with the option shown below.

Step 5
Accept the Server 2019 license agreement and click Next.

Step 6
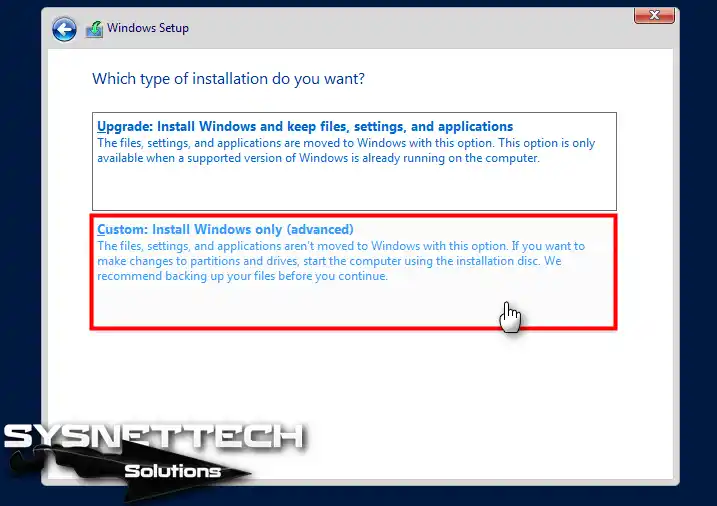
Select the “Custom: Install Windows only” option from the server installation types.
Step 7
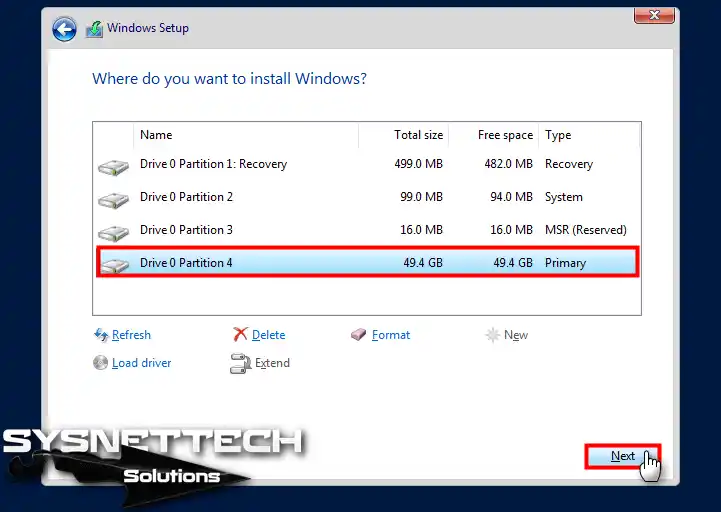
Partition the virtual machine disk. Then select the partition for installation. Click Next.
Step 8
Wait as the wizard copies the system files for the server.
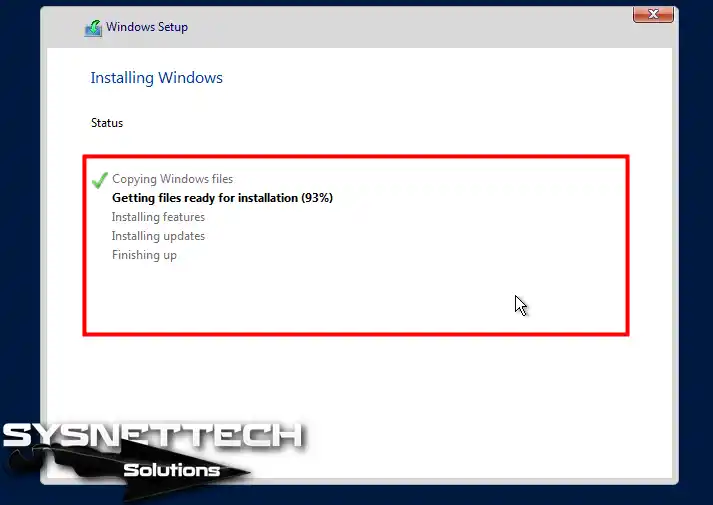
Step 9 Server waits for a moment as the devices prepare themselves to work at their best.

Step 10
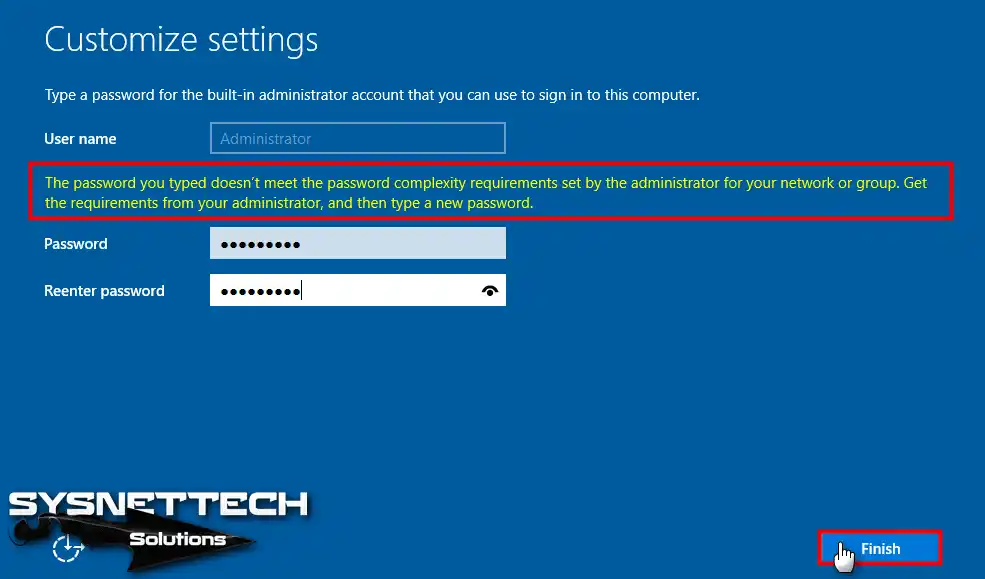
Set a complex password for the Admin user and click the Finish button.
Step 11
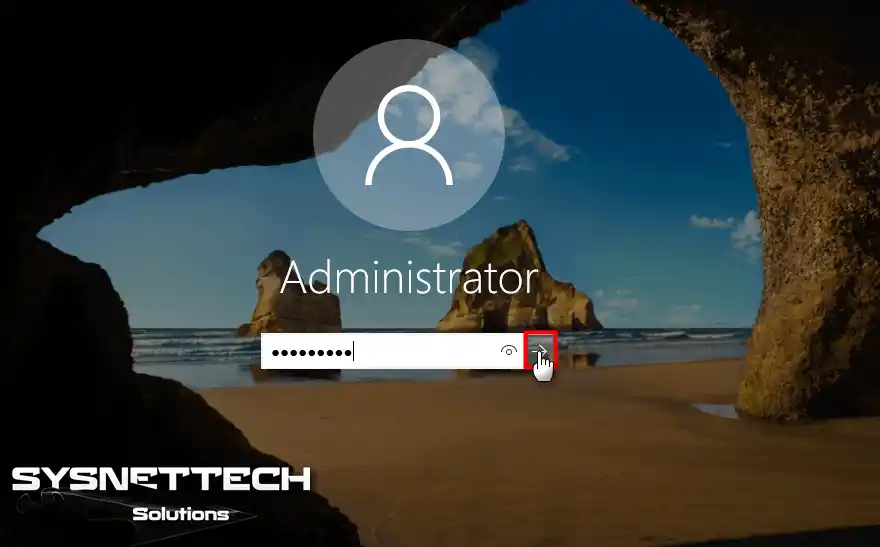
Once WS 2019 opens, press Ctrl + Insert at the same time. This switches to the user interface. Then type the password you specified and press ENTER.
Step 12
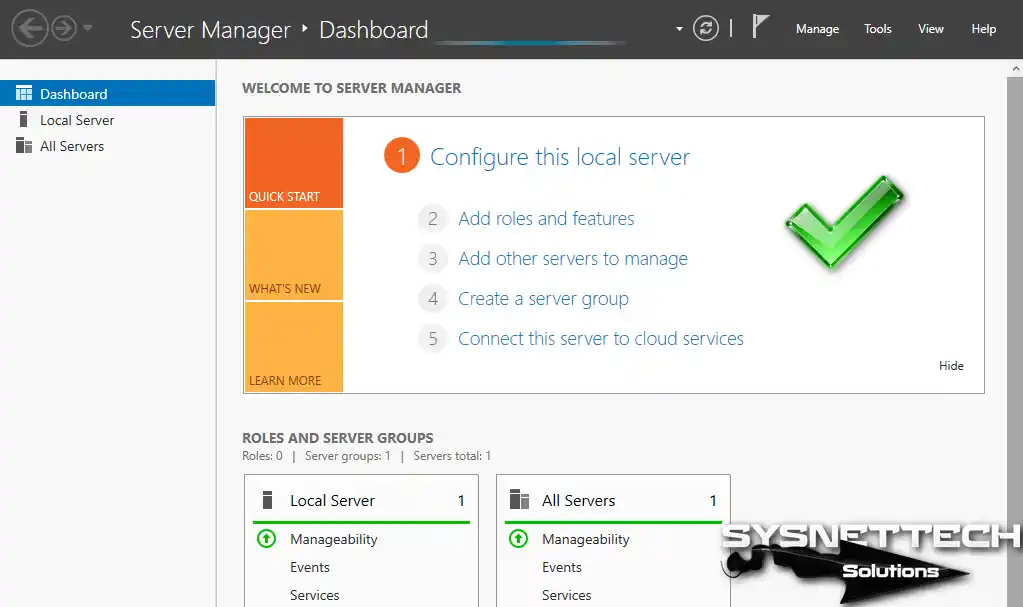
After completing the setup, proceed to the next step, which is to install VMware Tools.
How to Install VMware Tools in Windows Server 2019
When you’re using VMware Workstation, make sure to install VMware Tools. It helps your virtual systems work better.
To install VMware Tools in the virtual server, follow the steps below.
Step 1
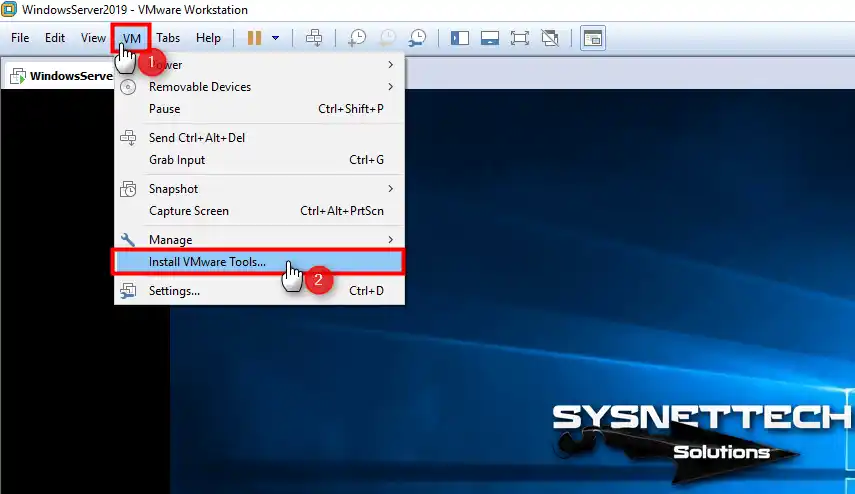
On VMware Windows Server, click the VM menu. Then click Install VMware Tools.
Step 2
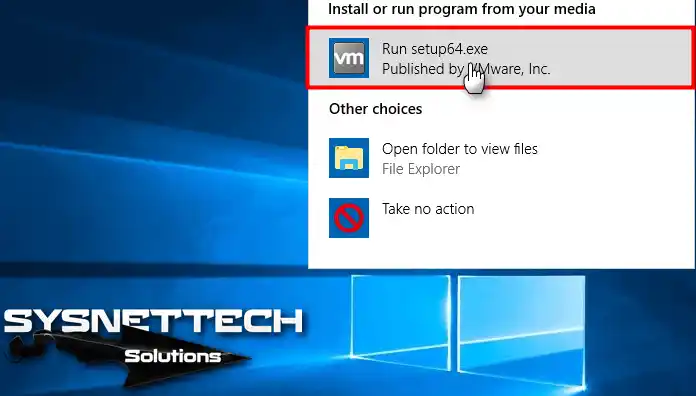
After VMware adds the Tools image file to the system, click Run setup64.exe.
Step 3
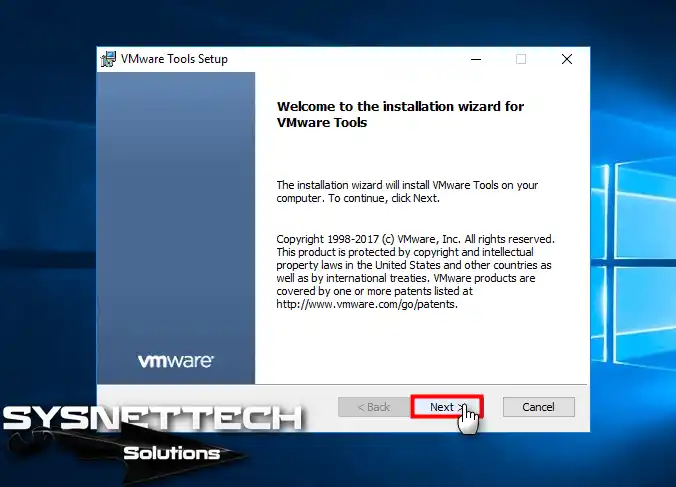
In the VMware Tools installation wizard window, click Next.
Step 4
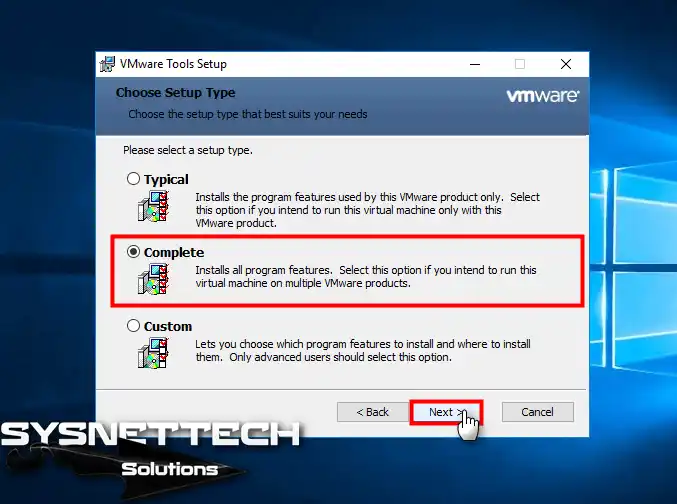
Select Complete for the type of installation and click Next.
Step 5
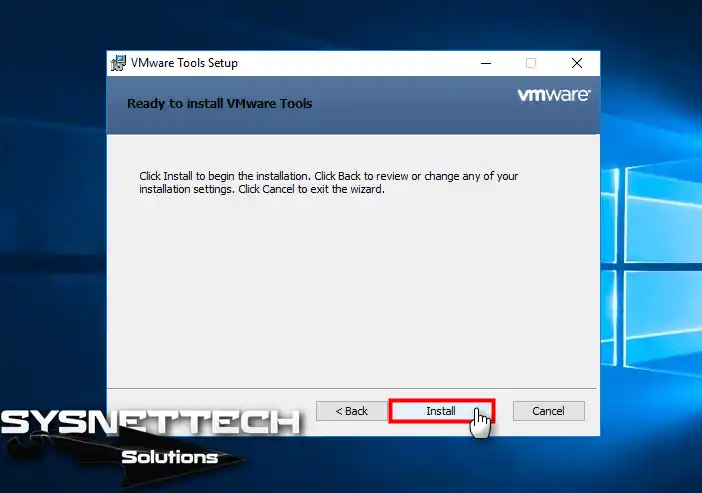
And finally, click the Install button to start the VMware Tools installation.
Step 6
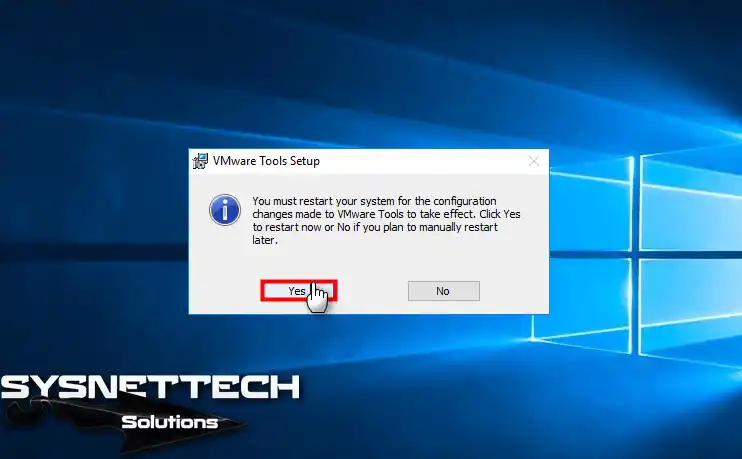
Restart your system so the changes take effect.
Step 7
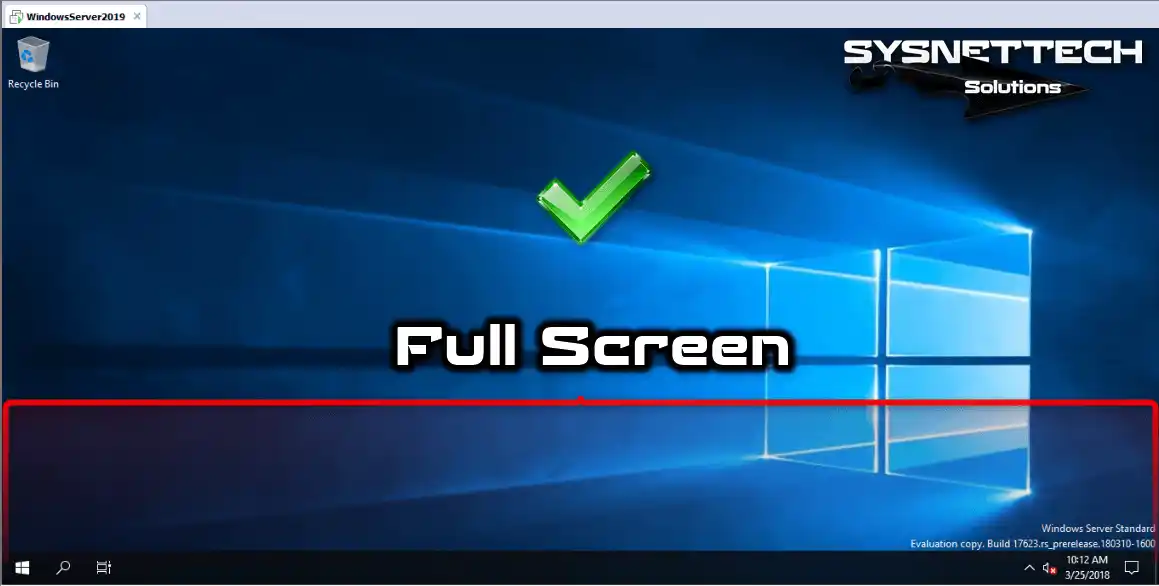
Configure the resolution setting of the virtual machine by clicking View / Fix Guest Now. After installing VMware Tools, you can exchange files. In this way, share them between your virtual and physical computers.
Video 1
Video 2
6 Critical Questions About Your Virtual Server Journey
Can I install a virtual server on a computer with Windows 11?
Is there a difference in setup between VMware Workstation 17 and 15?
Why do I need to select Windows Server 2016 as an option?
Why should I put the virtual machine disk on an external HDD?
Should I enable Secure Boot or not?
What happens if I do not install VMware Tools?
Conclusion
In conclusion, by installing Windows Server 2019 with VMware software, you will create many opportunities. That is, you will be able to manage and deploy applications in a virtualized environment. By following these steps, you can quickly create a virtual machine. In other words, you can create a server.
After setup, you may want to try different Windows versions. Installing a Windows 10 virtual machine is a solid starting point for these tests. Here is the critical point: do not risk your main system. Run tests inside a separate VM. This keeps your real machine safe.
In addition, you can discover the new features of Windows Server 2019. Thus, you can test configurations or develop applications. In short, benefit from the flexibility of virtual environments and start your journey with confidence!

2 People Shared Their Experience
Thank you
Great artical