
In this article, we will install macOS Mojave on an installed macOS High Sierra without using any virtualization program.
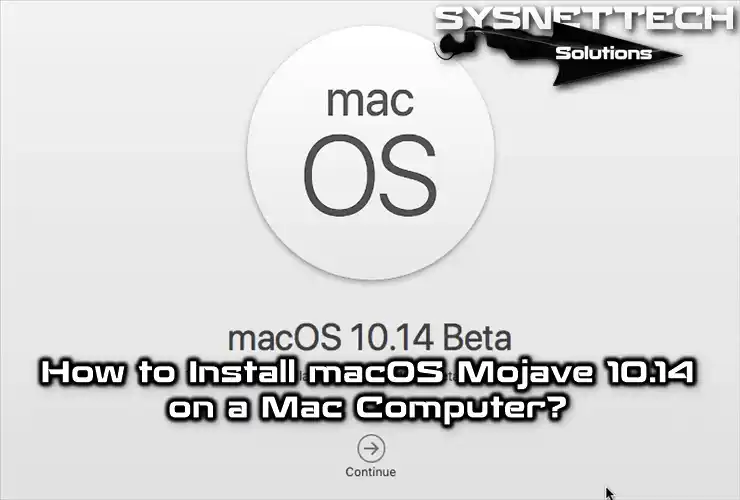
How to Install macOS Mojave Step-by-Step
Apple recently released macOS 10.14 for developers. At the end of this month, macOS 10.14 will be released to all users. macOS 10.14 Beta 1 was named Mojave.
To download macOS 10.14 for Apple Developer without a Developer account, you must use the macOS Developer Beta Access Utility. You can use macOS Access Utility to unlock macOS 10.14 and start the download.
You can update your current macOS operating system to macOS 10.14. In this article, we will upgrade an existing macOS High Sierra 10.13.5 to macOS 10.14 without using a virtualization program.
If you want to run with a virtualization program, we released the macOS Mojave ISO file in our previous article for you. You can use the macOS ISO file with virtualization programs such as VMware Workstation or VirtualBox.
How to Setup Mac OS Mojave 10.14 Beta 1
Follow the steps below to install Mac OS Mojave 10.14 Beta 1 on a Mac computer.
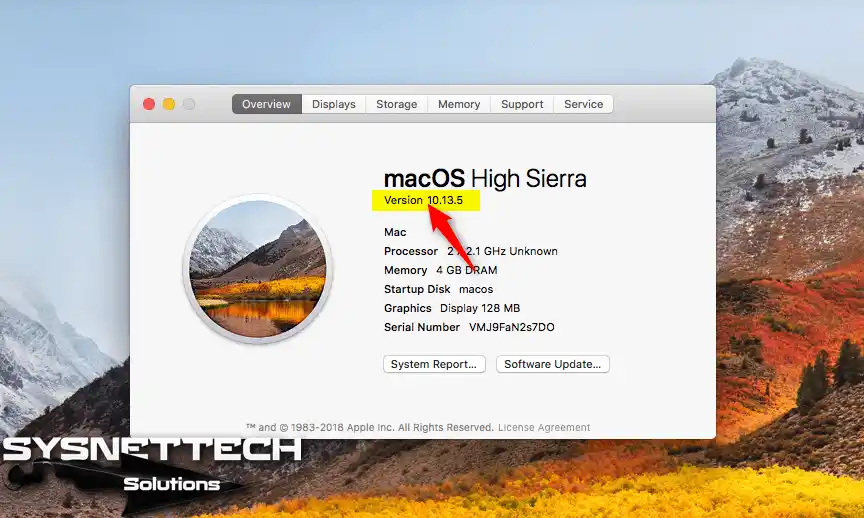
Step 1
As you can see in the image below, the version of the macOS system to be upgraded is 10.13.5. Proceed to the next step to download Apple’s Mojave system.
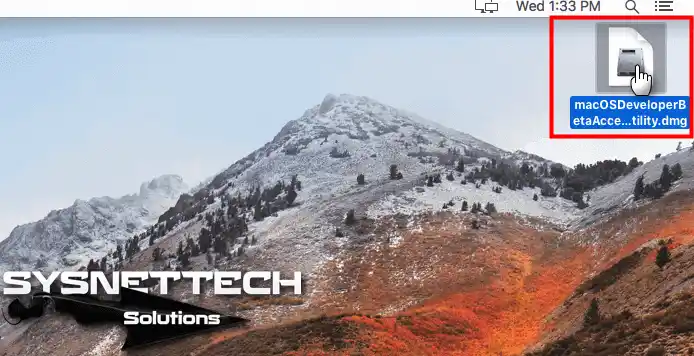
Step 2
After downloading the macOS download tool, run the .dmg extension.
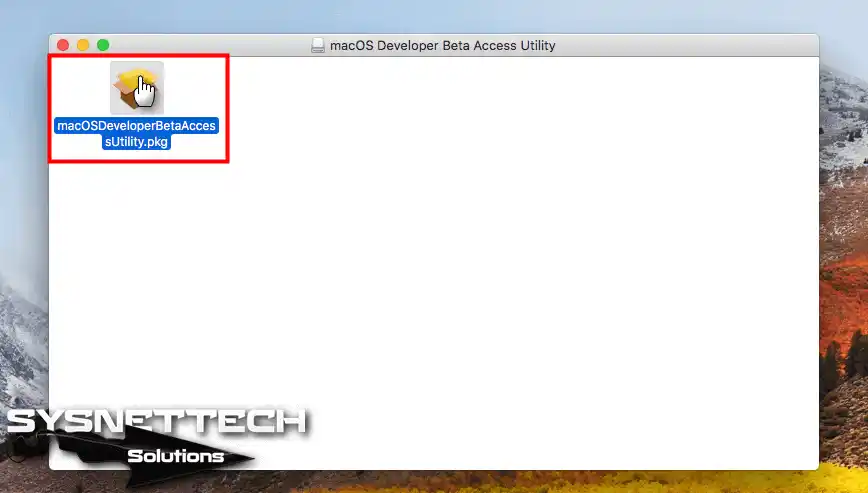
Step 3
Double-click the macOSDeveloperBetaAccessUtility.pkg file.
Step 4
Click Continue to install the macOS Developer Beta Access Utility.

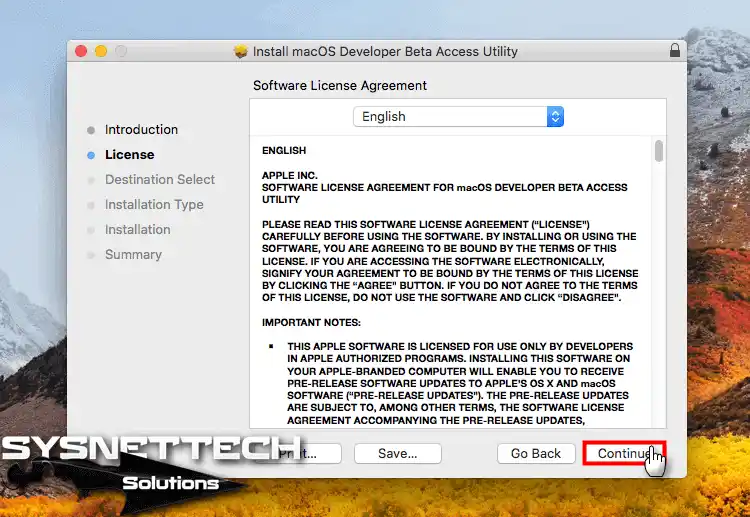
Step 5
In the macOS Utility’s license agreement window, click Continue.
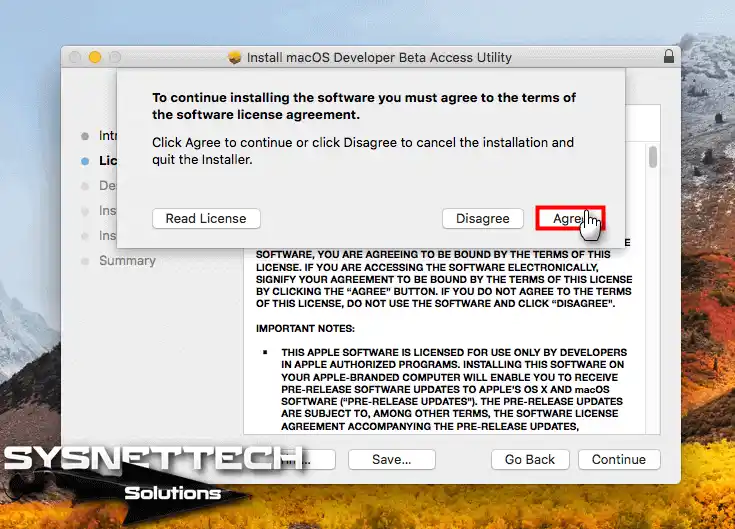
Step 6
Click Agree to accept the license agreement.
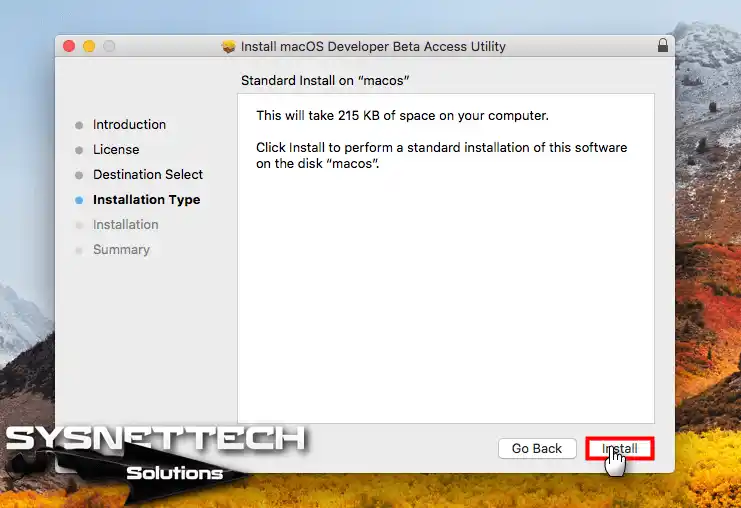
Step 7
Click Install to install the macOS Developer Utility.
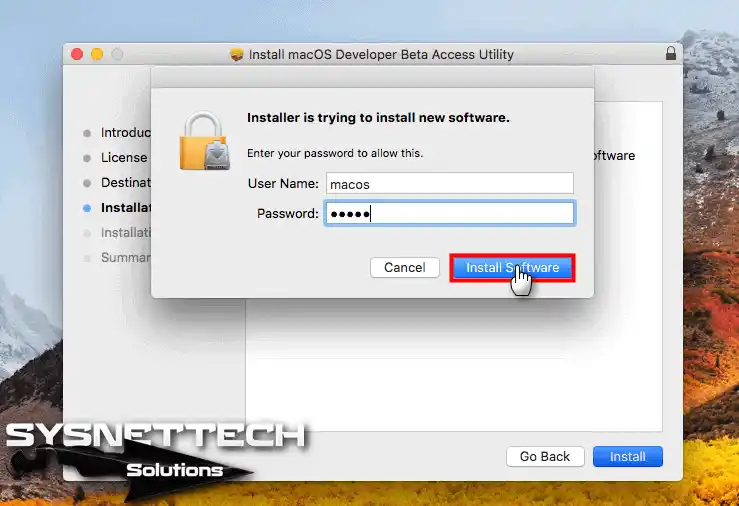
Step 8
Type your macOS Root password and click the Install Software button.
Step 9
Wait while installing macOS Utility.
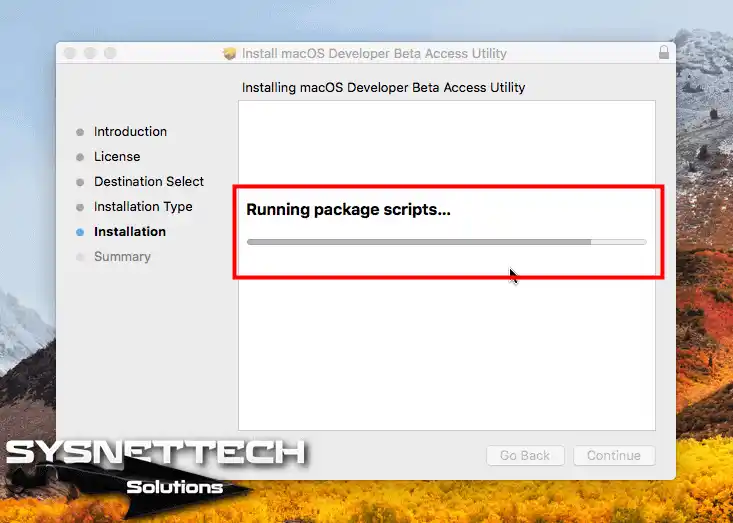
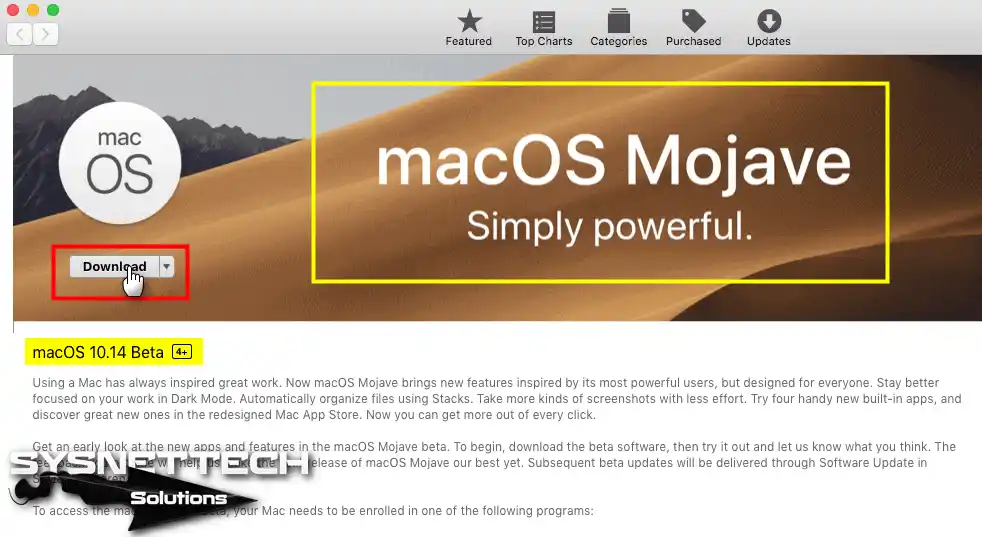
Step 10
After installing the macOS Developer Access Utility, the Mac App Store will open automatically and the macOS download page will open. Click the Download button to download Mojave.
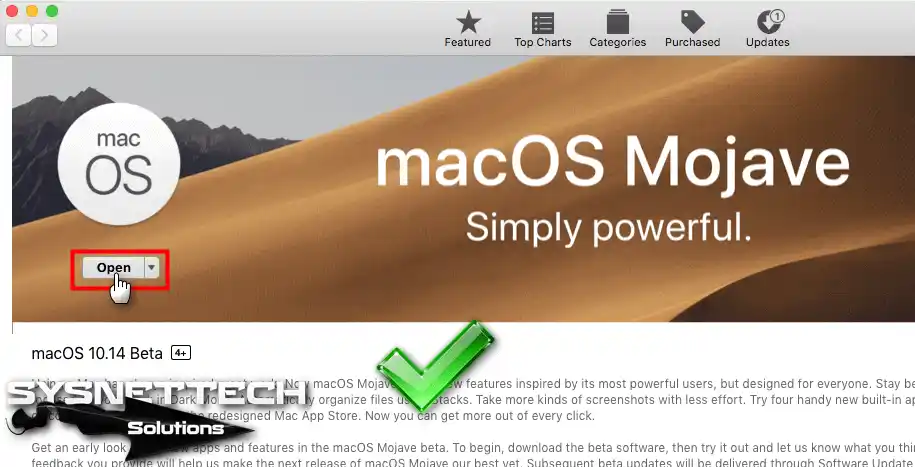
Step 11
After downloading macOS 10.14, click the Open button.
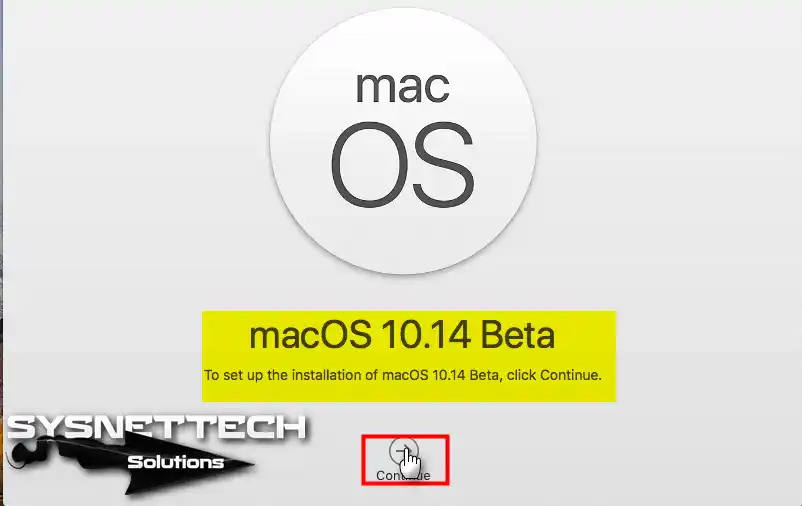
Step 12
Click Continue to start the macOS 10.14 Beta installation.
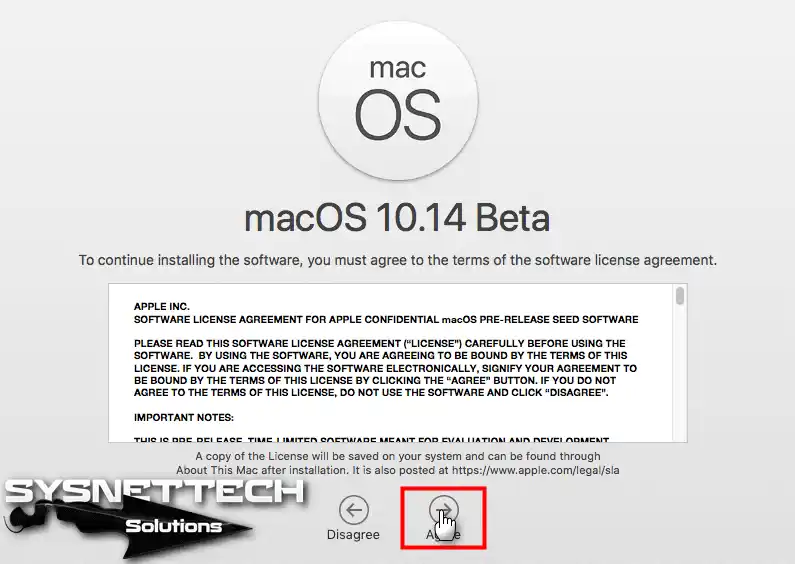
Step 13
Click Agree to accept the Mojave license agreement.
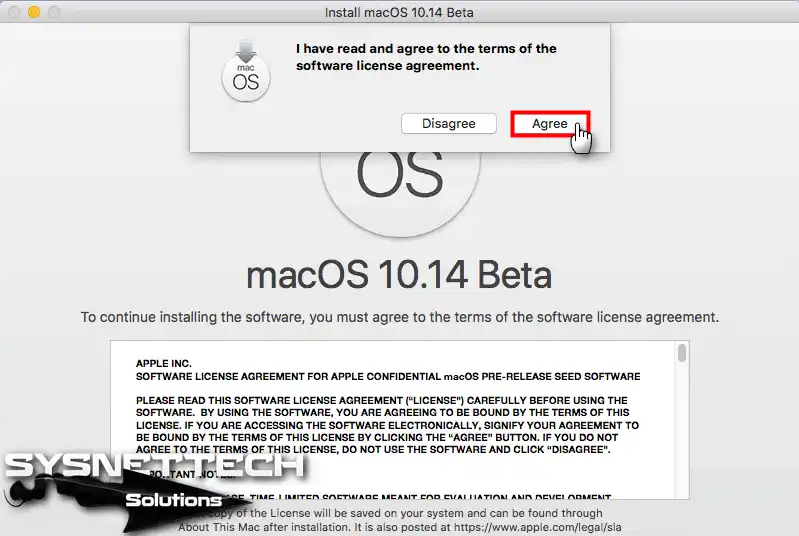
Step 14
Click Agree button again.
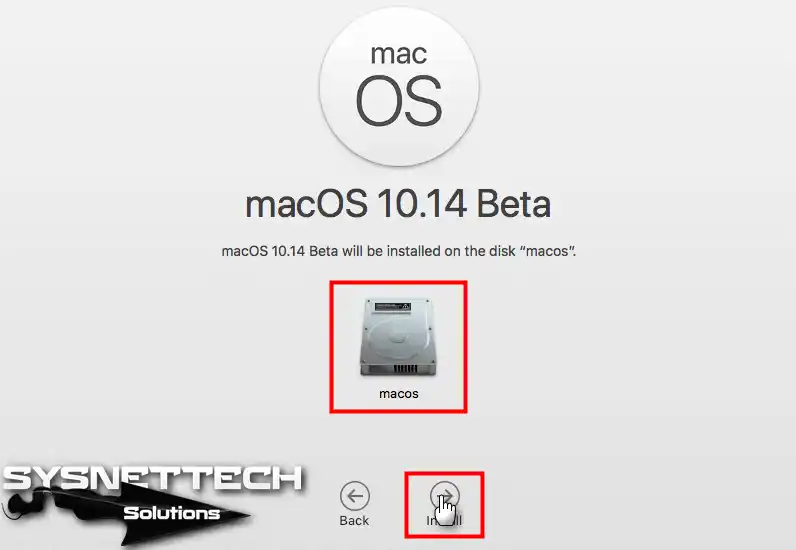
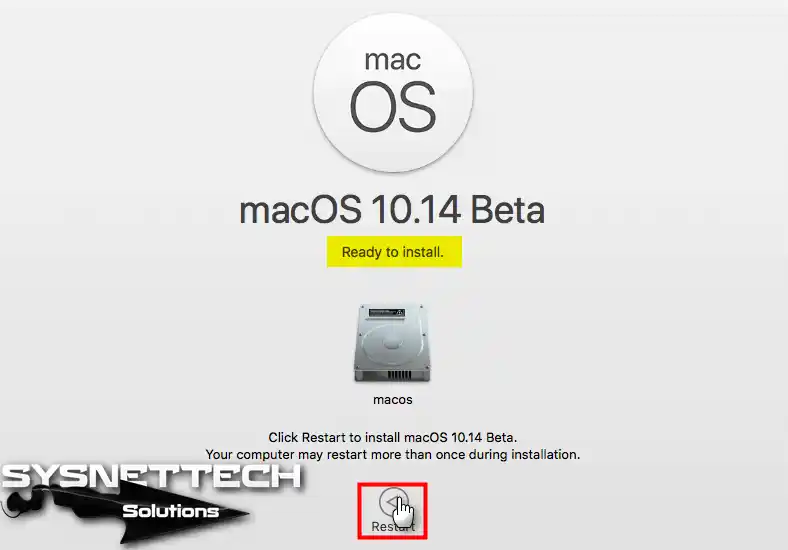
Step 15
The installation will do on macOS disk. Click the Install button to start the macOS installation.
Step 16
Type your macOS root password and press Enter.

Step 17
Wait while the installation files copies.
Step 18
Restart your system by clicking the Restart button after the installation copies the required files.
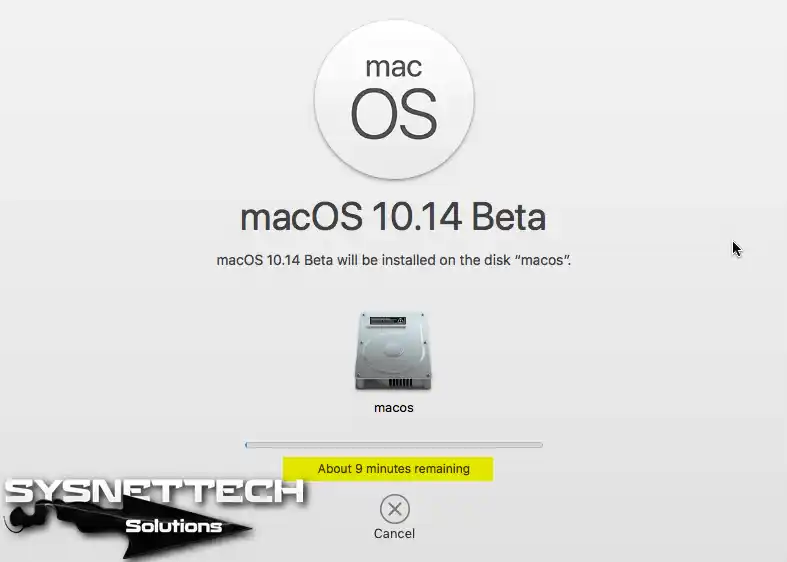
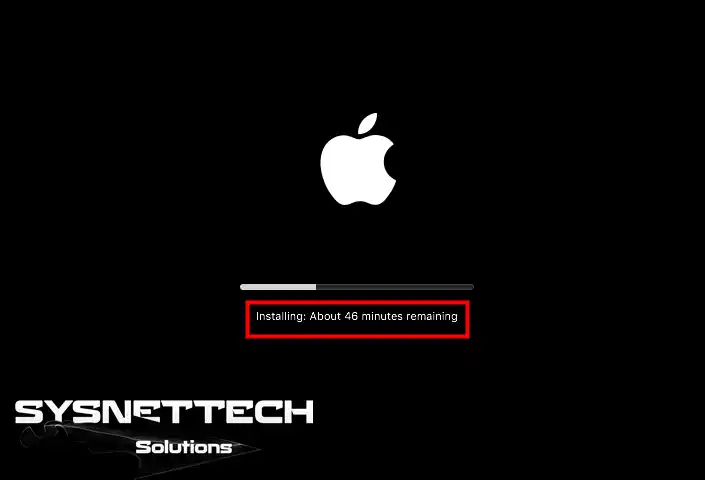
Step 19
Please wait while installing macOS 10.14 on Mac. The installation will complete in approximately 45 minutes.
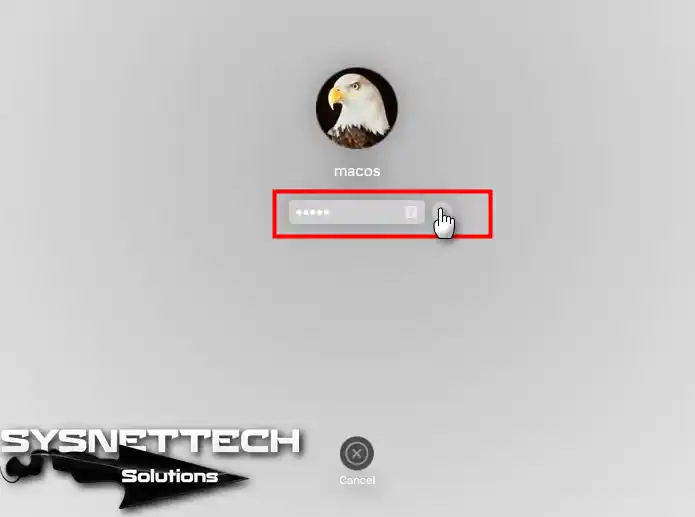
Step 20
After your computer restarts, type your root password and press Enter.
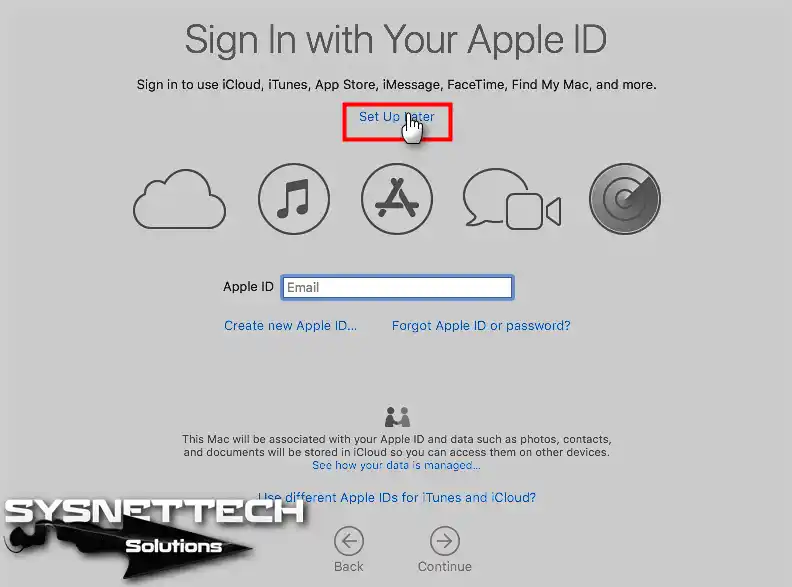
Step 21
If you’d like to log in to your Apple account, you can sign in in the following step. If you do not want to log in to account, click the Set Up Later button.
Step 22
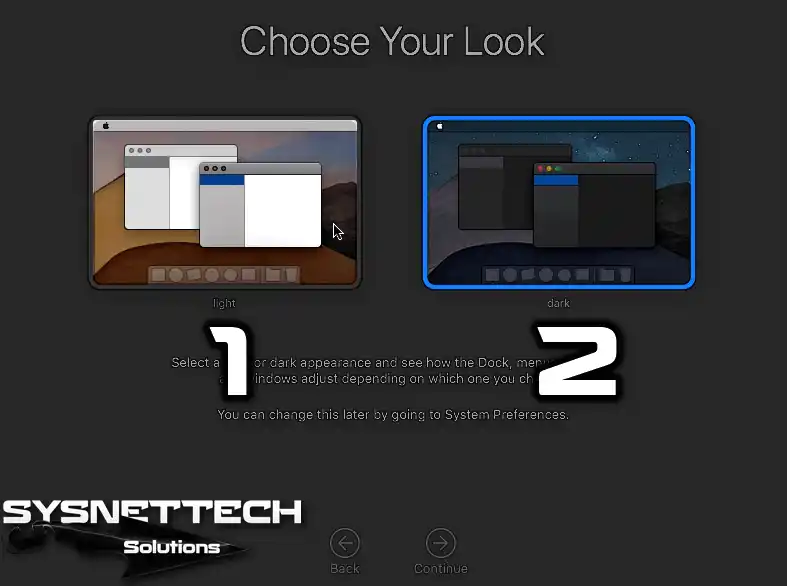
One of Mojave’s eye-catching features is the Night Mode feature. Select the View you want to use in this step and click Continue.
Step 23
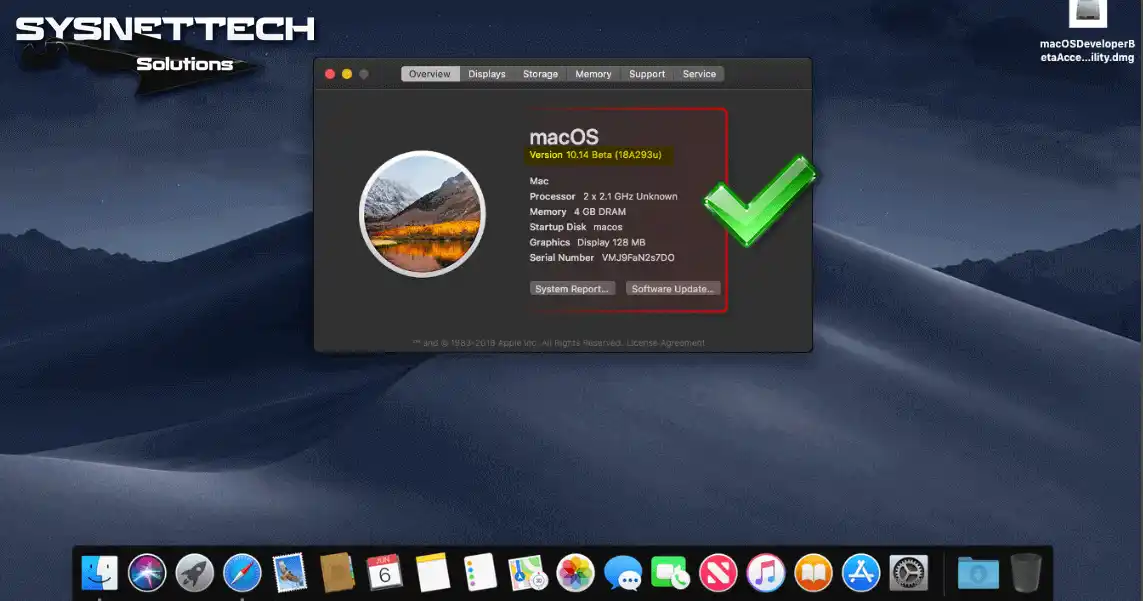
macOS 10.14’s desktop view is as follows. To check the macOS Mojave version, click the Apple Logo, and click About.
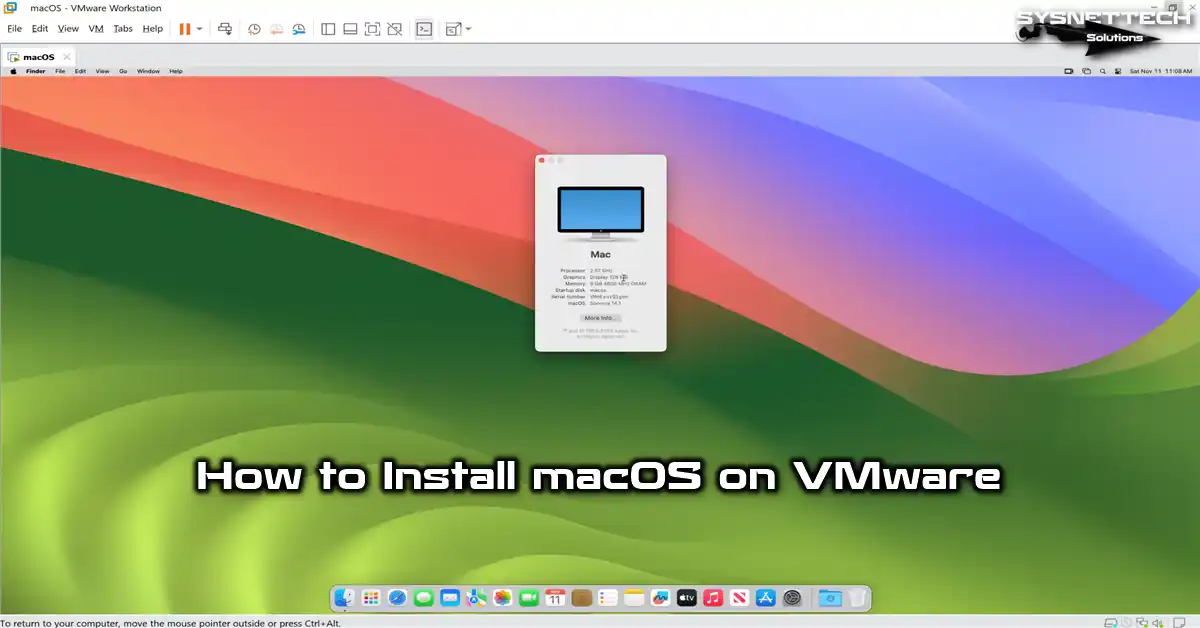
How to Run macOS using a Virtual Machine
To install macOS step by step on a virtual machine using VMware Workstation, click on the image below to browse our article.
Conclusion
In this article, we have updated macOS High Siera 10.13.5 to macOS 10.14 Beta on a Mac. Thanks for following us!

Be the first to share your comment