
In this guide, I will explain how to install Debian 12 Bookworm with VMware Workstation 17 Pro. Plus, I will set up this powerful and versatile Linux type on a virtual machine. This software is compatible with Windows 10 and 11 PCs and provides us with a seamless virtualization experience.
With Workstation Pro, we can run many operating systems at once. After setting up the VM, I will install VMware Tools. In addition, this tool will improve file sharing and performance in the VM. Thus, I will also cover the steps to improve the integration in detail.

How to Set Up Debian 12 on a Virtual Machine using VMware Workstation 17 Pro on Windows 10
Debian Linux is a free OS with open-source code. It also contains many free tools that home or business users can use to do their work. For example, I can give them software such as LibreOffice or VLC Media Player. We use LibreOffice to create or edit office documents. Over and above, we prefer VLC Media Player to open many video files.
You can install Debian without using your PC’s hard disk and without disrupting your current operating system. Of course, you will need a DVD or USB stick before doing this. You can also use what we call Live, meaning without installation. Let’s say you plan to install the Debian system on your PC later. In this case, you can start the system installation from the Live CD.
But I do not suggest trying the Debian system by running it as a Live version. Instead, you can use VMware Workstation software on your computer. It is a great idea to run a Linux system you want to test on a virtual machine.
The Workstation Pro software developed by VMware is paid for. But, if you want to use it without paying, you can choose the Player version. Yet, Workstation Pro still activates the more advanced features of the OS you will install. Thus, it allows you to create a professional VM to test new technologies.
How to Download Debian ISO Installation Image File
You can download Debian Linux as an ISO to your PC. To do this, visit the debian.org website.
After looking at the website, you might find it hard to see where to get the ISO file. But click on Getting Debian in the top menu. Then, click on the “complete installation image” link under the Download an installation image option.
Next, pick the “Download CD/DVD images using HTTP” link. Finally, choose amd64 in the “Official CD/DVD images of the stable release” subheading.
You will see two titles: CD and DVD. Click on amd64 in the DVD title. This will take you to the download page. Also, this DVD image is perfect for slow or no connection situations. Moreover, it contains many tools and is suitable for offline use.
After scrolling down the webpage a little, you can download the 3.7 GB ISO file named “debian-12.8.0-amd64-DVD-1.iso” to your computer.
How to Create a New Virtual Machine for Debian
When installing the Debian OS with VMware, the correct setup is vital. You also make to configure the VM’s settings correctly. In short, you will ensure a more stable and trouble-free OS.
Steps:
Step 1
After running the VMware VTx software, click on the Create a New Virtual Machine option. Thus, you will open a wizard window.
Also, check the “Custom (advanced)” option in the Virtual Machine Wizard. Then, click the Next button to continue the VM wizard.

Step 2
Set the hardware compatibility of the Debian VM to 17.x. Also, don’t forget to change this setting if you upgrade the Workstation software.
So, if you update the hardware compatibility, you will also increase the performance. But, by doing so, you will also prevent future problems.

Step 3
In the Guest OS Installation wizard, choose “I will install the operating system later.” After selecting what you want, click Next to continue. This way, you can install the operating system later.

Step 4
From this window, you need to select the operating system type for the virtual computer. Therefore, you need to configure the OS version here. First, select the Linux option. Then, choose Debian 12.x 64-bit from the Version section.

Step 5
From this window, you can choose where you want to install your virtual machine. If you have an old PC, there are ways to increase performance. For example, if you use a mechanical disk, you should be careful. That’s why it is helpful to store the virtual machine on an external SSD. That’s why you can get more increase.
Type a name for your Debian virtual machine and then choose where you want to store it.

Step 6
In the CPU Configuration, choose a thing that fits your processor’s power. It is also vital to pick this value based on your PC’s capacity. A good setup also affects the performance of your VM. Finally, after setting it, click Next.

Step 7
In the Memory window, select a value based on your current host’s RAM size. However, if you specify this value correctly, you will increase the performance of your VM.

Step 8
In the Network Type window, you can use NAT, which is selected by default. If you have configured a Bridged network in the Virtual Network Editor, you can choose this type.

Step 9
Leave the default option (LSI Logic) enabled for the controller type and click Next.

Step 10
Select the NVMe type, which is known as the newest technology, as the virtual disk type. If you try to install older Debian systems, you need to learn about NVMe support. If it does not support it, you can change the disk type to SATA or SCSI.

Step 11
In the Select a Disk window, you need to create a new disk. To do this, select the Create a new virtual disk option. In this way, you will be able to start installing Debian from scratch.
You can use the VMDK file instead of the Debian ISO file. So, you should select the “Use an existing virtual disk” option in the virtual machine setup. As a result, you can use a pre-existing virtual disk.

Step 12
In the Specify Disk Capacity section, specify the size of the virtual disk. Also, check the box to store this disk as a single file. In this way, you will slightly increase the write and read speeds of the VM.

Step 13
You can change the location where you want to back up the disk file from this window. The configuration in this window will only change the location of the virtual disk to be created.

Step 14
The summary hardware info for the virtual machine is as follows. Now, click Customize Hardware to turn on a few extra things.

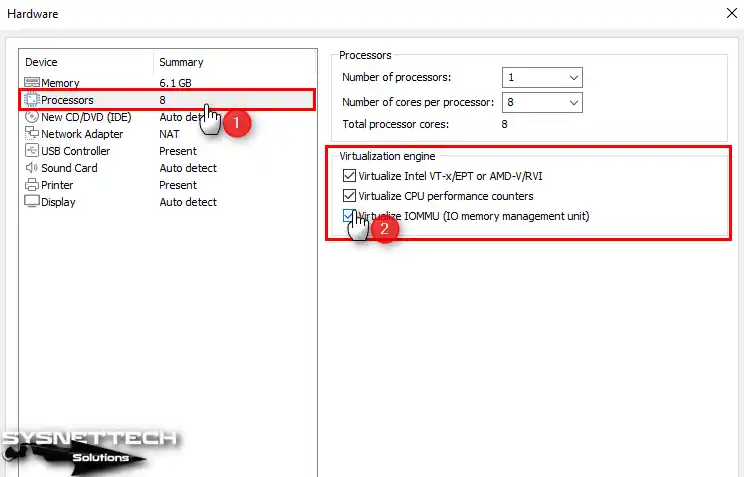
Step 15
After clicking on the Processor device, you will see some settings on the right. Under Virtualization Engine, there are three options. Now, turn on all three options I have listed below.
- Virtualize Intel VT-x/EPT or AMD-V/RVI
- Virtualize CPU Performance Counters
- Virtualize IOMMU (IO Memory Management Unit)
Step 16
Now, follow these steps to add the Debian 12 ISO file to the virtual machine. First, click on the “CD/DVD” option. Then, click on the “Use ISO image file” option. Finally, add the file with the “Browse” option.

Step 17
You can transfer files faster with USB 3.0/3.1 ports in your Debian virtual PC. So, I recommend changing the USB Controller device > Compatibility setting to 3.1.

Step 18
Finally, you need to configure the Display virtual hardware to 3D Graphics (Accelerate 3D Graphics). Plus, make the video memory to a size that your host can support.

Step 19
You have corrected all the settings for your Debian virtual machine. Now, check the settings in the summary window again and close the wizard.

Step 20
Up to this point, you have prepared a new virtual system for the Debian distribution. Now, let’s run the VM and start the system installation. To power up the virtual machine, click on the green Power icon.

How to Install Debian 12
After preparing the Debian guest VM, it’s time to install the Linux platform in the VM. First, we choose ISO as the setup tool. After that, let’s build this OS on the virtual machine.
Steps:
Step 1
First, run your Debian OS in Workstation Pro. Next, you will see the GNU/Linux installer menu in BIOS mode. Find the Graphical Install option & hit Enter.

Step 2
Now, select the system language for your Debian, then press Continue.

Step 3
In the “Select your location” area, pick your country and click Continue.

Step 4
In the “Configure the keyboard” section, pick the layout for your host. Then, click Continue to go ahead.

Step 5
In the Configure the Network window, you need to type a hostname to identify your system to a network. You can choose the name configured by default, as in the image below. On the other hand, you can specify a hostname that suits your network environment.

Step 6
If you are a home user, you can leave the Domain Name section blank.

Step 7
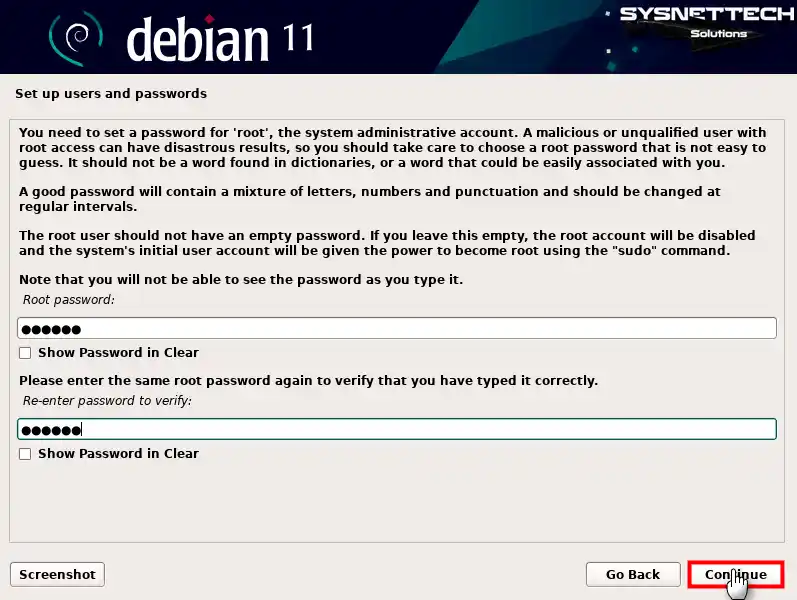
In this step, create a strong password for the Root account of your Debian system and press Continue.
Step 8
In the Set up users and passwords window, create a new account instead of the Root account. Here, you can type your full name or something else for non-administrative things.

Step 9
Retype your username for your account in lowercase letters. Or, if you typed your name and surname in the previous step, you can type your name in this window.

Step 10
I recommend that you add a password to the new user account you created. Therefore, write a strong password in both text fields here.

Step 11
Proceed by adjusting your time zone based on your location on the map provided.

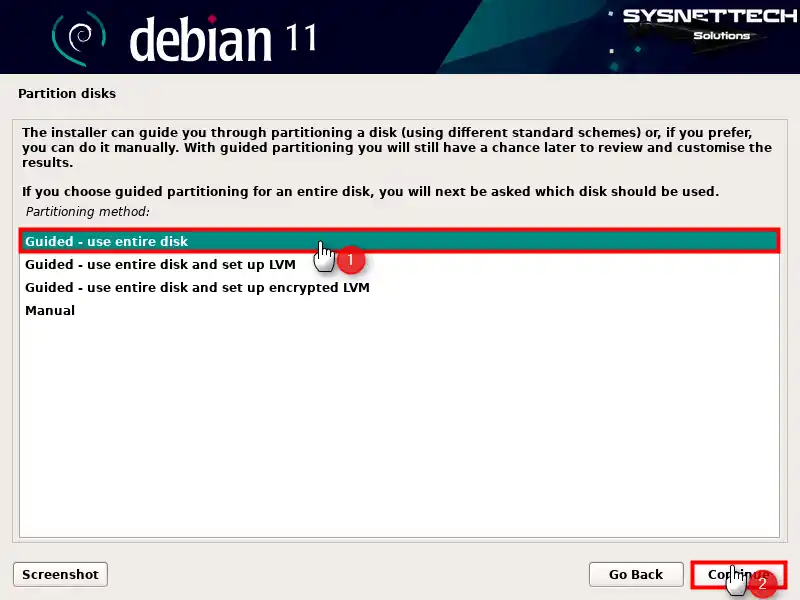
Step 12
Let’s say you are going to use the Linux/Debian system for the first time. In this case, continue with the Guided – Use Entire Disk in Partition Disks window.
Step 13
At this stage, choose the vdisk you want to partition. This step is essential because creating partitions for different uses allows you to manage space better.

Step 14
Likewise, you will see three different options in this wizard. But, if you are a new Debian user, select the All files in one partition option and press Continue.

Step 15
You will see a summary of the disk settings for the Debian virtual machine. If you want to make any changes to the disk partitioning, select Go Back. Otherwise, click Continue to proceed directly to the next step.
You need to complete the partitioning. So, select Finish partitioning and write changes to disk. This will ensure that all changes are saved to the hard disk.

Step 16
Changes made to the virtual NVMe disk need to take effect, so select Yes to continue.

Step 17
You may want to install some extra packages on your Debian system without using the Internet. If you’re going to scan the DVD media for offline use, check Yes.

Step 18
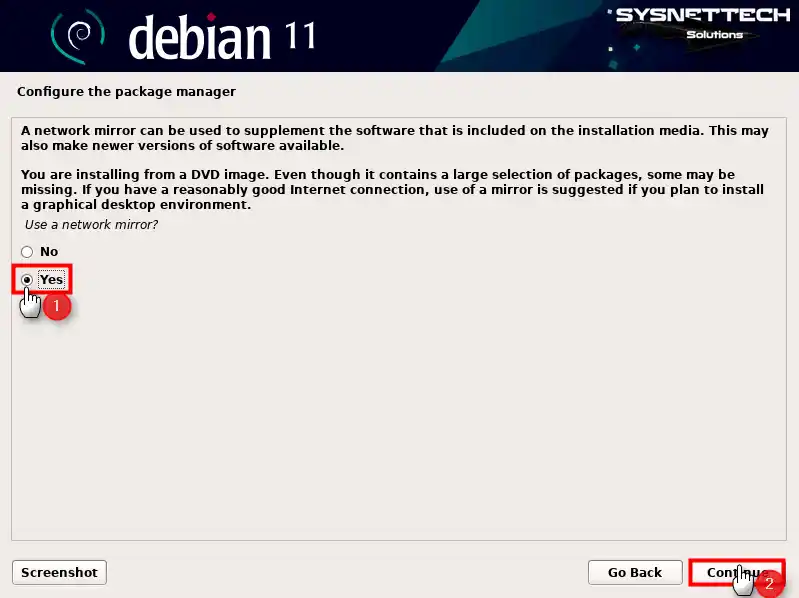
Let’s say you are going to download and install a program from the Internet to your Debian virtual system. At this point, the system first uses the defined mirror addresses. In other words, these repository addresses are essential. If you have not defined them, you can select No to add them manually later.
When you continue with No, your system will first scan offline for a program. In other words, it will first scan the installation media instead of the repository addresses. The software you want to install may not be available on the DVD media. In that case, you need to pull it from the mirror network on the Internet. Therefore, since you will need to use Network Mirror, proceed with Yes.
Step 19
In the Debian archive mirror country window, you can select your country for the Network Mirror setting. After that, you can download files faster from servers closer to you.

Step 20
We usually choose deb.debian.org for the Debian archive mirror. Honestly, both I and most users think it is safer.

Step 21
If you are using a proxy server in your network environment, you can make the relevant settings here. If you are not going to use something like this, leave the information box blank.

Step 22
If you want to send statistics of your most used apps, click “Yes.” This will turn on weekly data sharing. You can then continue setting up the necessary settings.

Step 23
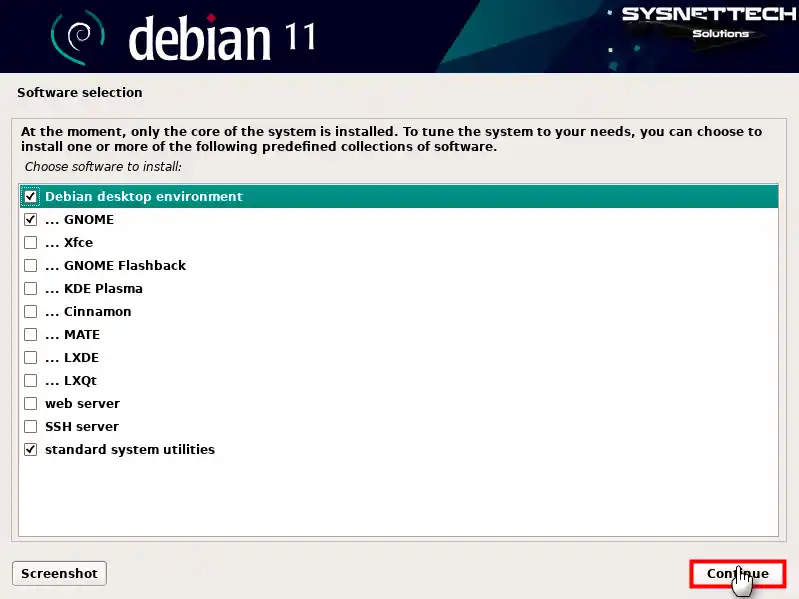
You can continue with the default desktop of the Debian system, GNOME. Additionally, you can choose a desktop look you like.
Now, in the Software Selection window, choose the desktop view you want to use. Usually, on Linux systems, selecting the theme is up to the user.
Step 24
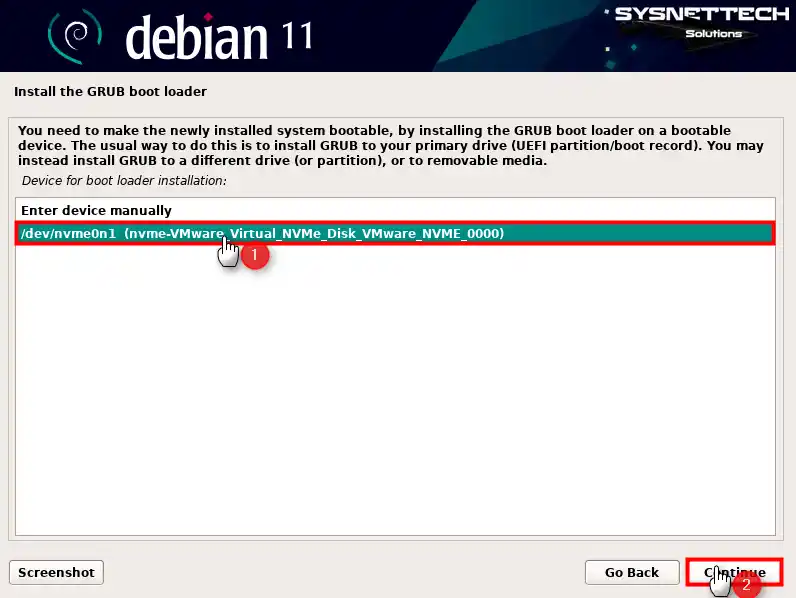
Select Yes to install GRUB Boot Loader on the primary virtual drive.

Step 25
Select the /dev/nvme0n1/ drive for the boot loader installation and click Continue.
Step 26
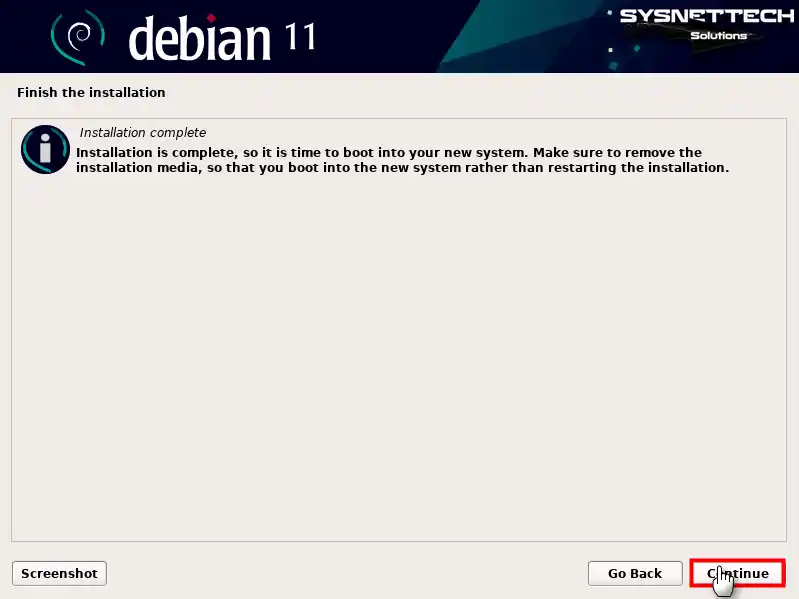
After finishing the Debian installation with VMware, you need to do one action. That is, extract the ISO file from your virtualized PC and reboot it.
Step 27
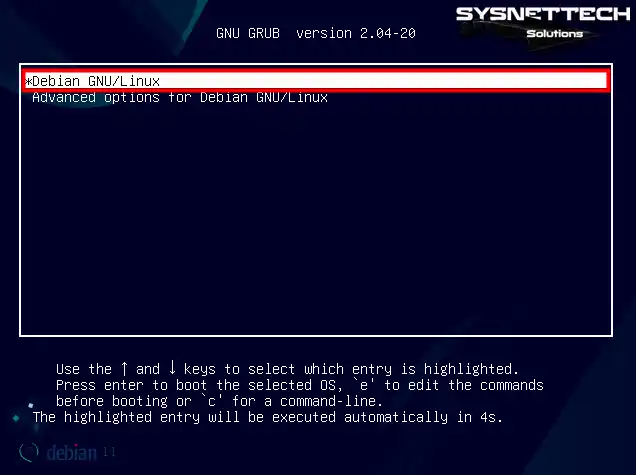
Now, you are on the GNU GRUB screen. If so, push the Enter button on the Debian GNU/Linux choice.
Step 28
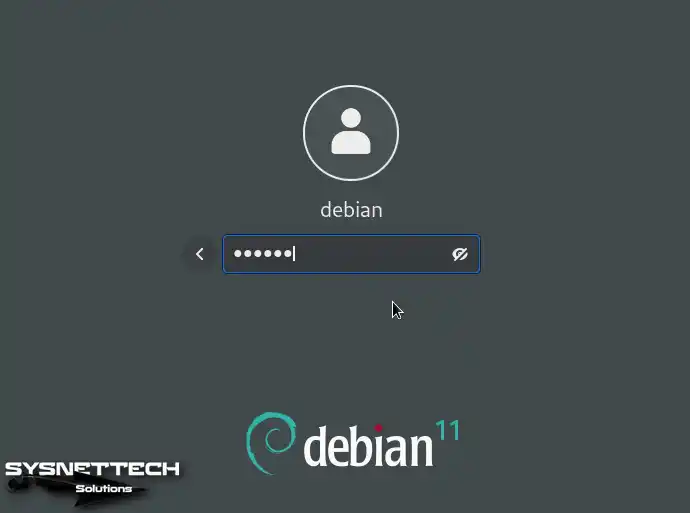
Type your username & passcode in the correct boxes. Then, press Enter to log in and access your account.
Step 29
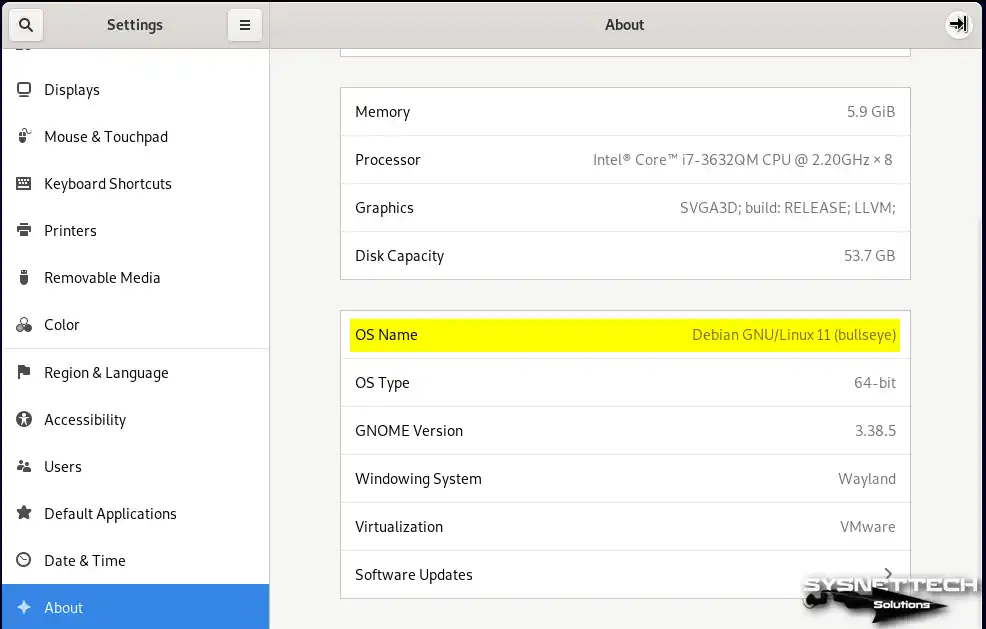
To see the edition of your Debian system, go to the “Settings” menu. Moreover, you can access the version information by clicking on the “About” tab. In particular, by doing this, you will verify that your OS is correct.
How to Install VMware Tools on Debian
After installing Debian OS on VMware Workstation, you need to install its drivers. This way, you will get more performance from your VM, and you will be able to use devices such as USB.
Also, if your network is connected, the wizard will install VMware Tools by itself. Honestly, you will almost never need to do it manually.
It’s OK if you want to connect your Debian virtual PC to the Internet later. You can install VMware Tools yourself, too.
Steps:
Step 1
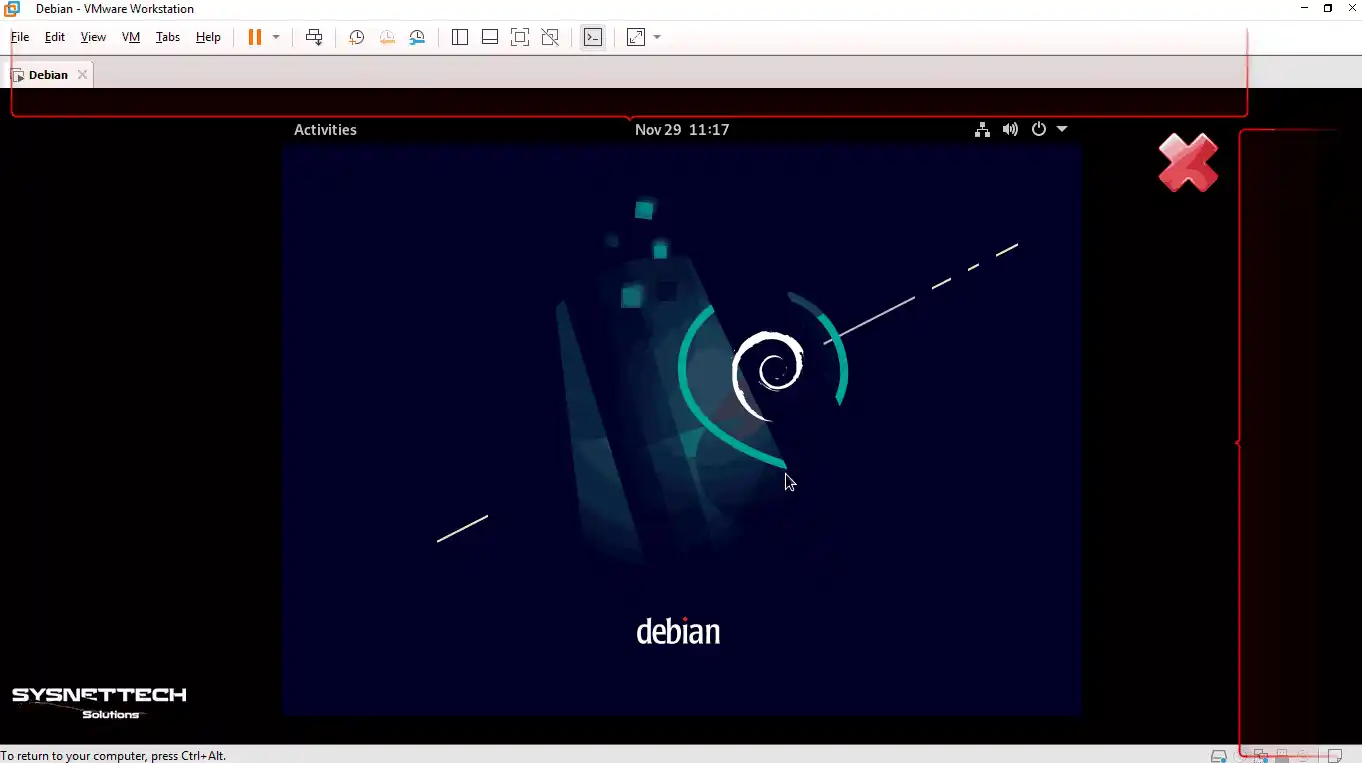
For example, you could not install VMware Tools automatically. In the meantime, the screen resolution of your guest system will be the same as the image below. You need to install these tools for both the screen problem and file transfer with the host.
Step 2
Check that your guest machine is online. Then, open the terminal and type “sudo apt install open-vm-tools-desktop.” Last, press Y and Enter to agree to install the new files.
sudo apt install open-vm-tools-desktop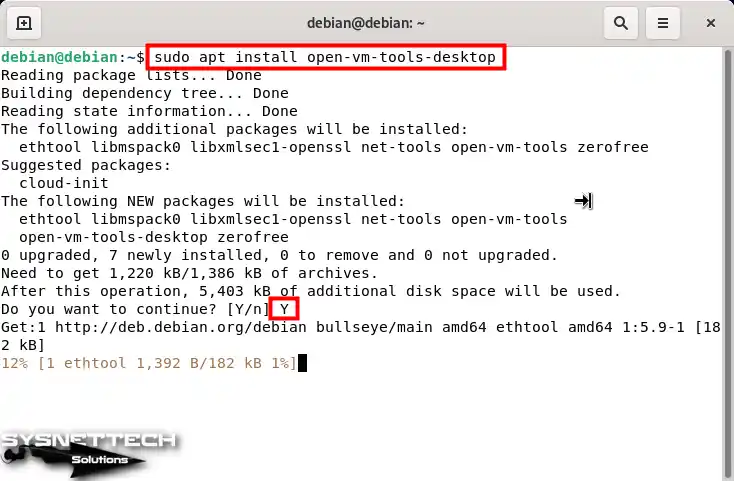
Step 3
Now, you have installed VMware Tools on your Debian VM. Anymore, continue it with the “sudo reboot” command and check the screen setting.
sudo reboot
Step 4
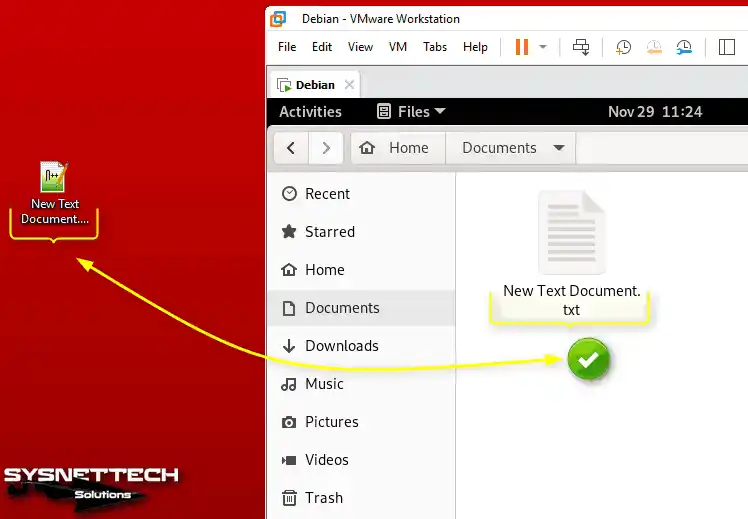
Pick any file from your host PC’s desktop or another area. Then, drag and drop it to your Debian guest, and you’ll notice that the file can be copied to the VM.
How to Configure Shared Folder in Debian
You can use the Shared Folder feature to speed up file transfers. That is, you can make it easier between the host and the VM with this feature. VMware Tools must be installed to enable this feature. Otherwise, you cannot use this feature without installing this tool. As a result, you cannot perform transfer operations.
To enable Shared Folder, click VM / Settings from the VMware Workstation Pro tool menu. This will open the virtual machine’s settings. Here, you will see the Hardware and Options tabs. At this point, select Options > Shared Folders.
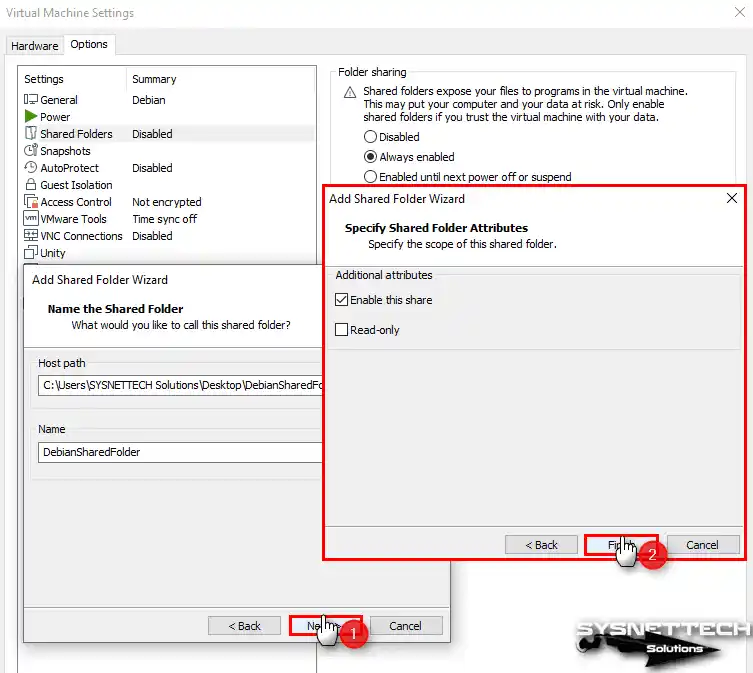
The right-hand column lists a Folder Sharing feature. Make this setting Always Enabled, then click the Add button in the Folders section. In the Add Shared Folder Wizard window, click Next to make the necessary settings.

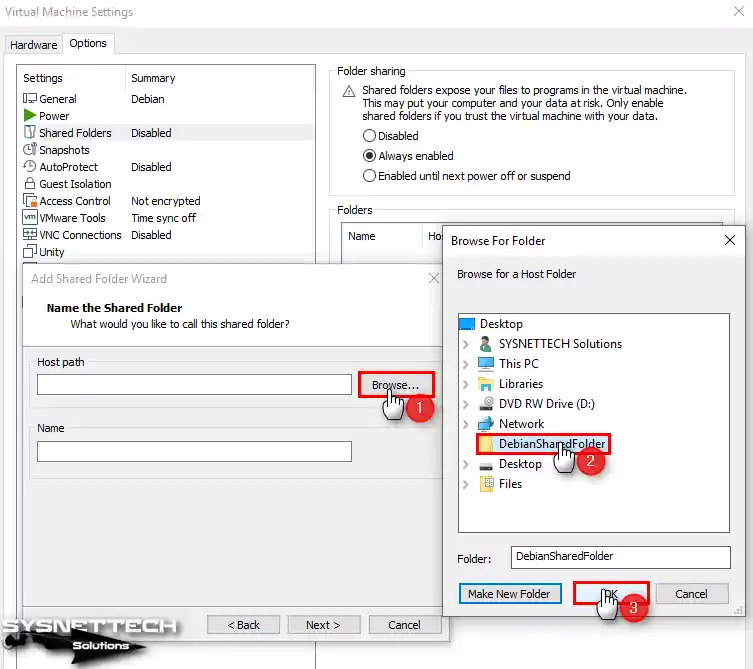
In the “Name the Shared Folder” window, select Browse. Then, please create a new folder in any location on your Host PC and select it.
Go to Shared Folder Attributes > Enable This Share. Then, click Finish and close the Debian VM settings.
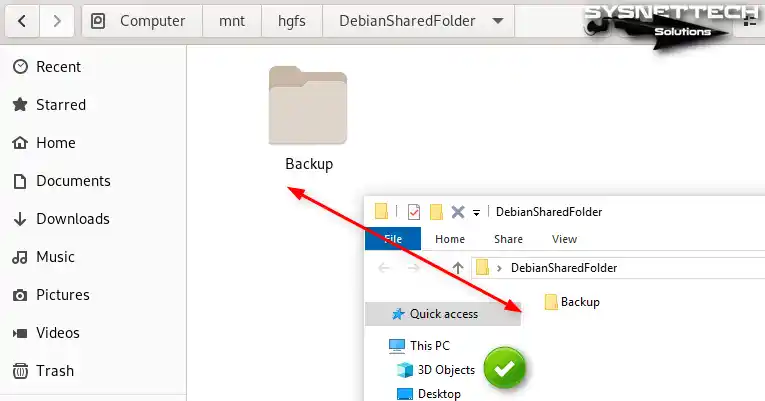
You can find the shared folder in /mnt/hgfs/FolderName on your Debian guest machine. Now, create a file or folder in the shared folder. Finally, when you check it on your host PC, you can see that the file sharing is successful.
You can make a shortcut to the shared folder anywhere you like on your Debian system. For instance, a shortcut to Documents using the terminal is a good idea.
sudo ln -s /mnt/hgfs/DebianSharedFolder/ ~/Documents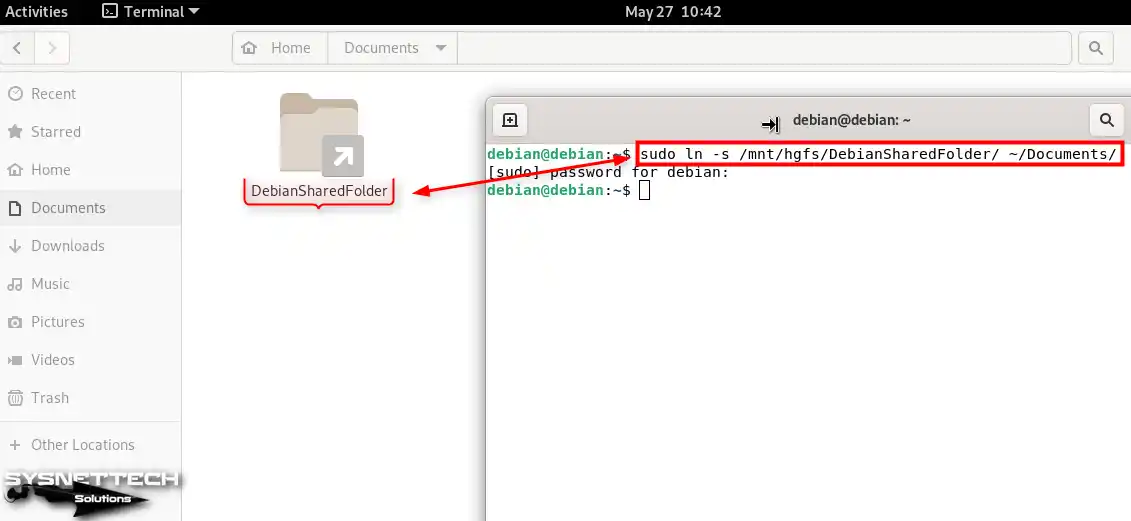
To access the shared folder more quickly, right-click on the shortcut location. Then, click Add to Bookmarks.

Let’s say you restarted your VMware Debian guest machine. When you click on Shared Folder, you may see the error “This location could not be displayed.”
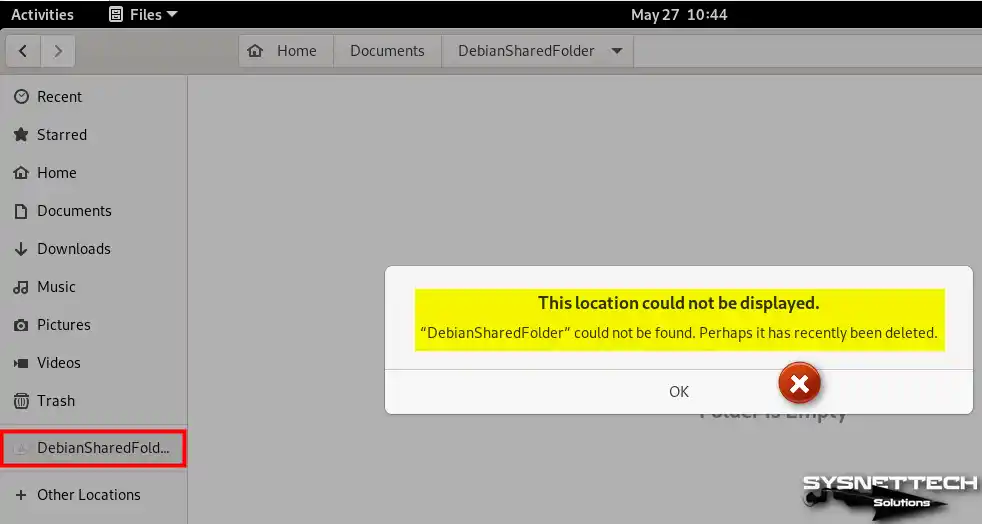
To fix the Shared Folder error and make it permanent, you need to edit /etc/fstab. To do this, run the “sudo nano /etc/fstab” command in the terminal and view the contents of the file.
sudo nano /etc/fstab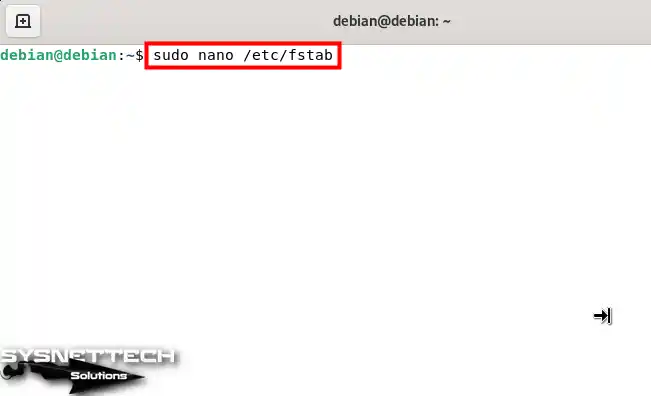
Type the command below at the bottom of fstab, press CTRL + X, and then Enter to save the file.
.host:/DebianSharedFolder /mnt/hgfs/DebianSharedFolder fuse.vmhgfs-fuse allow_other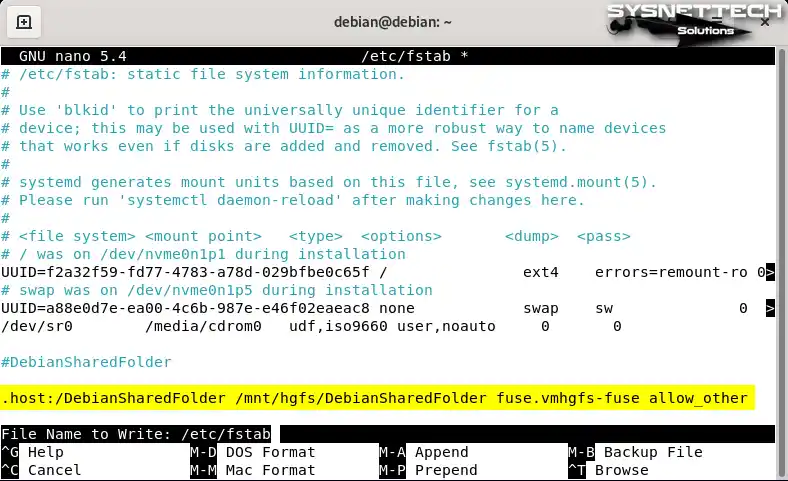
How to Use USB Flash Memory in Debian VM
You may want to copy large files to the VMware Debian virtual system. Of course, if you have such thoughts, you can use different methods. For example, a USB flash drive is a more logical way to choose.
You can also connect an external SSD storage device to the VM. Moreover, you can back up your data faster in this way. As a result, you can make your process more manageable by considering a suitable option.
Step 1
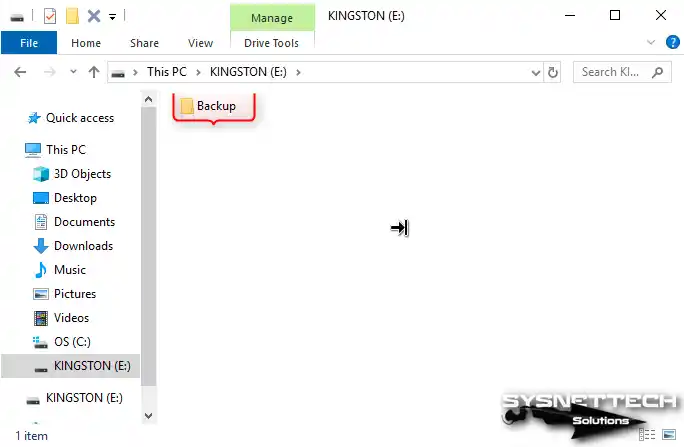
Plug a flash memory into one of the USB ports of your host computer. After that, create a folder named Backup in your device, for example.
Step 2
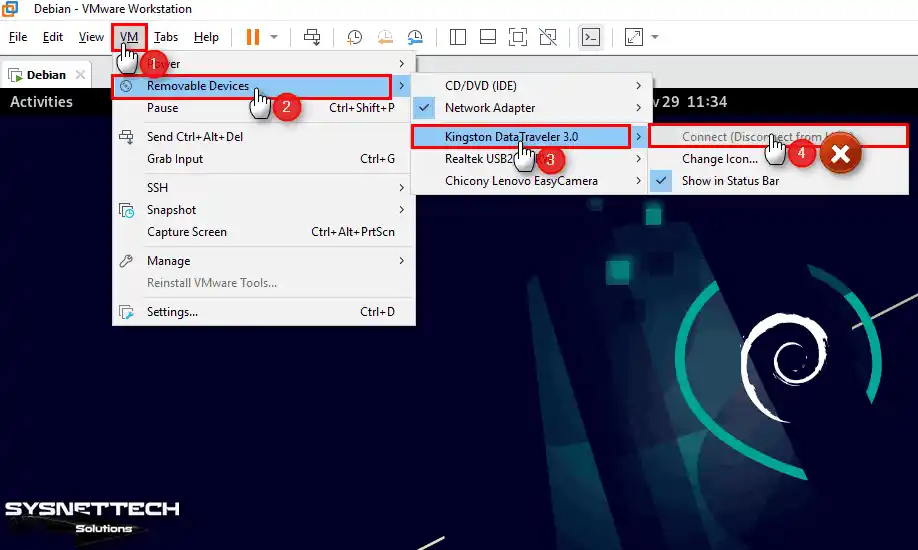
You need to insert a USB disk into your Guest operating system. To do this, click VM / Removable Devices / Your USB Name from the VMware tool menu.
However, in this case, you may see the Connect option disabled or grayed out. To resolve this issue, you need to edit the VMX file.
Step 3
Go to the area where you installed your Debian 12 system. Open the VMX file with the notepad. Here, change the value (usb.restrictions.defaultAllow = “FALSE” ) to “TRUE”.
Change: usb.restrictions.defaultAllow = "FALSE"
To: usb.restrictions.defaultAllow = "TRUE"
Step 4
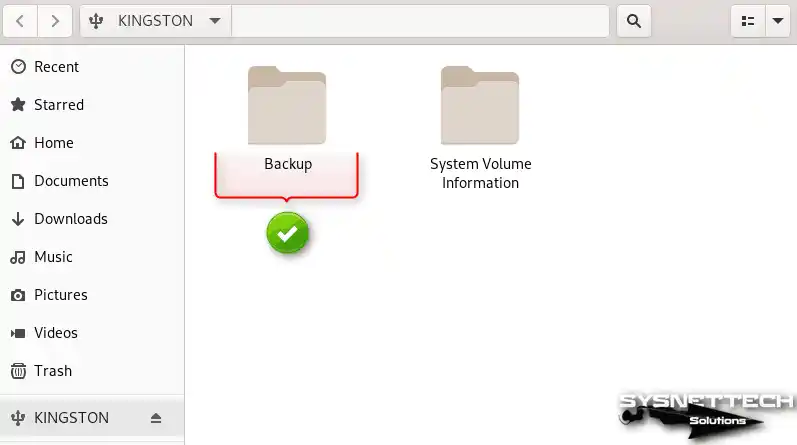
You have connected your USB flash stick to your virtual system without any problems. Now you see the Backup folder inside it. So now you can transfer files between your host & VM faster with a USB disk.
Video
Installing Old Versions
| Debian / VMware Workstation Version | YouTube Video | Slide |
|---|---|---|
| 9 / 14 Pro | Watch | – |
| 10 / 15 Pro | Watch | View |
| 11 / 16 Pro | Watch | View |
| 11 / 17 Pro | Watch | – |
Frequently Asked Questions (FAQ)
- What system requirements do I need to install Debian 12 with VMware?
- How do I configure virtual machine settings for best performance?
- What should I do after running Debian 12?
Conclusion
In conclusion, it is easy to install a VM like Debian 12 with VMware on Windows 10 or 11. If you follow the stages I shared, you will set up hardware compatibility correctly. For example, choosing the right amount of RAM and disk space is essential. Also, with the correct ISO image, you can use Debian OS without a physical machine.
Debian is a strong and reliable operating system. Because of this, many users, including me, like to try it on a virtual machine. Thus, never forget to install the VMware Tools package. You need it to get the best performance from your VM.

3 People Shared Their Experience
Works well except some small diff. caused by versions dissimilarity probably. Great help, especially for the part with installing boot loader, which was not understandable intuitively, thx
Fantastic guide!
Thanks for the effort!
You’re welcome, thanks for your nice comment.