The purpose of NAT configuration on routers is to convert private IP addresses on the local network to global IP addresses to bring them to the Internet.

How to Configure Static NAT on a Router
There are two parameters in Static NAT operation. These are; Inside and Outside.
When any computer on the network requests to open a web page, the IP packet first passes through the Switch to the Inside of the Router and transmits the packet to the Internet via the Outside.
According to the network topology, NAT INSIDE and NAT OUTSIDE must be defined by specifying which Router the computers on the LAN will access the Internet from.
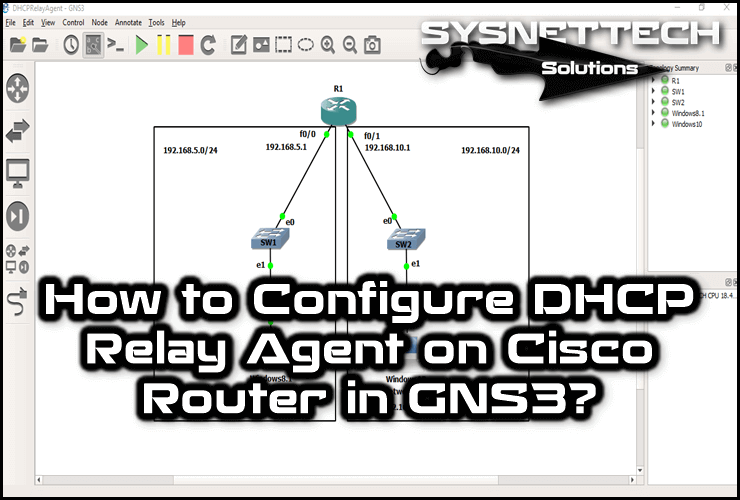
Before proceeding with the configuration steps, create a network topology as in Step 1 in the GNS3 program.
NOTE: When you create the topology, you must select your physical computer’s Ethernet adapter for the Cloud setting. If you select a VMnet created on VMware, the virtual machine will not be able to access the Internet even if you configure Static NAT.
How to Enable Static NAT in GNS3
You must configure the NAT settings on the Cisco Router to make the Internet connection of the virtual machines on the LAN.
Now, to add a fixed NAT record, follow the steps below.
Step 1
After running GNS3, create a network topology as shown in the image below.

Step 2
Open the CLI prompt by double-clicking on the router and execute the ip address dhcp command to assign an IP address to the FastEthernet0/0 interface.
When you look at the image below, you can see that the Router (R1) has obtained an IP address from the DHCP server running on the ADSL modem on the local network.

Step 3
After integrating Windows 10 or any virtual machine running VMware on the topology, configure the TCP/IP settings. Then, open the CMD and try to Ping the Router’s FastEthernet0/1 interface.
Because the Windows 10 VM is on the local network, Ping will succeed as follows!

Step 4
Likewise, test the connection by pinging the router’s FastEthernet0/0 interface.

Step 5
Because a NAT not configured in this topology, the virtual machine on the local network cannot access the Internet.
As in the image below, the virtual machine will not be able to access Google’ın DNS addresses!

Step 6
In this step, you need to create a Static NAT on the Router to bring the virtual computer to the Internet.
At the CLI prompt of R1, execute the following commands respectively.
R1# conf t
R1(config)# interface fastethernet 0/0
R1(config-if)# ip address dhcp
R1(config-if)# no shutdown
R1(config-if)# ip nat outside
R1(config-if)# exit
R1(config)# interface fastethernet 0/1
R1(config-if)# ip address 192.168.8.1 255.255.255.0
R1(config-if)# ip nat inside
R1(config-if)# no shutdown
R1(config-if)# exit
R1(config)# ip nat inside source static 192.168.8.10 192.168.1.50
R1(config)# ip name-server 192.168.1.1
R1(config)# ip domain-lookup
R1(config)# end
R1# copy running-config startup-config
After performing the necessary commands, ping the router from the Router to the Google DNS server and observe the status.

Step 7
After adding a Static NAT record for the Windows 10 machine to the Router, turn on the VM and ping again using the CMD.
When you look at the image below, you can see that the VM can now access the Internet.

Step 8
If you leave the DNS field blank in the TCP/IP settings of the virtual machine, you will not be able to access any website through the web browser.
Type the IP address of your ADSL modem in the DNS field of the VM, and after saving the settings, try to access Google via Internet Explorer.
The computer on the local network will now be able to access the Internet as follows!

Step 9
When you execute the show ip nat translations command on the router, you will see the NAT records for the Google.com website.
When you look at the records, you can see that the 192.168.8.10 IP address from the inner leg has converted to the 192.168.1.50 IP address.

Step 10
When analyzing network errors, it is useful to delete some entries in the Router. One of these is to delete NAT records.
You can use in privileged configuration mode to delete NAT records that occur on the router.

Step 11
In privileged configuration mode, you can see that records delete when you run the show ip nat translations command.

Step 12
For example, if you visit Facebook.com, NAT records will be created instantly on the Router.

Show Commands
R1# show running-config
Building configuration...
Current configuration : 1050 bytes
!
version 12.4
service timestamps debug datetime msec
service timestamps log datetime msec
no service password-encryption
!
hostname R1
!
boot-start-marker
boot-end-marker
!
no aaa new-model
memory-size iomem 5
no ip icmp rate-limit unreachable
ip cef
!
ip name-server 192.168.1.1
ip auth-proxy max-nodata-conns 3
ip admission max-nodata-conns 3
!
ip tcp synwait-time 5
!
interface FastEthernet0/0
ip address dhcp
ip nat outside
ip virtual-reassembly
duplex auto
speed auto
!
interface FastEthernet0/1
ip address 192.168.8.1 255.255.255.0
ip nat inside
ip virtual-reassembly
duplex auto
speed auto
!
ip forward-protocol nd
!
no ip http server
no ip http secure-server
ip nat inside source static 192.168.8.10 192.168.1.50
!
no cdp log mismatch duplex
!
control-plane
!
gatekeeper
shutdown
!
line con 0
exec-timeout 0 0
privilege level 15
logging synchronous
line aux 0
exec-timeout 0 0
privilege level 15
logging synchronous
line vty 0 4
login
!
end
R1#
R1#show ip nat statistics
Total active translations: 2 (1 static, 1 dynamic; 1 extended)
Outside interfaces:
FastEthernet0/0
Inside interfaces:
FastEthernet0/1
Hits: 7 Misses: 1
CEF Translated packets: 8, CEF Punted packets: 0
Expired translations: 0
Dynamic mappings:
Appl doors: 0
Normal doors: 0
Queued Packets: 0
R1#show ip nat translations
Pro Inside global Inside local Outside local Outside global
icmp 192.168.1.50:1 192.168.8.10:1 8.8.8.8:1 8.8.8.8:1
--- 192.168.1.50 192.168.8.10 --- ---
R1#show ip nat translations Pro Inside global Inside local Outside local Outside global tcp 192.168.1.50:49704 192.168.8.10:49704 204.79.197.200:443 204.79.197.200:443 tcp 192.168.1.50:49705 192.168.8.10:49705 93.184.220.20:80 93.184.220.20:80 tcp 192.168.1.50:49706 192.168.8.10:49706 204.79.197.200:443 204.79.197.200:443 tcp 192.168.1.50:49707 192.168.8.10:49707 204.79.197.200:443 204.79.197.200:443 tcp 192.168.1.50:49708 192.168.8.10:49708 204.79.197.200:443 204.79.197.200:443 tcp 192.168.1.50:49709 192.168.8.10:49709 204.79.197.200:443 204.79.197.200:443 tcp 192.168.1.50:49710 192.168.8.10:49710 204.79.197.200:443 204.79.197.200:443 tcp 192.168.1.50:49711 192.168.8.10:49711 31.13.92.36:443 31.13.92.36:443 tcp 192.168.1.50:49712 192.168.8.10:49712 31.13.92.36:443 31.13.92.36:443 tcp 192.168.1.50:49713 192.168.8.10:49713 93.184.220.29:80 93.184.220.29:80 tcp 192.168.1.50:49714 192.168.8.10:49714 31.13.92.36:443 31.13.92.36:443 tcp 192.168.1.50:49715 192.168.8.10:49715 31.13.92.36:443 31.13.92.36:443 tcp 192.168.1.50:49716 192.168.8.10:49716 93.184.220.29:80 93.184.220.29:80 tcp 192.168.1.50:49717 192.168.8.10:49717 31.13.93.7:443 31.13.93.7:443 tcp 192.168.1.50:49718 192.168.8.10:49718 31.13.93.7:443 31.13.93.7:443 tcp 192.168.1.50:49719 192.168.8.10:49719 31.13.93.10:443 31.13.93.10:443 tcp 192.168.1.50:49720 192.168.8.10:49720 31.13.93.10:443 31.13.93.10:443 tcp 192.168.1.50:49721 192.168.8.10:49721 207.46.101.29:80 207.46.101.29:80 udp 192.168.1.50:51647 192.168.8.10:51647 192.168.1.1:53 192.168.1.1:53 udp 192.168.1.50:53083 192.168.8.10:53083 192.168.1.1:53 192.168.1.1:53 udp 192.168.1.50:58578 192.168.8.10:58578 192.168.1.1:53 192.168.1.1:53 udp 192.168.1.50:59312 192.168.8.10:59312 192.168.1.1:53 192.168.1.1:53 udp 192.168.1.50:59671 192.168.8.10:59671 192.168.1.1:53 192.168.1.1:53 Pro Inside global Inside local Outside local Outside global udp 192.168.1.50:59896 192.168.8.10:59896 192.168.1.1:53 192.168.1.1:53 udp 192.168.1.50:60946 192.168.8.10:60946 192.168.1.1:53 192.168.1.1:53 udp 192.168.1.50:61739 192.168.8.10:61739 192.168.1.1:53 192.168.1.1:53 udp 192.168.1.50:64596 192.168.8.10:64596 192.168.1.1:53 192.168.1.1:53 --- 192.168.1.50 192.168.8.10 --- ---
R1#show ip nat statistics
Total active translations: 2 (1 static, 1 dynamic; 1 extended)
Outside interfaces:
FastEthernet0/0
Inside interfaces:
FastEthernet0/1
Hits: 2735 Misses: 78
CEF Translated packets: 2699, CEF Punted packets: 227
Expired translations: 89
Dynamic mappings:
Appl doors: 0
Normal doors: 0
Queued Packets: 0
R1#
How to Setup Static NAT ⇒ Video
You can watch the video below to configure and verify Static Network Address Translation and also subscribe to our YouTube channel to support us!
Final Word
In this article, we’ve examined the show commands after adding Static NAT for a computer. In our next articles, we will create more detailed projects about NAT. Thanks for following us!
Related Articles
♦ How to Configure Dynamic NAT
♦ How to Configure PAT
♦ How to Configure NAT with SDM
♦ How to Enable Telnet in Router
♦ How to Enable SSH in Router

TolgaBagci
Hi, I'm Tolga, a computer expert with 20 years of experience. I help fix computer issues with things like hardware, systems, networks, virtualization, servers, and operating systems. Check out my website for helpful info, and feel free to ask me anything. Keep yourself in the loop about the newest technologies!